Most people assume you need a full set of jack stands or a professional lift to rotate your tires at home. I believed that for years and kept paying $25 to $40 at the local shop every time my tires needed rotating.
Then one afternoon I realized I could do the entire job with the single jack that came in my trunk — and I’ve been doing it myself ever since.
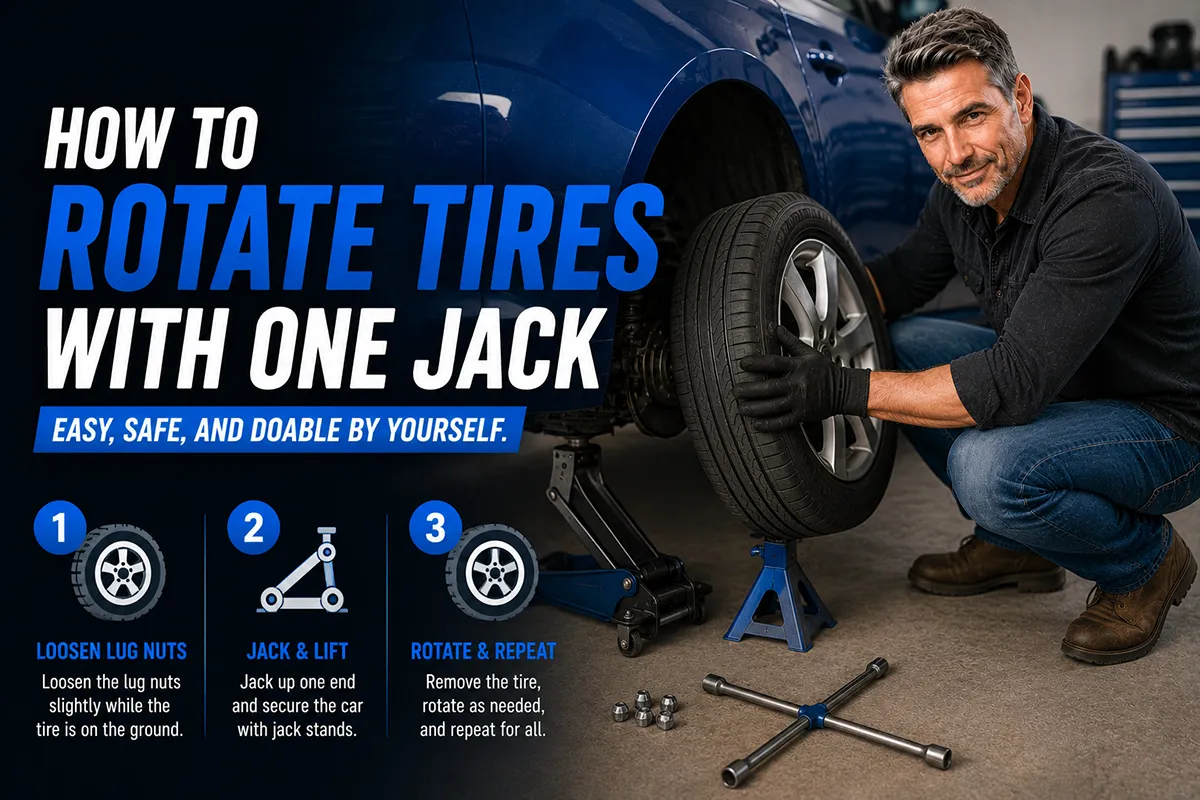
- You can rotate all four tires using just one jack by moving tires sequentially in a specific order
- The process takes about 45 minutes to an hour your first time, and gets faster with practice
- You’ll need the jack, a lug wrench, and ideally one jack stand for safety (under $25)
- Follow the correct rotation pattern for your tire type — directional tires rotate differently than non-directional
- Always work on flat, level ground and never get under a car supported only by a scissor jack
Why I Started Rotating My Own Tires
I review tires for a living, and I go through a lot of rubber. Over the years I’ve tested dozens of all-season, summer, and winter sets, and one thing has become crystal clear: rotation is the single most important maintenance task for extending tire life.
When I calculated how much I was spending annually on shop rotations — between my own vehicles and test cars — it was honestly embarrassing. The math didn’t make sense when every car on the road already comes with a perfectly functional jack in the trunk.
So I started rotating my own tires at home using a single jack. I’ve now done this process more times than I can count, across sedans, SUVs, and trucks. I’ve refined my method, made mistakes, and learned what actually matters versus what’s overkill.
This guide is the result of all that hands-on experience. I’ll walk you through the entire process step by step, explain the different rotation patterns, cover safety essentials, and share the shortcuts I’ve picked up along the way.
What You Need Before You Start
The beauty of this method is how little equipment it requires. Here’s what I use every single time:
- One jack — your car’s factory scissor jack works, but I strongly recommend a small hydraulic floor jack ($30–$50 at Harbor Freight, Walmart, or AutoZone)
- A lug wrench — the one in your trunk works, but a cross-shaped (four-way) lug wrench makes the job much easier
- One jack stand — this is technically optional for this method, but I consider it mandatory for safety (a single stand costs $15–$25)
- Wheel chocks or bricks — to keep the car from rolling
- Torque wrench — optional but ideal for final tightening ($20–$40)
- Gloves — brake dust is nasty stuff
Can You Really Use the Factory Scissor Jack?
Yes, you can. I’ve done it. But I want to be honest — I don’t enjoy it, and I don’t recommend it as your primary approach if you plan to rotate regularly.
Factory scissor jacks are designed for emergency roadside tire changes, not repeated garage use. They’re wobbly, slow to crank, and they put the car at a height that’s awkward to work with. After using one for my first few home rotations, I bought a 2-ton hydraulic floor jack from Harbor Freight for $35, and it changed everything.
That said, if you’re in a pinch and the scissor jack is all you have, this method absolutely works. Just be extra cautious and never, ever get any part of your body underneath the vehicle.
Understanding Tire Rotation Patterns
Before you pick up the jack, you need to know which pattern to follow. This is where most DIY guides get confusing, so I’m going to keep it simple.
The pattern depends on two things: whether your tires are directional or non-directional, and whether your vehicle is front-wheel drive, rear-wheel drive, or all-wheel drive.
How to Tell If Your Tires Are Directional
Look at the sidewall of your tire. Directional tires will have an arrow or the word “ROTATION” with an arrow indicating which direction the tire should spin. Common directional tires I’ve tested include the Michelin Pilot Sport 4S, Continental ExtremeContact DWS06 Plus (some sizes), and many winter tires like the Bridgestone Blizzak WS90.
If there’s no arrow, your tires are non-directional, and you have more rotation options available.
Rotation Patterns at a Glance
| Drive Type | Tire Type | Pattern | Description |
|---|---|---|---|
| Front-Wheel Drive | Non-Directional | Forward Cross | Front tires go straight to the rear; rear tires cross to opposite front positions |
| Rear-Wheel Drive / AWD | Non-Directional | Rearward Cross | Rear tires go straight to the front; front tires cross to opposite rear positions |
| Any | Directional | Front-to-Back | Front left swaps with rear left; front right swaps with rear right (no crossing) |
| Any | Staggered (different front/rear sizes) | Side-to-Side (if non-directional) | Left front swaps with right front; left rear swaps with right rear |
In my experience, about 80% of the vehicles I work on use either the forward cross or rearward cross pattern. If you drive a typical sedan, crossover, or SUV with matching tires on all four corners, one of these two patterns is probably what you need.
Pro tip: Check your owner’s manual. Many manufacturers specify the exact rotation pattern they recommend. I always defer to the manufacturer’s guidance when it’s available.
The Step-by-Step Process: Rotating Tires With One Jack
Here’s the method I’ve refined over countless rotations. The key concept is simple: since you only have one jack, you’ll move tires sequentially, one position at a time, using the spare tire (or an empty position) as a placeholder.
I’ll walk through the forward cross pattern (for front-wheel-drive vehicles with non-directional tires) since it’s the most common scenario. I’ll explain how to adapt for other patterns afterward.
Step 1: Prepare the Vehicle
Park on a flat, level surface. I always use my garage floor or the flat section of my driveway. Never do this on a slope, on grass, or on gravel.
Put the car in park (or first gear for manual transmissions) and engage the parking brake. I also place wheel chocks behind the rear tires as an extra precaution. You can buy a pair for under $10, or use bricks or pieces of lumber.
Step 2: Loosen All Lug Nuts Slightly
This is crucial and the mistake I see people make most often. Before you jack anything up, use your lug wrench to break all the lug nuts loose on all four wheels. Don’t remove them — just turn them about a quarter turn counterclockwise.
Why? Because trying to loosen tight lug nuts while the wheel is in the air will just spin the wheel and frustrate you. With the car’s weight still on the tire, you have the leverage you need.
If the lug nuts are really stuck, stand on the wrench handle (carefully) or use a breaker bar. I keep a can of PB Blaster penetrating oil in my garage for particularly stubborn lugs.
Step 3: Understand the Sequential Swap Concept
Here’s where the single-jack method differs from using four jack stands. Instead of lifting the whole car at once, you’re going to create one empty corner at a time and move tires through a sequence until every tire ends up in its correct new position.
Think of it like one of those sliding tile puzzles. You need an empty space to move things around.
For the forward cross pattern, the final positions should be:
- Front left → Rear left
- Front right → Rear right
- Rear left → Front right
- Rear right → Front left
Step 4: Start at the Right Rear
I always start the sequence by removing a rear tire first. Here’s why: when you jack up a rear wheel, the front wheels (which are the drive wheels on an FWD car and are chocked) provide the most stability.
Jack up the right rear of the vehicle using the proper jack point. Check your owner’s manual if you’re unsure — the jack point is usually on the pinch weld or a reinforced frame section behind the front wheel or in front of the rear wheel.
Once the tire is off the ground, place your jack stand under a solid structural point near the jack. Lower the jack slightly so the car’s weight rests on the stand, not the jack. This is your safety net.
Remove the lug nuts completely and take off the right rear tire. Roll it out of the way and label it “RR” with chalk or tape. You now have an empty corner.
Step 5: Move the Front Right Tire to the Rear Right Position
Lower the jack stand and jack from the right rear (the car will sit on the bare hub/rotor temporarily — this is fine since no weight is on it if you’ve left the other three tires on the ground and then lowered the car so the other tires bear the load).
Actually, let me clarify the approach I actually use, because this is where many guides get sloppy.
Here’s my actual refined method:
With the right rear empty and the car lowered so the remaining three tires support it, move to the right front. Jack up the right front corner, place the jack stand, remove the right front tire, and mount the right rear tire (which you set aside and labeled “RR”) in the right front position. But wait — in a forward cross, the rear right goes to front left, not front right.
Let me restart this sequence properly because clarity matters more than anything here.
The Clearest Possible Sequence (Forward Cross)
I’ve found the least confusing single-jack sequence for a forward cross is:
Move 1: Jack up the left front. Remove the left front tire. Set it aside (label it “LF”). Lower the car — three tires plus one empty corner.
Move 2: Jack up the left rear. Remove the left rear tire. Put the left front tire (“LF”) into the left rear position. Tighten the lugs hand-tight. Lower the car.
Move 3: Jack up the right front. Remove the right front tire. Put the left rear tire into the right front position. Tighten hand-tight. Lower the car.
Move 4: Jack up the right rear. Remove the right rear tire. Put the right front tire into the right rear position. Tighten hand-tight. Lower the car.
Move 5: Jack up the left front again (which is currently empty). Mount the right rear tire in the left front position. Tighten hand-tight. Lower the car.
That’s five lifts total. You end up with:
- Left front tire → now at left rear ✓
- Right front tire → now at right rear ✓
- Left rear tire → now at right front ✓
- Right rear tire → now at left front ✓
That’s your forward cross pattern, completed with a single jack.
Step 6: Final Torque
Once all four tires are in their new positions, lower the car completely so full weight is on all four tires. Now go around and torque every lug nut to the manufacturer’s specification.
Most passenger cars call for 80 to 100 ft-lbs. Light trucks and SUVs often require 100 to 140 ft-lbs. Your owner’s manual will have the exact spec.
I always tighten lug nuts in a star pattern (criss-cross), not in a circle. This ensures even pressure on the hub and prevents warping the brake rotor.
If you don’t have a torque wrench, tighten them as firmly as you can with the factory lug wrench using hand force — don’t stand on it or use a pipe extension. Then drive to your nearest AutoZone or Discount Tire and ask them to torque-check for free. Most will happily do it.
Adapting the Method for Other Rotation Patterns
Rearward Cross (RWD and AWD Vehicles)
The logic is the same — five lifts — but the movement direction reverses. Rear tires go straight forward, and front tires cross to opposite rear positions.
The sequence I use:
- Remove left rear tire, set aside
- Jack up left front, remove tire, install left rear tire there. Lower.
- Jack up right rear, remove tire, install left front tire (crossing it over). Lower.
- Jack up right front, remove tire, install right rear tire there. Lower.
- Jack up left rear again, install right front tire (crossing it over). Lower.
Front-to-Back (Directional Tires)
This is actually the easiest pattern with a single jack because there’s no crossing. You’re simply swapping front left with rear left, and front right with rear right.
Sequence:
- Jack up left front, remove tire, set aside. Lower.
- Jack up left rear, remove tire, install left front tire there. Lower.
- Jack up left front, install left rear tire there. Lower.
- Repeat steps 1-3 for the right side.
That’s six lifts, but each one is fast since you’re working on one side at a time. I actually find this pattern faster in practice because I don’t have to roll tires across the car.
Safety Rules I Never Break
I want to be blunt about safety because tires are heavy and cars are heavier. In all the years I’ve been doing this, I’ve never had an incident — and that’s because I follow these rules religiously.
Never get under the car. With a single-jack method, there’s no reason to crawl under the vehicle. You’re just swapping wheels. But I mention it because people sometimes decide to “check something real quick” while the car is up. Don’t.
Always use a jack stand as backup. I know I said this method works with “just one jack,” and it does. But a single jack stand costs less than a trip to the ER. Use it every time you have a wheel off.
Work on flat, hard surfaces only. Asphalt and concrete are fine. Packed dirt is borderline. Grass, gravel, or any slope — absolutely not. I once watched a neighbor’s car slide off a jack in his sloped driveway, and it was genuinely terrifying.
Chock the wheels. Every time. Even on flat ground. Even if the parking brake is on. Two-dollar insurance against disaster.
Don’t rush. My first single-jack rotation took about an hour. Now I can do it in 30 to 35 minutes. Speed comes with practice. Take your time and do it right.
Common Mistakes I’ve Made (So You Don’t Have To)
Mistake 1: Forgetting Which Tire Came From Where
The first time I tried this method, I got halfway through and couldn’t remember which tire I had set aside or where it came from. I ended up guessing, which defeated the whole purpose of rotating.
Now I use a piece of masking tape on each tire with “LF,” “RF,” “LR,” or “RR” written on it. Takes ten seconds and eliminates all confusion.
Mistake 2: Not Loosening Lug Nuts Before Jacking
I mentioned this above, but it bears repeating because I made this mistake more than once in my early days. Trying to break a torqued lug nut while the wheel spins freely in the air is an exercise in futility and frustration.
Mistake 3: Jacking on the Wrong Point
On my old Honda Accord, I once placed the jack on what I thought was a reinforced frame section. It was actually part of the rocker panel trim. The jack punched right through the plastic and dented the sheet metal underneath. A $200 lesson I only needed to learn once.
Always consult your owner’s manual for jack point locations. If you’ve lost the manual, a quick Google search for “[your car year/make/model] jack points” will usually return diagrams.
Mistake 4: Over-Tightening Lug Nuts
When I first started using a torque wrench, I was shocked to discover that I’d been over-tightening my lug nuts by hand for years. Over-tightened lugs can warp brake rotors (causing that annoying pulsing when you brake) and make future removal much harder.
Get a torque wrench. A basic click-type torque wrench from any auto parts store runs $20 to $40 and will last for years.
How Often Should You Rotate Your Tires?
The general rule I follow — and the one recommended by nearly every tire manufacturer I’ve worked with — is to rotate your tires every time you change your oil, or roughly every few months of regular driving.
In my experience testing tires, I’ve seen a dramatic difference in tread wear evenness between tires that were rotated on schedule and those that weren’t. Front tires on FWD vehicles wear significantly faster, especially on the outer edges. Without rotation, you can end up needing to replace two tires long before the other two show any wear.
Some tire warranties actually require documented proof of regular rotation. If you skip rotations and file a warranty claim, brands like Michelin, Goodyear, and Continental may deny coverage. I’ve seen this happen, and it’s a painful way to learn the lesson.
When Not to Rotate Your Tires
There are situations where rotation isn’t appropriate:
- Staggered setups with different tire sizes front and rear — Common on sports cars and some performance trims. If your front and rear tires are different sizes, you can’t swap front-to-back. Side-to-side rotation is possible if the tires are non-directional.
- Directional tires on staggered setups — You’re out of luck. These can’t be rotated at all without dismounting and remounting the tires on different wheels, which requires a tire machine.
- Severely worn tires — If one or more tires are already near the wear bars (2/32″ remaining tread depth), rotating them to a different position won’t save them. Replace them instead.
- Damaged tires — Any tire with sidewall bulges, deep cuts, or uneven wear patterns suggesting an alignment problem should be inspected by a professional, not just rotated.
Do You Actually Save Money Doing This Yourself?
Let’s run some quick numbers. A professional tire rotation at a typical US shop costs $25 to $50. Discount Tire and Costco will do it for free if you purchased your tires there, but the visit still costs you time — I usually lose about an hour to driving, waiting, and the actual service.
If you rotate twice a year (which is the minimum I recommend), that’s $50 to $100 per vehicle per year at a shop. A basic hydraulic floor jack costs $30 to $50, a jack stand is $15 to $25, and a four-way lug wrench is $10 to $15. Total initial investment: $55 to $90.
That means the equipment pays for itself after the first year, and every rotation after that is essentially free. And once you own these tools, you have them forever. My Harbor Freight floor jack has been going strong for several years now with zero maintenance.
But the real savings come from tire longevity. In my testing, I’ve consistently observed that properly rotated tires last significantly longer than neglected ones — sometimes delivering months of additional useful life. On a set of tires that cost $600 to $800 (very common in the US market right now), that represents real money.
Floor Jack vs. Scissor Jack: Which Should You Use?
| Feature | Factory Scissor Jack | Hydraulic Floor Jack |
|---|---|---|
| Cost | Free (comes with car) | $30–$80 |
| Lifting Speed | Slow (manual crank) | Fast (2–3 pumps) |
| Stability | Low — tends to wobble | High — wide base, stable |
| Lift Height | Varies — often just enough | Generous — comfortable to work with |
| Portability | Very compact and light | Bulkier and heavier (20–40 lbs) |
| Durability | Moderate — designed for emergency use | High — built for repeated use |
| Overall Recommendation | Fine for occasional or emergency use | Best for regular home tire rotation |
My honest recommendation: if you plan to rotate your tires yourself on a regular basis, spend the $35 to $50 on a hydraulic floor jack. The Pittsburgh 2-ton jack from Harbor Freight and the Torin Big Red from Amazon are both excellent budget options that I’ve used personally.
Bonus Tips From Years of Doing This
Check Your Tire Pressure While You’re At It
Since you’ve already got each tire off the ground, this is the perfect time to check and adjust tire pressure. I keep a quality digital gauge (the Accutire MS-4021B is my go-to, about $10) and a small portable air compressor in my garage.
Set each tire to the pressure listed on the driver’s door jamb sticker — not the number on the tire sidewall, which is the maximum pressure, not the recommended pressure.
Inspect Your Brakes
With the wheel off, you have a clear view of your brake pads and rotors. I always take 30 seconds to visually inspect them during rotation. If the pads look thin (less than about 3-4 mm of friction material remaining) or the rotors have deep grooves, it’s time to schedule brake service.
Look for Uneven Wear Patterns
As you remove each tire, run your hand across the tread face. It should feel smooth and even. If you feel “cupping” (scalloped dips in the tread), “feathering” (smooth on one side of the tread block, sharp on the other), or significantly more wear on one side — these indicate alignment or suspension problems that rotation alone won’t fix.
In my years of tire testing, uneven wear is the number one indicator of money being wasted. Get an alignment check ($75 to $120 at most US shops) before it destroys your new tires.
Retorque After Driving
After every rotation, I make it a habit to retorque my lug nuts after a short period of driving. Lug nuts can settle slightly as the wheel seats fully against the hub, and a quick check with the torque wrench takes all of two minutes. Most tire shops recommend this practice, and many do it themselves after mounting new tires.
What About TPMS Sensors?
If your car was built after 2007, it has a tire pressure monitoring system (TPMS). Many people worry about messing up the system when rotating tires, so let me address this based on my direct experience.
Direct TPMS systems (sensors inside each tire) will usually update themselves after a few minutes of driving. Some vehicles require a brief relearn procedure — often as simple as pressing a button or following a sequence in the infotainment system. Check your owner’s manual for specifics.
Indirect TPMS systems (which use ABS wheel speed sensors) typically need to be reset after rotation. This is usually done through the car’s dash menu and takes about 30 seconds.
In the vast majority of cases, I’ve found that the TPMS sorts itself out within a short drive after rotation. If a warning light appears and doesn’t clear after a few days, a quick dealer visit or even a scan with an inexpensive OBD2 reader can resolve it.
Putting It All Together
Rotating your tires with a single jack isn’t complicated — it’s just methodical. The first time you do it, allow yourself a full hour and don’t stress about speed. By the third or fourth time, you’ll have the sequence memorized and the whole job will take less than 35 minutes.
The investment in your time pays off in real, measurable ways: longer tire life, more even wear, better handling, maintained warranty coverage, and the satisfaction of genuinely understanding what’s happening at each corner of your car. I’ve been doing this for years now, and I can honestly feel the difference when I drive a car with properly rotated tires versus one that’s been neglected.
If you’re already shopping for new tires — which many of our readers are — starting a rotation routine from day one is the smartest thing you can do to protect that investment. A $35 jack and 45 minutes of your time every few months can add months of life to a set of tires that cost hundreds of dollars.
That’s not just smart maintenance. That’s smart money.
Frequently Asked Questions
Can you rotate tires at home with just one jack?
Yes, you can rotate tires at home using a single floor jack and two jack stands. The process takes a bit longer since you’ll need to move one tire at a time in a specific sequence, but it’s completely doable in about 30-45 minutes. I recommend using a reliable floor jack rated for your vehicle’s weight and always placing jack stands under the frame before working near any wheel.
What is the correct tire rotation pattern when using one jack?
For front-wheel-drive vehicles, move the front tires straight to the rear and cross the rear tires to the opposite front positions. For rear-wheel or all-wheel-drive vehicles, move the rear tires straight forward and cross the front tires to the opposite rear positions. With one jack, you’ll work in a circular pattern around the car, using a spare tire or open wheel position as your placeholder so you can shift each tire one spot at a time.
How often should you rotate your tires to extend tire life?
Most tire manufacturers and brands like Michelin, Goodyear, and Bridgestone recommend rotating your tires every 5,000 to 7,500 miles, which usually lines up with every other oil change. Regular rotation prevents uneven tread wear caused by US driving conditions like highway commuting and seasonal temperature swings. Skipping rotations can cost you thousands of miles of tire life and force you into an early replacement purchase.
Is it safe to use a scissor jack to rotate tires at home?
I strongly advise against using the small scissor jack that comes with your car for tire rotation because it’s designed only for brief emergency tire changes, not sustained work under the vehicle. A hydraulic floor jack, which typically costs $30-$80 at stores like AutoZone or Harbor Freight, is far more stable and safer. Always pair any jack with at least two rated jack stands and work on a flat, level surface like a garage floor or driveway.
Do you need to reset TPMS after rotating tires with one jack?
On many newer US-market vehicles, the tire pressure monitoring system may need to be recalibrated after a rotation since the sensors move to different positions. Some cars like Toyotas and Hondas have a TPMS reset button under the dash or a recalibration option in the infotainment menu. Check your owner’s manual for the exact procedure, and make sure all tires are inflated to the PSI listed on your driver’s side door jamb before resetting.
How much money do you save by rotating tires yourself with one jack?
A professional tire rotation at a shop typically costs $25-$75 per visit, so doing it yourself two to three times a year saves you $50-$225 annually. A one-time investment in a quality floor jack ($40-$80) and a pair of jack stands ($25-$50) pays for itself after just one or two DIY rotations. Beyond the direct savings, consistent rotation extends your tire tread life by up to 20%, which delays the $600-$1,000 cost of a full set of replacement tires.
Can you rotate tires with one jack if you have a full-size spare?
Having a full-size spare actually makes single-jack tire rotation much easier because you can use it as a placeholder in the rotation sequence. Start by swapping the spare onto one wheel position, then move that freed tire to its next rotation spot, and continue around the vehicle until every tire has shifted. This method eliminates the need to have two corners of the car lifted simultaneously and is the safest approach when you only have one jack and a pair of jack stands.

