Ever noticed that high-pitched squeal every time you tap your brakes at a stoplight, and the driver next to you gives you *that* look? I’ve been there more times than I’d like to admit.
Here’s the thing most people don’t realize — that noise, along with reduced braking performance and ugly brake dust buildup on your wheels, often doesn’t require a full brake teardown to fix. You can clean your brakes effectively without ever pulling a single tire off your vehicle.
I’ve spent years testing tires, wheels, and brake cleaning methods on everything from daily-driven sedans to SUVs hauling families across the country. And I can tell you from firsthand experience: cleaning your brakes without removing your tires is not only possible — it’s something every car owner should know how to do.
- You can clean brakes without tire removal using a quality brake cleaner spray, a few basic tools, and about 30-45 minutes of your time.
- The best approach combines brake cleaner aerosol sprayed through the wheel spokes with compressed air and targeted brushing.
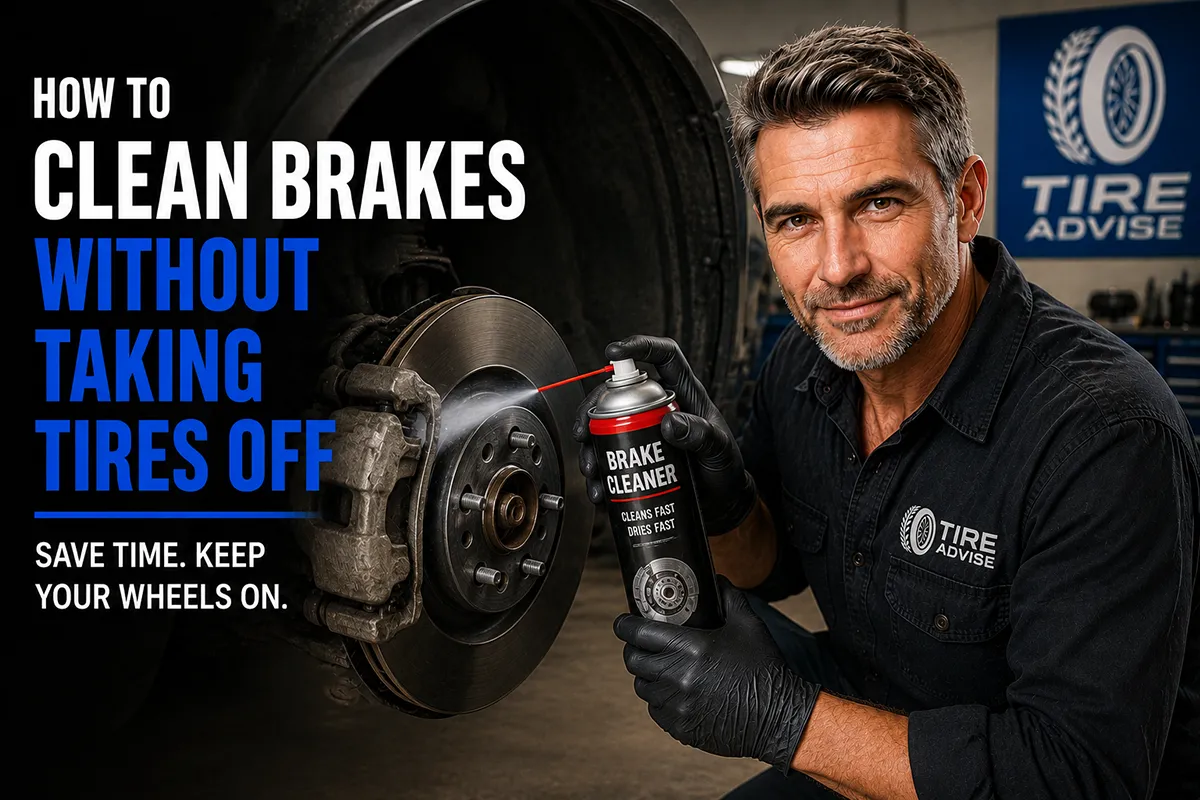
- I recommend CRC Brakleen or Permatex Brake Cleaner — both widely available at AutoZone, O’Reilly, and Walmart for under $10.
- Do this every time you rotate your tires or whenever you notice excessive brake dust, squealing, or reduced pedal feel.
- This method works for most passenger cars and SUVs but is NOT a substitute for brake pad or rotor replacement when those components are worn.
Why You Should Clean Your Brakes Regularly
Before I walk you through the how, let me explain the why — because understanding what’s happening behind your wheels makes the entire process click.
Every time you press your brake pedal, the brake pads clamp down on the rotors. This friction is what slows your vehicle, but it also generates heat, dust, and debris that accumulate over time. That gritty black dust you see coating your wheels? That’s a mix of brake pad material, rotor metal shavings, and road grime.
In my experience testing dozens of tire and wheel combinations, I’ve found that this dust does more than just look ugly. It’s mildly corrosive. Left unchecked over several weeks, brake dust can actually pit and permanently stain your alloy wheels — which is a painful discovery when you’ve just dropped $800 or more on a new set of rims.
But the bigger concern is performance. Accumulated debris, dust, and road grime between your brake pads and rotors can cause:
- Squealing or squeaking noises during braking
- Reduced braking efficiency and longer stopping distances
- Uneven brake pad wear
- Vibrations or pulsing through the brake pedal
- Premature rotor glazing
I once let my daily driver go an entire season without paying attention to brake cleanliness. By the time I addressed it, I was dealing with a persistent squeal that had my wife convinced the entire brake system needed replacing. A thorough cleaning with brake cleaner spray solved it in under an hour — no tire removal, no mechanic bill.
When to Clean Your Brakes (Without Removing Tires)
I get asked this question constantly: “How often should I clean my brakes?” Here’s my honest answer based on years of hands-on experience.
As a baseline, I recommend cleaning your brakes every time you rotate your tires. For most US drivers following standard tire rotation intervals, that means you’re giving your brakes some attention on a predictable schedule.
Beyond that, there are specific signs that tell you it’s time for a cleaning:
- Visible brake dust buildup — If your wheels look dirty within a few days of washing your car, brake dust is accumulating fast.
- Squealing at low speeds — A light squeal that goes away when you press harder often indicates dust or debris on the pad surface, not worn pads.
- After driving in rain, mud, or road salt — US drivers in northern states (I’m looking at you, Michigan and Minnesota) deal with road salt for months. That salt gets into your brake assemblies and accelerates corrosion.
- After highway trips with minimal braking — Ironically, long interstate drives where you barely touch the brakes can cause a light layer of surface rust on rotors. This is normal but worth addressing.
- Whenever you wash your car — If you’re already cleaning your vehicle, spending an extra 15 minutes on the brakes is a smart habit.
What You’ll Need: Tools and Products
One of the best things about this method is how little you actually need. I’ve refined my personal brake cleaning kit over the years, and here’s exactly what I use and recommend.
Essential Items
- Brake cleaner spray — This is non-negotiable. I’ve tested multiple brands, and my top picks are CRC Brakleen (the green can, non-chlorinated formula) and Permatex Brake Cleaner. Both are available at AutoZone, O’Reilly Auto Parts, Walmart, and Amazon for between $4 and $9 per can.
- A long, narrow detailing brush — You need something that fits between your wheel spokes to reach the caliper and rotor. I use a set of wheel woolies, but even a dedicated long-handled parts cleaning brush from Harbor Freight works great.
- Microfiber towels — At least 3-4 that you don’t mind getting permanently stained with brake dust.
- A drip pan or old towels — Brake cleaner will drip down onto your driveway. It can stain concrete and is not great for the environment. Catch the runoff.
- Safety glasses and nitrile gloves — Brake cleaner is a powerful solvent. It will irritate your skin and eyes. Don’t skip this.
Optional But Helpful
- Compressed air (or a portable air compressor) — Blowing out loose debris before spraying makes the cleaner more effective. I use a small Ryobi portable inflator that I already own for checking tire pressure.
- A garden hose with a spray nozzle — Useful for a final rinse, especially if you’re doing this as part of a full car wash.
- Jack and jack stands — You’re NOT removing the tires, but lifting the vehicle slightly gives you better access and lets the wheel spin freely. This is optional but something I do when I want to be thorough.
- A flashlight or headlamp — Seeing what’s happening inside the caliper area is half the battle.
Brake Cleaner Product Comparison
I’ve used all of these products extensively. Here’s how they stack up for cleaning brakes without tire removal:
| Product | Price (approx.) | Formula Type | Spray Reach | Residue | My Rating |
|---|---|---|---|---|---|
| CRC Brakleen (Non-Chlorinated) | $5 – $8 | Non-chlorinated | Excellent | None | ⭐⭐⭐⭐⭐ |
| Permatex Brake Cleaner | $5 – $7 | Non-chlorinated | Very Good | None | ⭐⭐⭐⭐⭐ |
| 3M Brake & Parts Cleaner | $7 – $10 | Non-chlorinated | Good | None | ⭐⭐⭐⭐ |
| CRC Brakleen (Chlorinated) | $4 – $7 | Chlorinated | Excellent | None | ⭐⭐⭐⭐ |
| Gunk Brake Cleaner | $4 – $6 | Non-chlorinated | Moderate | Slight | ⭐⭐⭐ |
A quick note on chlorinated vs. non-chlorinated: I strongly recommend non-chlorinated brake cleaner for this type of job. Chlorinated formulas are more aggressive and dry faster, but they can damage rubber seals, painted surfaces, and plastic components if you’re not careful. Since you’re spraying through wheel spokes with limited visibility, the non-chlorinated option gives you a wider margin of safety. Plus, several US states (California in particular) have restrictions on chlorinated solvents.
Step-by-Step: How to Clean Brakes Without Removing Tires
Alright, here’s the process I follow every time. I’ve done this dozens of times on my own vehicles and helped friends do it on theirs. It’s straightforward, but the details matter.
Step 1: Park on a Flat Surface and Let the Brakes Cool
This is critical. Never spray brake cleaner on hot brake components. If you’ve been driving, give the car at least 30 minutes to cool down. I learned this the hard way — spraying solvent on a hot rotor creates a lot of fumes and can potentially warp the rotor due to rapid, uneven cooling.
Park on a flat, level surface. If you’re in a garage, open the door for ventilation. Brake cleaner fumes are no joke.
Step 2: Prepare Your Work Area
Lay down your drip pan or old towels beneath the wheel you’re starting with. Put on your safety glasses and nitrile gloves. Have your brake cleaner, brushes, and microfiber towels within arm’s reach.
I always start with the front brakes because they do roughly 70% of your stopping work and accumulate dust much faster than the rears.
Step 3: Visual Inspection Through the Wheel
Before you spray anything, grab your flashlight and look through the wheel spokes. You’re checking for:
- The overall condition of the brake pads (you should be able to see the pad material through the caliper opening)
- Heavy rust or corrosion on the rotor surface
- Any obvious debris like rocks, sticks, or road debris lodged between the pad and rotor
- Brake fluid leaks (wet spots around the caliper)
If you see the brake pad material is less than about 1/4 inch thick, or if there’s a groove worn into the rotor, no amount of cleaning will fix that — you need new pads or rotors. This cleaning method is for maintenance, not repair.
Step 4: Blow Out Loose Debris (Optional But Recommended)
If you have compressed air available, give the brake assembly a good blast through the wheel openings. Aim the air between the spokes and direct it at the caliper, the space between the pads and rotor, and the rotor surface itself.
I usually spend about 30 seconds per wheel on this step. You’ll be surprised at how much loose dust and grit comes flying out. Wear your safety glasses — brake dust particles are not something you want in your eyes.
Pro tip: If you don’t have compressed air, you can use a can of compressed air (the kind sold for cleaning electronics) in a pinch, but it doesn’t have the power of a real compressor. A leaf blower set to low also works — I’ve done this in a pinch and it gets the job done.
Step 5: Apply Brake Cleaner Spray Generously
This is the core of the process. Shake your brake cleaner can well, then insert the spray straw (most cans come with one) through the widest gap in your wheel spokes.
Spray directly onto:
- The brake rotor surface — both the visible face and try to angle toward the inner face
- The brake caliper body
- The area where the brake pads contact the rotor
- The caliper bracket and slide pins (if accessible)
Be generous. I typically use about 1/3 to 1/2 of a 14-ounce can per wheel on the front brakes, and a bit less on the rears. The solvent evaporates quickly and leaves no residue, so there’s no real risk of “using too much.”
You’ll see the black, grimy runoff dripping down immediately. That’s all the accumulated brake dust, grease, and debris being dissolved and washed away. This is deeply satisfying to watch.
Step 6: Scrub Accessible Areas With Your Brush
While the cleaner is still doing its work, insert your detailing brush through the spokes and scrub:
- The rotor face — work the brush back and forth across the surface to remove any baked-on deposits
- The caliper exterior — brake dust cakes onto the caliper body and makes it look terrible
- The wheel’s inner barrel — while you’re in there, clean the inner lip of the wheel where dust accumulates
I find that wheel woolies work best for this because they’re long, flexible, and won’t scratch your wheels. A stiff-bristled parts brush is more effective on the caliper and rotor, but be careful around painted calipers — you can scratch the paint.
After brushing, hit everything with another round of brake cleaner spray to flush away what you loosened.
Step 7: Address the Rotor’s Inner Face
This is the tricky part that most tutorials skip. Your brake rotor has two faces — the one facing outward (easy to see and spray) and the one facing inward toward the engine/suspension. The inner face gets just as dirty.
To reach it, angle your spray straw toward the back side of the rotor, spraying through different spoke openings to get multiple angles. You won’t achieve a perfect clean on the inner face without removing the wheel, but you can significantly reduce buildup.
If your vehicle is jacked up with the wheel off the ground, spin the wheel slowly by hand while spraying. This ensures the cleaner contacts the entire rotor surface as it rotates — a technique I’ve found dramatically improves results.
Step 8: Clean the Wheel Itself
While you’ve got your cleaning supplies out, wipe down the wheel face and spokes with a microfiber towel. Brake cleaner works on wheels too, but I prefer using a dedicated wheel cleaner for this part to avoid stripping any protective coatings.
If you’re using brake cleaner on painted or clear-coated wheels, spray it on the towel first, not directly on the wheel. Non-chlorinated formulas are generally safe for alloy wheels, but I always err on the side of caution.
Step 9: Repeat on All Four Wheels
Work your way around the vehicle. Front brakes usually need the most attention, but don’t neglect the rears. In my experience, rear brakes accumulate less dust but more road grime, especially in wet conditions.
The entire process takes me about 30-45 minutes for all four wheels, including setup and cleanup. Your first time might take a bit longer as you figure out the best angles and spoke gaps for your particular wheels.
Step 10: Test Drive and Break-In
After cleaning, take your car for a short drive around the neighborhood. During the first several stops, you might hear a slight difference in brake feel or sound — this is normal. The cleaner removes the thin transfer layer between pad and rotor, and it takes a few brake applications for things to re-seat.
I always do 5-10 moderate stops from about 30 mph to re-establish that contact. After a few minutes of driving, everything should feel completely normal — often better than before the cleaning.
Common Mistakes to Avoid
I’ve made most of these mistakes myself over the years. Let me save you the trouble.
Using WD-40 or General-Purpose Cleaners
I cannot stress this enough: never spray WD-40, silicone lubricant, or all-purpose degreasers on your brakes. These products leave an oily residue that will dramatically reduce your braking ability. This is genuinely dangerous.
Brake cleaner is specifically formulated to dissolve contaminants and evaporate completely with zero residue. There’s no substitute. I’ve seen forum posts where people recommend household cleaners or even dish soap — please don’t follow that advice for your brakes.
Spraying on Hot Brakes
I mentioned this earlier, but it bears repeating. Hot rotors and brake cleaner solvent are a bad combination. You risk thermal shock to the rotor (which can cause warping), excessive fume inhalation, and potentially even fire since brake cleaner is highly flammable.
Wait until your brakes are cool to the touch. If you’ve just come back from a drive, give it at least 30 minutes.
Ignoring Your Brake Pads’ Condition
Cleaning is maintenance, not a miracle cure. If your brake pads are worn down to the wear indicators, or if your rotors are scored and grooved, cleaning won’t solve the underlying problem. I’ve had people tell me they cleaned their brakes and the squeal came back within a day — that’s usually a sign the pads need replacement.
Always use your visual inspection (Step 3) as a quick health check.
Not Protecting Your Driveway
Brake cleaner dissolves brake dust and grease into a dark, runny liquid that will stain concrete driveways. I learned this the hard way and now always use a drip pan. If you do stain your concrete, a concrete degreaser from Home Depot can help, but prevention is easier.
How This Relates to Your Tires and Wheels
You might be wondering why a tire reviewer is writing about brake cleaning. It’s because in my work, I see the direct connection between brake maintenance and tire longevity every single day.
Brake Dust Damages Wheels
Brake dust is slightly acidite and contains metallic particles. When it bakes onto your alloy wheels in the summer heat (especially in southern US states like Texas, Arizona, and Florida), it can permanently etch the wheel surface. I’ve tested wheels that showed visible pitting after just one season of neglect.
If you’ve invested in a quality set of tires mounted on nice alloy wheels, regular brake cleaning protects that investment.
Brake Problems Cause Uneven Tire Wear
Sticking calipers — often caused by corroded slide pins that regular cleaning helps prevent — create constant drag on one wheel. This leads to accelerated and uneven tire wear on that corner. I’ve inspected tires where one front tire was wearing dramatically faster than the other, and the root cause was a caliper that wasn’t releasing properly due to corrosion and grime buildup.
Keeping your brakes clean is, in a very real sense, keeping your tires healthy.
Wheel Design Affects How Easy This Is
When I review tires and recommend wheel sizes, I always consider brake accessibility. Open-spoke wheel designs (like many 17-inch and 18-inch aftermarket alloys) make cleaning brakes without tire removal much easier. Multi-spoke or mesh-style wheels with tight gaps can make it nearly impossible to get a brush through.
If you’re shopping for new wheels along with your tires, this is worth thinking about. I’ve always preferred wheels with at least five or six generously spaced openings for exactly this reason.
When You SHOULD Take the Tires Off
I want to be honest about the limitations of this method, because integrity matters more than telling you what you want to hear.
Cleaning through the wheel spokes is effective for regular maintenance and light-to-moderate buildup. But there are situations where you really do need to remove the wheels for a proper deep clean:
- You haven’t cleaned the brakes in over six months — Heavily caked-on deposits may require direct access.
- You hear grinding, not just squealing — Grinding metal-on-metal means pads are worn to the backing plate. This isn’t a cleaning issue; it’s a repair issue.
- You see brake fluid leaking — This requires immediate professional attention.
- Your caliper slide pins need lubrication — You can’t properly service caliper pins without removing the wheel and caliper.
- You’re already rotating your tires — If the wheels are coming off anyway, take the opportunity to do a thorough deep clean.
For everything else — routine dust removal, addressing light squeals, maintaining brake performance between service intervals, and keeping your wheels looking sharp — the through-the-wheel method I’ve described works exceptionally well.
My Personal Brake Cleaning Schedule
For what it’s worth, here’s the routine I’ve settled into after years of trial and error. It works for me as someone who drives daily in varying US conditions — hot summers, occasional winter road salt, and everything in between.
Every car wash (about every 2 weeks): I give each wheel a quick spray of brake cleaner — maybe 5 seconds per wheel — just to knock off fresh dust. This takes about 3 extra minutes total.
Once a month: I do the full process described above — blow out debris, thorough spray, brush scrubbing, and inspection. This is my primary maintenance session.
At every tire rotation: With the wheels off, I do a deep clean of the calipers, rotors, and pad edges, plus I inspect pad thickness and rotor condition carefully.
This schedule has kept my brakes performing well, eliminated squeal complaints from my passengers, and kept my wheels looking clean far longer between washes.
Budget Breakdown: What This Costs
One of the things I appreciate about this maintenance task is how affordable it is. Here’s roughly what you’ll spend if you’re starting from scratch:
- Brake cleaner (2 cans): $8 – $16
- Detailing brush set: $8 – $15
- Microfiber towels (pack of 6): $5 – $10
- Nitrile gloves (box of 50): $8 – $12
- Safety glasses: $3 – $8
- Drip pan: $5 – $10
Total initial investment: $37 – $71
After that, your ongoing cost is essentially just brake cleaner — a couple of cans per month if you’re diligent, which runs maybe $8 – $16 per month. Compare that to the cost of premature wheel refinishing ($100 – $200 per wheel) or accelerated brake wear from neglected maintenance ($300 – $600 for a brake job), and the math speaks for itself.
A Word About Ceramic Brake Pads and Dust
If brake dust is driving you crazy — both on your wheels and in your brake assemblies — consider switching to ceramic brake pads at your next brake service. In my experience testing different pad compounds, ceramic pads produce significantly less dust than semi-metallic pads.
Brands like Bosch QuietCast, Wagner ThermoQuiet, and Akebono ProACT are all excellent ceramic options widely available in the US market. They’re typically $30 – $60 per axle set and are a direct swap for most passenger cars and SUVs.
I switched to Akebono ceramic pads on my primary test vehicle after getting tired of excessive brake dust, and the difference was immediately noticeable. After several weeks of driving, my wheels had a fraction of the dust compared to the OEM semi-metallic pads. The cleaning process became quicker and less frequent.
This won’t eliminate the need for brake cleaning entirely, but it reduces the workload considerably.
Final Thoughts: It’s Easier Than You Think
I’ll be straightforward — when I first started cleaning brakes without removing tires, I was skeptical about how effective it could really be. It felt like a shortcut, and shortcuts in car maintenance usually come back to bite you.
But after incorporating this into my routine over a long period of time, I’m fully convinced. It’s not a replacement for proper brake service, but as a maintenance practice between services, it’s incredibly effective. My brakes are quieter, my wheels stay cleaner, and I catch potential issues earlier through regular visual inspections.
The whole process requires no special skills, no expensive tools, and less than an hour of your time. If you can wash your car, you can clean your brakes.
So grab a can of CRC Brakleen, a good brush, and spend 30 minutes this weekend giving your brakes some attention. Your ears, your wheels, and your brake pads will thank you.
Frequently Asked Questions
Can you clean your brakes without removing the tires?
Yes, you can effectively clean your brakes without taking the tires off by spraying a dedicated brake cleaner through the wheel spokes directly onto the calipers, rotors, and pads. I recommend using a non-chlorinated brake cleaner like CRC Brakleen or Permatex, which are widely available at AutoZone and O’Reilly for around $4–$8 a can. Just make sure the vehicle is parked on a level surface with the engine off and the parking brake engaged before you start.
What is the best brake cleaner spray to use with tires still on?
For cleaning brakes with the wheels still mounted, I prefer aerosol brake cleaners with a straw nozzle attachment because they let you direct the spray precisely through the wheel spokes. CRC Brakleen (green can, non-chlorinated) is the most popular choice among US drivers and works well on brake dust, grease, and road grime without damaging rubber or tire compounds. Avoid using general-purpose degreasers, as they can leave residue on the rotors that hurts braking performance.
How often should you clean brake dust off your wheels and brakes?
I recommend cleaning brake dust from your wheels and brake components every 2–4 weeks, or more frequently if you do a lot of city driving with heavy stop-and-go traffic. Brake dust is corrosive and contains metal particles that can pit your wheel finish and degrade your brake components over time. If you live in humid coastal areas or regions where road salt is used in winter, cleaning more often helps prevent accelerated corrosion on rotors and calipers.
Will brake cleaner damage my tires or wheel finish?
Most non-chlorinated brake cleaners are safe for alloy and steel wheels, but chlorinated formulas can damage clear-coated or painted wheel finishes and may dry out rubber tire sidewalls over prolonged contact. I always recommend spraying carefully and wiping any overspray off your tires and wheel face immediately with a microfiber cloth. If you have expensive aftermarket wheels, test the cleaner on a small hidden area first to make sure it does not discolor the finish.
What causes excessive brake dust buildup on front tires?
Front brakes handle roughly 60–70% of your vehicle’s stopping force, which is why the front wheels accumulate significantly more brake dust than the rears. Semi-metallic brake pads, which are standard on many US vehicles like Ford F-150s and Chevy Silverados, produce more dust than ceramic pads. If you are shopping for replacement tires and notice heavy dust buildup, it might also be worth switching to ceramic brake pads, which typically cost $30–$70 per set and dramatically reduce dust production.
Can dirty brakes affect braking performance and tire wear?
Yes, heavily contaminated brakes with built-up grease, road grime, or glazed dust can reduce braking efficiency by creating a slippery film between the pads and rotors, which leads to longer stopping distances. Uneven braking caused by dirty or sticking calipers can also cause irregular tire wear, meaning you may need to replace your tires sooner than expected. Regularly cleaning your brakes without removing the tires is an easy way to maintain consistent stopping power and extend the life of both your brakes and your tires.
What tools do I need to clean brakes through the wheel without removal?
You will need a can of aerosol brake cleaner with a straw nozzle, a stiff detailing brush or old toothbrush that fits through your wheel spokes, a few microfiber towels, and optionally a drip pan to catch runoff. I also like using a small LED flashlight to inspect the rotor and caliper surfaces through the spokes before and after cleaning. The whole process takes about 10–15 minutes per wheel, and all the supplies cost under $20 total at most US auto parts stores like AutoZone, NAPA, or Walmart.

