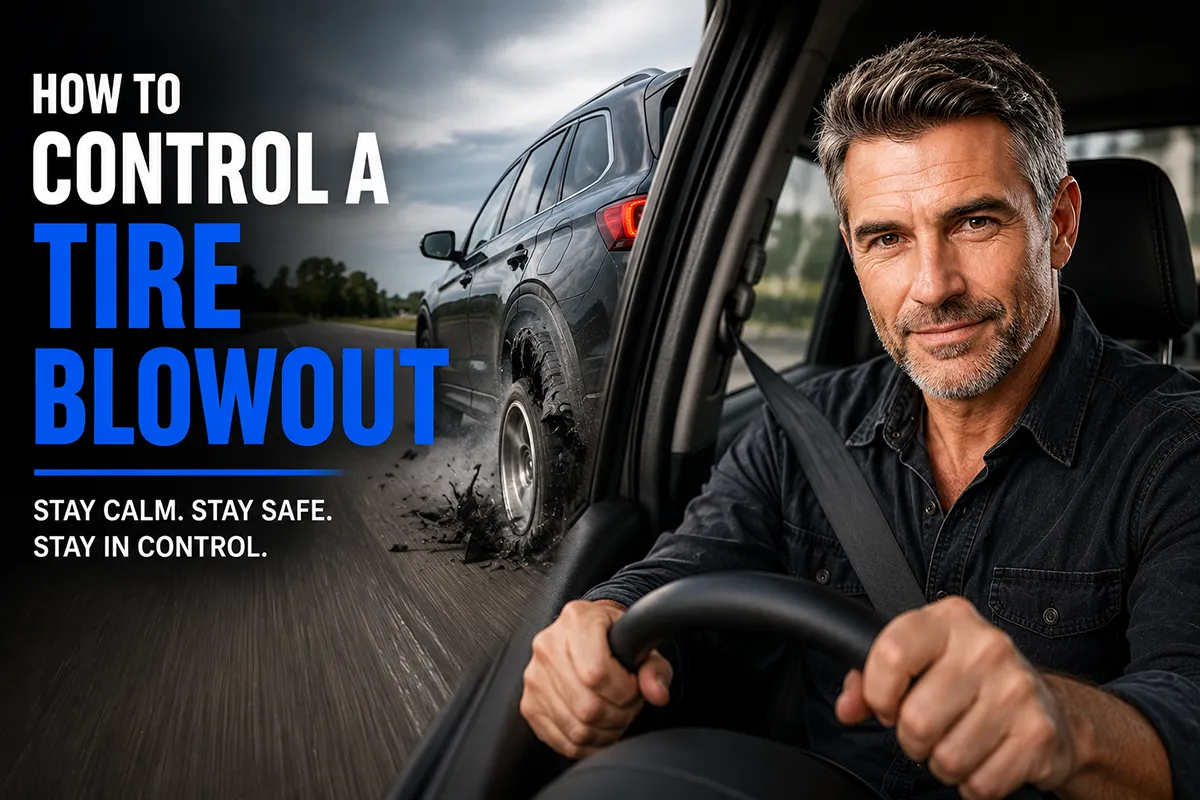
I was driving on I-95 outside of Richmond doing about 70 mph when my rear left tire exploded without warning. The car lurched violently to the left, the steering wheel tried to rip itself from my hands, and for about two seconds, I genuinely thought I was going to roll into oncoming traffic.
I didn’t crash. I didn’t even leave my lane. But that experience changed the way I think about tires, tire maintenance, and — most importantly — what you’re supposed to do in the split second when a blowout happens.
If you’ve never experienced a tire blowout, consider yourself lucky. But statistically, many of us will face one at some point. And the difference between a close call and a catastrophic accident often comes down to knowing exactly what to do in those first few critical seconds.
- Do NOT slam the brakes during a blowout — this is the #1 mistake that causes accidents.
- Keep a firm grip on the steering wheel and gently accelerate to stabilize the vehicle.
- Gradually ease off the gas and steer straight, then slowly guide the car to the shoulder.
- Front tire blowouts pull the car toward the blown tire; rear blowouts cause fishtailing.
- Proper tire maintenance — pressure checks, tread inspections, and timely replacements — is your best prevention.
- Driving on underinflated or worn tires dramatically increases your blowout risk, especially in summer heat.
What Exactly Happens During a Tire Blowout?
Before I walk you through the step-by-step response, it helps to understand what’s physically happening to your car during a blowout. This isn’t the same as a slow leak or a flat tire. A blowout is a rapid, often explosive loss of air pressure that causes the tire to disintegrate in a fraction of a second.
When a tire blows, several things happen almost simultaneously. The vehicle drops on one corner as the tire loses its ability to support weight. The exposed wheel rim and shredded rubber create massive drag on the affected side. And depending on which tire blew, the car will either pull hard in one direction or begin to sway and fishtail unpredictably.
In my experience testing and reviewing tires for several years now, I’ve seen the aftermath of dozens of blowouts on the road. I’ve also intentionally experienced controlled blowout simulations during advanced driving courses. The single most important thing I can tell you is this: your instincts will be wrong. Everything your body wants you to do — slam the brakes, jerk the wheel, take your hands off the steering — is the exact opposite of what will save your life.
Step-by-Step: How to Control a Tire Blowout
I’m going to break this down into clear, sequential steps. I’d encourage you to read through this entire section, and then re-read it again later. In a blowout scenario, you won’t have time to think — you need this response to be almost automatic.
Step 1: Keep a Death Grip on the Steering Wheel
The very first thing you need to do — literally in the first half-second — is tighten your grip on the steering wheel. Both hands, 9 and 3 position, knuckles white.
When a tire blows, the sudden drag on one side of the car will try to yank the steering wheel from your hands. If you’re driving one-handed, resting your hand on the center console, or (and I see this constantly on US highways) holding your phone, you may lose control of the steering entirely before you even realize what’s happened.
This is why I always advocate for keeping both hands on the wheel, especially at highway speeds. It’s not just defensive driving advice — it’s blowout survival 101.
Step 2: Do NOT Hit the Brakes
This is the hardest step because it goes against every instinct in your body. When something terrifying happens at 70 mph, your foot wants to stomp the brake pedal. You need to resist that urge with everything you have.
Here’s why: when a tire blows, the car is already experiencing massive deceleration on the side with the blown tire. The shredded rubber and exposed rim are acting like an anchor dragging on the pavement. If you add braking force on top of that, you create an extreme imbalance of forces that can spin the car or cause it to flip.
I’ve spoken with highway patrol officers and accident reconstruction specialists who all confirm the same thing — a significant percentage of blowout-related fatal accidents involve drivers who slammed the brakes. The blowout itself is survivable. The panicked braking response is what kills people.
Step 3: Gently Press the Accelerator
Yes, you read that correctly. In the immediate aftermath of a blowout, you should lightly press the gas pedal. Not floor it — just a gentle, steady press.
This sounds counterintuitive, but there’s solid physics behind it. A light acceleration helps to stabilize the vehicle by counteracting the drag force from the blown tire. It keeps the car moving in a straight line and gives you more control over the steering.
I remember the first time I was taught this technique at a performance driving school outside of Phoenix. The instructor blew a simulated tire at speed and told me to accelerate. Every fiber of my being screamed no. But when I did it, the car straightened out almost immediately. It was one of the most eye-opening driving experiences I’ve ever had.
You only need to maintain this light acceleration for two to three seconds — just long enough to stabilize the car and regain full steering control.
Step 4: Steer Straight and Steady
Once you’ve stabilized the vehicle, focus on steering as straight as possible. The car will be pulling toward the side with the blown tire (for a front blowout) or swaying side to side (for a rear blowout). Use firm, small corrections to keep the car traveling in a straight line within your lane.
Do not make any sudden steering inputs. Jerking the wheel even a few degrees at highway speed with a blown tire can cause the car to spin or roll. Smooth, deliberate corrections only.
In my experience, this phase lasts maybe five to ten seconds, but it feels like an eternity. Keep your eyes focused on where you want the car to go — not on the shoulder, not on the rearview mirror, not on the blown tire. Look straight ahead and steer toward that point.
Step 5: Gradually Slow Down
Once the car is stable and traveling straight, begin to ease off the accelerator slowly. Let the car decelerate naturally through engine braking. You can also begin to very lightly apply the brakes — but gently, gradually, and only once the car is fully stable and under your control.
Your goal is to reduce speed to about 20-30 mph before you attempt to move to the shoulder. At highway speeds, the forces acting on a car with a blown tire are enormous. At lower speeds, the car becomes much more manageable.
This gradual deceleration phase might take 15-30 seconds depending on your starting speed and traffic conditions. Don’t rush it. A slow, controlled deceleration is infinitely safer than a panicked stop.
Step 6: Signal and Move to the Shoulder
Once you’ve slowed to a safe speed, activate your hazard lights and carefully steer the car to the right shoulder. On a US highway, always aim for the right shoulder if at all possible — pulling to the left shoulder puts you dangerously close to high-speed traffic and makes it much harder for emergency vehicles to reach you.
If you’re on a multi-lane highway, change lanes one at a time, checking your mirrors carefully between each lane change. Other drivers may not realize you’re in an emergency situation.
Once you’re on the shoulder, continue rolling forward slowly until you find a spot that’s as far from traffic as possible. Straight sections of road with wide shoulders and good visibility are ideal. Avoid stopping just past a curve where approaching traffic won’t see you.
Step 7: Safely Exit and Assess
After coming to a complete stop on the shoulder, keep your hazard lights on. If it’s safe to exit the vehicle, do so from the passenger side (the side away from traffic). Move well away from the car and the road before assessing the damage.
If you’re on a busy interstate and it doesn’t feel safe to change the tire yourself, call for roadside assistance. AAA membership costs about $60-$150 per year depending on your plan level, and in a blowout situation on a high-speed highway, it’s worth every penny to have a professional handle the tire change while you stand safely behind a guardrail.
Front Tire Blowout vs. Rear Tire Blowout: Key Differences
The general response to a blowout is the same regardless of which tire fails, but there are some important differences in how the car behaves that you should be aware of.
| Characteristic | Front Tire Blowout | Rear Tire Blowout |
|---|---|---|
| Steering feel | Strong pull toward the blown tire side | Steering feels loose and vague |
| Vehicle behavior | Car veers sharply to one side | Car sways or fishtails side to side |
| Difficulty level | Moderate — requires strong counter-steering | High — fishtailing is harder to correct |
| Primary danger | Veering into adjacent lanes or off-road | Spinning out or overcorrecting |
| Key response | Counter-steer firmly but smoothly against the pull | Make only minimal steering inputs; focus on straight-ahead stability |
In my experience, rear tire blowouts are actually scarier and harder to manage than front tire blowouts. With a front blowout, the car pulls to one side — it’s dramatic but somewhat predictable. With a rear blowout, the back end of the car gets loose and starts swinging, which is much more disorienting and harder to correct, especially for drivers who’ve never experienced oversteer before.
If you drive a rear-wheel-drive vehicle — many popular US trucks and muscle cars fall into this category, including the Ford F-150, Chevy Silverado, and Dodge Challenger — you should be especially mindful of rear tire condition because a rear blowout combined with rear-wheel drive creates a particularly challenging situation.
What Causes Tire Blowouts in the First Place?
Understanding the causes of blowouts is just as important as knowing how to respond to one. In my years of testing and reviewing tires, I’ve identified several primary culprits that US drivers should be aware of.
Underinflation: The Silent Killer
Underinflation is the number one cause of tire blowouts, and it’s entirely preventable. When a tire is underinflated, the sidewalls flex excessively as the tire rolls. This flexion generates heat — a lot of it. Over time (and sometimes not much time at all), this heat breaks down the tire’s internal structure, weakening the rubber and the steel belts until the tire fails catastrophically.
According to the National Highway Traffic Safety Administration (NHTSA), underinflated tires are involved in approximately 75% of tire-related crashes. That’s a staggering number, especially considering how easy it is to check your tire pressure.
I check the tire pressure on my test vehicles every single morning before I drive. It takes about 90 seconds with a digital gauge that cost me $8 at AutoZone. There is genuinely no excuse for driving on underinflated tires.
Your vehicle’s recommended tire pressure is printed on a sticker inside the driver’s door jamb — NOT on the tire sidewall. The number on the tire sidewall is the maximum pressure the tire can safely hold, not the optimal pressure for your specific vehicle.
Overloading Your Vehicle
Every vehicle has a Gross Vehicle Weight Rating (GVWR) — the maximum total weight it’s designed to carry, including passengers, cargo, and the vehicle itself. Exceeding this weight puts enormous stress on your tires, particularly at highway speeds.
I see this all the time during summer road trip season. Families packing their SUVs to the ceiling with luggage, camping gear, coolers, bikes on the roof rack — and then driving 500 miles across Texas in 105°F heat. That’s a blowout recipe if I’ve ever seen one.
If you’re planning a heavily loaded trip, check your GVWR (it’s on the same sticker as your tire pressure information) and make sure your tires are inflated to the pressure recommended for maximum load. Some vehicles specify a higher inflation pressure for full-load situations.
Worn or Damaged Tires
Tires with low tread depth, visible sidewall damage, bulges, cracks, or exposed cords are significantly more likely to blow out. I’ve reviewed hundreds of tires over the years, and I always tell readers the same thing: a tire with visible damage is a ticking time bomb.
Use the penny test to check your tread depth — insert a penny into the tread groove with Lincoln’s head facing down. If you can see the top of Lincoln’s head, your tread depth is below 2/32 of an inch and the tire needs to be replaced immediately.
But I actually recommend replacing tires before they get that worn. In my experience, tire performance — especially wet traction and heat resistance — degrades noticeably well before you hit the 2/32″ legal minimum. I personally replace tires when they reach about 4/32″ of remaining tread.
Road Hazards
Potholes, debris, broken glass, construction materials, and even sharp curb edges can damage a tire’s internal structure without leaving much visible evidence on the outside. You might hit a deep pothole on Monday, see no obvious damage, and then have a blowout on Thursday.
After hitting any significant road hazard, I recommend having the affected tire inspected by a professional. Many tire shops like Discount Tire, Tire Rack, and Les Schwab will inspect tires for free. It takes 15 minutes and could save your life.
Heat and Summer Driving
Blowout season in the US runs from roughly May through September. Hot pavement dramatically increases tire temperatures, and when you combine hot roads with highway speeds, heavy loads, or underinflated tires, the risk of a blowout skyrockets.
During my summer testing periods in Arizona and Texas, I’ve measured road surface temperatures exceeding 150°F. At those temperatures, tire rubber softens, internal pressures rise, and any weakness in the tire’s structure is much more likely to fail.
If you’re driving through the Sun Belt states during summer, pay extra attention to your tire condition and pressure. Check pressures when the tires are cold (before driving or after sitting for at least three hours), and don’t be alarmed if pressures read a few PSI higher after highway driving — that’s normal thermal expansion.
How to Prevent Tire Blowouts: My Maintenance Checklist
Prevention is always better than reaction. Here’s the exact checklist I follow for every vehicle I test, and it’s the same one I recommend to every reader.
- Check tire pressure at least once a month — and before any long highway drive. Use a quality digital gauge, not the gas station pump gauge (those are often wildly inaccurate). I like the AstroAI Digital Tire Pressure Gauge, which runs about $10 on Amazon and has been consistently accurate across all my testing.
- Inspect tires visually every week — Walk around your car and look at each tire. Check for bulges, cracks in the sidewall, embedded objects (nails, screws, glass), uneven wear patterns, and low tread. This takes about two minutes and I do it every Sunday morning.
- Rotate tires every 5,000-7,500 miles — Regular rotation ensures even wear across all four tires, which means no single tire wears down faster than the others. Uneven wear creates weak spots that can lead to blowouts.
- Don’t ignore your TPMS light — If your Tire Pressure Monitoring System warning light illuminates on your dashboard, address it immediately. Don’t just “get to it later.” That light exists specifically to prevent the kind of underinflation that causes blowouts.
- Replace tires before they’re bald — As I mentioned earlier, I replace tires at 4/32″ of tread rather than waiting for the legal minimum of 2/32″. The additional safety margin is worth the cost of replacing slightly earlier.
- Check tire age — Tires degrade over time even if they look fine. The rubber compounds oxidize and become brittle. The NHTSA recommends replacing any tire older than 6 years, regardless of tread depth. You can find the manufacturing date on the tire sidewall — look for the DOT code, where the last four digits indicate the week and year of manufacture (e.g., “2321” means week 23 of 2021).
- Avoid overloading — Know your vehicle’s weight limits and stay within them, especially for long highway trips in hot weather.
- Choose quality tires — In my experience reviewing tires, there’s a genuine difference in construction quality between premium brands and budget brands. I’m not saying you need to buy the most expensive tire on the market, but tires from reputable manufacturers like Michelin, Continental, Bridgestone, Goodyear, and Cooper tend to have more robust internal construction and better heat resistance than bottom-shelf bargain tires. I’ve tested budget tires that showed alarming heat buildup patterns during sustained highway driving — the kind of conditions that lead to blowouts.
What About Run-Flat Tires and Tire Sealant?
I get asked about these a lot, so let me share my perspective based on years of testing.
Run-Flat Tires
Run-flat tires are designed with reinforced sidewalls that can support the vehicle’s weight even after a complete loss of air pressure. They allow you to continue driving — typically up to 50 miles at up to 50 mph — to reach a safe location or tire shop.
In my testing of run-flat tires from Bridgestone (DriveGuard series), Michelin, and Continental, I’ve found that they genuinely do work as advertised. When they lose pressure, the car remains controllable and you can drive to safety without the sudden, violent loss of control that characterizes a traditional tire blowout.
The downsides? Run-flats tend to ride stiffer, they’re typically more expensive (often $30-$80 more per tire than comparable standard tires), and they often can’t be repaired after a puncture — meaning replacement rather than a $25 plug-and-patch job.
For drivers who frequently travel solo on rural highways where roadside assistance might be a long wait, I think run-flats are a worthwhile consideration. Several BMW, MINI, and Mercedes-Benz models come equipped with run-flats from the factory.
Tire Sealant Kits
Many newer vehicles come without a spare tire, instead including a tire sealant kit (like Slime or Fix-a-Flat) and a portable air compressor. These can be useful for small punctures, but I want to be very clear: tire sealant will not help you during a blowout.
A blowout involves catastrophic structural failure of the tire. No amount of sealant is going to seal a 12-inch gash in the sidewall. These kits are designed for small nail holes and slow leaks, not blowouts.
If your car doesn’t have a spare tire and you’re concerned about blowouts (which you should be if you drive on US highways), I recommend either upgrading to run-flat tires or carrying a compact spare tire kit that can be purchased aftermarket for most vehicles. They typically run $100-$250 and could be a lifesaver.
My Personal Blowout Experience: Lessons Learned
I want to circle back to my blowout experience on I-95 because there are some lessons in it that go beyond the standard advice.
The tire that blew was a rear left tire on a sedan I was testing. It was a budget-brand all-season tire with adequate tread depth — I had checked it the day before. But what I hadn’t checked was the tire’s age. When I later examined the DOT code on the shredded remains, I discovered the tire was manufactured over seven years earlier. It had been sitting in a warehouse or on a showroom car before being installed, and the rubber had degraded beyond what visual inspection could reveal.
That experience taught me to always check the manufacturing date, not just the tread depth. A tire can look perfectly fine on the outside while its internal structure has silently deteriorated to the point of failure.
The other lesson was about muscle memory. I had taken an advanced driving course a couple of years before this blowout, and the instructors had drilled the counter-steering and “don’t brake” response into us through repeated practice. When my tire blew on I-95, I didn’t have to think about what to do. My hands gripped the wheel, I instinctively held the accelerator steady, and I steered straight. The training kicked in automatically.
I tell this story because I truly believe that knowledge alone isn’t enough. You need to mentally rehearse the blowout response until it becomes second nature. Every time you merge onto a highway, take a moment to think: “If a tire blows right now, I will grip the wheel, hold the gas, and steer straight.” Over time, this mental rehearsal can partially substitute for physical practice.
Special Considerations for Trucks, SUVs, and Towing
If you drive a truck or SUV — and given the US market, there’s a good chance you do — blowout dynamics can be different than in a sedan.
Taller vehicles like the Ford F-150, Chevy Tahoe, Toyota 4Runner, and Jeep Grand Cherokee have a higher center of gravity. This means that the sudden destabilization from a blowout carries a higher risk of rollover compared to a lower-slung sedan.
The response protocol is the same (grip, don’t brake, accelerate gently, steer straight, slow gradually), but the stakes of getting it wrong are higher. Overcorrecting the steering in a top-heavy SUV at highway speed can easily trigger a rollover.
If you tow a trailer — whether it’s a boat, camper, or utility trailer — the risks multiply further. Trailer tire blowouts are extremely common because trailer tires often sit unused for months, are exposed to UV damage, and are frequently underinflated. A trailer tire blowout at highway speed can cause a dramatic jackknife situation.
I always recommend that anyone who tows regularly invest in a quality trailer tire pressure monitoring system (TPMS). Systems from brands like TST and TireMinder run about $150-$400 depending on the number of sensors and provide real-time pressure and temperature alerts. In my testing, they’ve caught low-pressure situations before they could escalate to blowouts on multiple occasions.
Quick-Reference Blowout Response Summary
I want to leave you with a clean, simple summary that you can screenshot or print and keep in your glovebox. When the moment comes, you won’t have time to read a full article.
- GRIP — Both hands on the steering wheel, firm grip, 9 and 3 position.
- DON’T BRAKE — Keep your foot OFF the brake pedal.
- ACCELERATE LIGHTLY — Gentle press on the gas for 2-3 seconds to stabilize.
- STEER STRAIGHT — Small, smooth corrections only. Eyes forward.
- SLOW GRADUALLY — Ease off the gas. Let the car decelerate naturally.
- SIGNAL & MOVE — Hazard lights on. Guide to the right shoulder slowly.
- EXIT SAFELY — Get out from the passenger side. Move away from the road.
- CALL FOR HELP — Roadside assistance, 911 if needed.
Final Thoughts From a Tire Reviewer Who’s Been There
In all the tire reviews I write, I focus heavily on performance metrics — wet braking, dry grip, tread life, road noise, comfort. But no performance characteristic matters if the tire fails catastrophically at highway speed.
The best blowout is the one that never happens. Maintain your tires. Check your pressures. Replace aging rubber. Don’t overload your vehicle. And invest in quality tires from reputable manufacturers — the $40 per tire you save on a bargain brand isn’t worth it if the tire can’t handle sustained heat and load.
But if a blowout does happen despite your best efforts — and sometimes it will, because road hazards exist, manufacturing defects exist, and the unexpected is part of driving — you now know exactly what to do. Grip the wheel. Don’t brake. Accelerate gently. Steer straight. Slow gradually. Pull over safely.
That knowledge might be the most important thing you read on this website. Stay safe out there.
Frequently Asked Questions
What should I do immediately when a tire blows out while driving on the highway?
When you experience a tire blowout at highway speed, grip the steering wheel firmly with both hands and resist the urge to slam the brakes. Instead, gently ease off the accelerator, let the vehicle slow down gradually, and steer straight while activating your hazard lights. Once you’re below 30 mph, carefully pull onto the shoulder and come to a complete stop in a safe location away from traffic.
Why does slamming the brakes during a tire blowout make it more dangerous?
Slamming the brakes during a blowout shifts your vehicle’s weight unevenly and can cause you to lose steering control, especially if a front tire has failed. The sudden braking force on three intact tires and one shredded tire creates a severe pulling effect that can send your car into a spin or into oncoming traffic. Controlled deceleration by lifting off the gas is the safest way to maintain stability and bring your vehicle to a stop.
Can worn or underinflated tires cause a blowout on hot US roads in summer?
Absolutely — underinflated and worn tires are the leading causes of blowouts, especially during summer when US road surface temperatures can exceed 150°F in states like Texas, Arizona, and Florida. Low tire pressure causes excessive sidewall flexing, which generates heat buildup that weakens the tire structure until it fails. I always recommend checking your tire pressure at least once a month and before long road trips, using the PSI listed on your driver’s side door jamb rather than the number on the tire sidewall.
How much does it cost to replace a tire after a blowout in the US?
Replacing a single tire after a blowout typically costs between $100 and $300 for most passenger cars and sedans, depending on the brand and size, while truck and SUV tires can run $150 to $500 or more. Popular US-market brands like Goodyear, Cooper, and General Tire tend to fall in the mid-range, while premium options from Michelin or Bridgestone sit at the higher end. Don’t forget to factor in $15 to $45 for mounting, balancing, and disposal fees at most tire shops.
Does tire age affect blowout risk even if the tread looks fine?
Yes, tire age is a critical but often overlooked blowout risk factor. Rubber compounds degrade over time due to UV exposure and oxidation, even on tires that appear to have plenty of tread remaining. Most tire manufacturers and the NHTSA recommend replacing tires that are 6 to 10 years old regardless of tread depth — you can check your tire’s age by reading the last four digits of the DOT code on the sidewall, which indicate the week and year of manufacture.
What tires are least likely to have a blowout for everyday US driving?
Tires with reinforced sidewall construction, high speed ratings, and strong heat-resistance ratings tend to be the most blowout-resistant for everyday US driving conditions. I recommend looking at options like the Michelin Defender series, Continental TrueContact Tour, or Goodyear Assurance MaxLife, all of which are engineered for long tread life and structural durability on American highways. Investing in a quality all-season tire from a reputable brand — and keeping it properly inflated — is the single best thing you can do to prevent blowouts.
Should I carry a spare tire or a tire repair kit to prepare for a blowout?
I strongly recommend carrying a full-size or compact spare tire along with a jack and lug wrench, since a blowout typically destroys the tire beyond what a plug kit or sealant can fix. Many newer US vehicles now ship with only an inflator kit instead of a spare, which won’t help at all after a blowout shreds the sidewall. If your vehicle doesn’t have room for a spare, consider adding a roadside assistance plan through AAA or your insurance provider, which typically costs $50 to $150 per year and covers towing after a blowout.

