I walked out to my car on a freezing January morning in Michigan, already running late for work, and discovered all four tires were encased in a thick shell of ice.
The wheels wouldn’t budge. The tires were literally frozen to the pavement, and every second I stood there in the bitter cold felt like an eternity.
That morning taught me something most drivers never think about until it happens to them: knowing how to de-ice your tires properly isn’t just a convenience skill — it’s a necessity if you live anywhere that sees real winter weather.
- Never pour boiling water on frozen tires — it can crack the rubber and refreeze even worse.
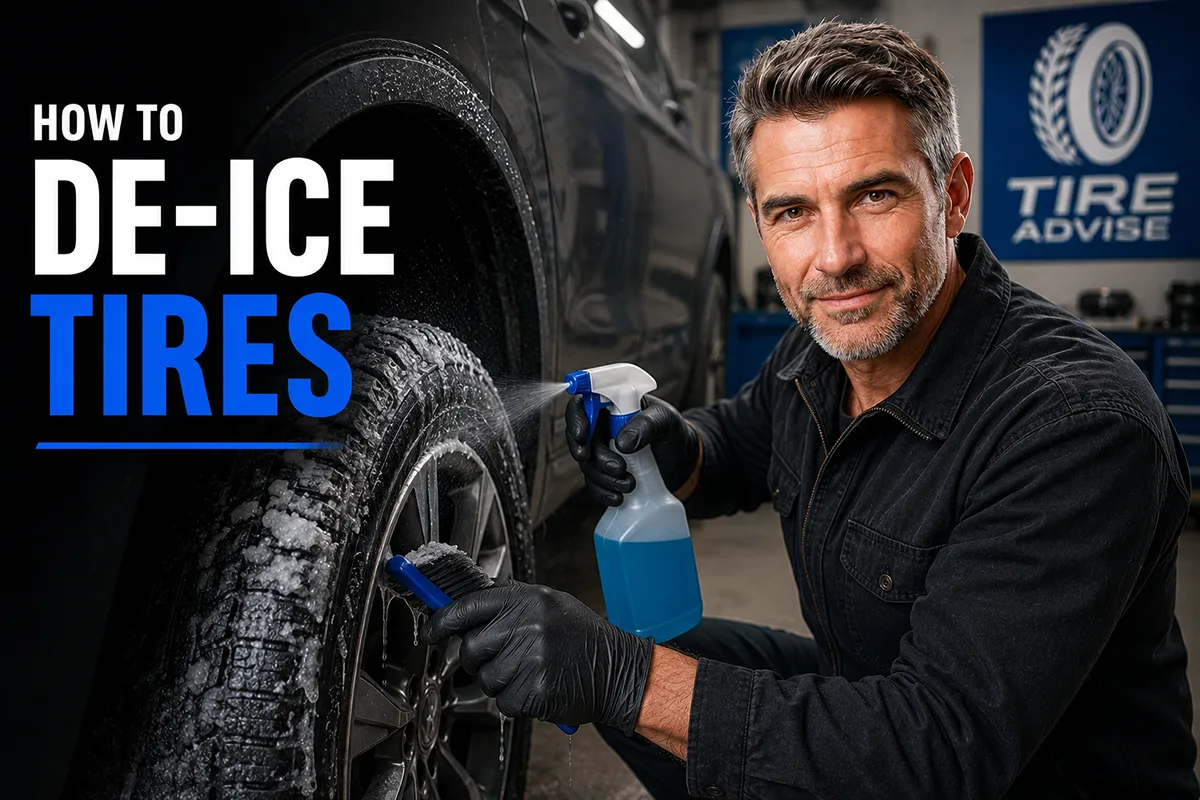
- Use lukewarm water, a commercial de-icer spray, or a rubbing alcohol solution to safely melt ice.
- A plastic scraper or rubber mallet can break thick ice without damaging your tires or wheels.
- Prevent ice buildup by parking on cardboard, using tire covers, or applying silicone-based protectant.
- If your tires are frozen to the ground, gently rock the vehicle in drive and reverse — never floor it.
- Winter tires with proper tread depth resist ice adhesion far better than worn all-seasons.
Why Do Tires Get Encased in Ice in the First Place?
Before I walk you through the de-icing methods I’ve personally tested, it helps to understand why this happens. It’s not just about snow — ice forms on tires for several specific reasons, and understanding the cause helps you pick the right solution.
Standing Water and Overnight Freezes
When you park your car in a puddle or on wet pavement and the temperature drops below 32°F overnight, that water freezes around the bottom of your tires. I’ve seen this happen dozens of times in my own driveway, especially during those late-fall nights when you don’t expect a hard freeze.
The tire essentially becomes bonded to the ground by a layer of ice. In extreme cases, the ice can extend several inches up the sidewall, making the wheel impossible to turn.
Freezing Rain and Sleet
Freezing rain is the worst offender in my experience. It coats everything — your windshield, your door handles, and yes, every square inch of your tires.
I’ve dealt with freezing rain events that left a quarter-inch glaze on my tires’ tread blocks. The ice fills every groove and sipe in the tread pattern, which completely eliminates the tire’s ability to grip the road even after you get moving.
Snow Melt and Refreeze Cycles
This one catches people off guard. During the day, snow on your tires melts slightly from road heat and friction. At night, that water refreezes into hard, compacted ice that’s much more difficult to remove than fresh snow.
I’ve noticed this cycle is especially brutal during late February and March in the Midwest, when daytime temps creep above freezing but nights still plunge into the teens.
Methods I’ve Tested for De-Icing Tires (Ranked by Effectiveness)
Over several winters, I’ve tried just about every method people recommend for de-icing tires. Some work brilliantly. Others are a waste of time — or worse, they can damage your tires.
Here’s my honest breakdown.
Method 1: Lukewarm Water (My Go-To Quick Fix)
This is the method I reach for most often because it’s fast, free, and available in every home. I fill a bucket or large pitcher with lukewarm water — emphasis on lukewarm, not hot — and pour it slowly over the icy areas of the tire.
The warm water melts the ice on contact, and within about 30 seconds per tire, I can usually free the wheel and clear the tread. I always follow up by moving the car immediately so the water doesn’t refreeze around the tires.
Important warning: Never use boiling or very hot water. I made this mistake once during my first winter as a car owner, and the thermal shock caused a visible crack in my tire’s sidewall. Rubber contracts in cold weather, and hitting it with extreme heat can cause micro-fractures that compromise the tire’s structural integrity.
Method 2: Rubbing Alcohol and Water Solution (Best for Stubborn Ice)
This is my favorite method for thicker ice buildup. I mix two parts 70% isopropyl rubbing alcohol with one part water in a standard spray bottle. The alcohol lowers the freezing point of the solution, so it actively melts ice rather than just warming it.
I spray it generously over the frozen areas and let it sit for about a minute. The ice starts cracking and loosening on its own, and I can usually peel off large chunks by hand or with a plastic scraper.
A 32-ounce spray bottle of this mixture costs me about $2 to make and lasts several applications. I keep one in my garage all winter long.
Method 3: Commercial De-Icer Spray
Products like CRC Ice-Off, Prestone Ice & Frost Shield, and even generic store-brand windshield de-icers work well on tires too. I’ve tested several over the years, and they all perform roughly the same.
I spray the product directly onto the iced-over tread and sidewalls, wait about 60 to 90 seconds, and the ice begins to break apart. These sprays typically run between $4 and $8 a can at Walmart, AutoZone, or O’Reilly Auto Parts.
The main advantage over my DIY rubbing alcohol mix is convenience — the commercial sprays often come in larger cans with better nozzles for targeted application. But honestly, the homemade solution works just as well.
Method 4: Plastic Scraper or Rubber Mallet (For Mechanical Ice Removal)
Sometimes the ice is so thick that liquid solutions alone won’t cut it. In those situations, I start with a plastic ice scraper — the same kind you’d use on your windshield — and carefully chip away at the ice around the tire.
For ice that’s bonded the tire to the pavement, I’ve had great success using a rubber mallet. I tap gently around the base of the tire where it meets the ground, breaking the ice seal without striking the rubber hard enough to cause damage.
Never use a metal scraper, hammer, or chisel directly on your tires. I’ve seen people do this, and it gouges the rubber, damages the sidewall lettering, and can even puncture the tire if you’re not careful.
Method 5: Running the Engine and Turning the Wheels
If your tires are frozen but the car itself starts fine, I sometimes use this technique: I start the engine, let it warm up for a few minutes, then gently try to turn the steering wheel back and forth. The slight movement can crack the ice bond around the front tires.
For the drive wheels, I put the car in drive and then reverse, gently rocking it. The key word here is gently. I never floor the accelerator on icy tires — that’s a great way to spin your wheels, burn rubber, and potentially damage your drivetrain.
This method works best as a complement to one of the liquid methods above. I’ll spray down the tires first, wait a minute, then try to rock the car free.
De-Icing Methods Comparison Table
| Method | Cost | Effectiveness | Risk to Tires | Best For |
|---|---|---|---|---|
| Lukewarm Water | Free | ★★★★☆ | Low (if not too hot) | Light to moderate ice |
| Rubbing Alcohol Spray | ~$2 | ★★★★★ | Very Low | Thick, stubborn ice |
| Commercial De-Icer | $4–$8 | ★★★★★ | Very Low | Quick convenience |
| Plastic Scraper / Rubber Mallet | $5–$15 | ★★★★☆ | Low (if careful) | Ice bonded to pavement |
| Rocking the Vehicle | Free | ★★★☆☆ | Moderate (if aggressive) | Supplement to other methods |
| Boiling Water | Free | ★★★★☆ | HIGH — Avoid! | Not recommended |
How to De-Ice Tires That Are Frozen to the Ground
This specific scenario deserves its own section because it’s the most common and most frustrating situation I encounter. When your tires are physically bonded to the pavement by ice, you can’t just drive away.
Step 1: Assess the Situation
Before you do anything, I recommend walking around the car and checking all four tires. Sometimes only the side facing the wind or the side sitting in a low spot will be frozen. Knowing which tires are stuck helps you plan your approach.
I also check how thick the ice is. A thin glaze might break free with gentle rocking, while a thick buildup needs chemical help first.
Step 2: Apply Your De-Icing Solution
I spray my rubbing alcohol mixture (or commercial de-icer) generously around the base of each frozen tire, focusing on the contact patch where the rubber meets the pavement. I make sure to spray from multiple angles to get the solution into the gap between the tire and the ice.
Then I wait. I know it’s tempting to jump in and try to drive immediately, but giving the solution 2 to 3 minutes to work makes a huge difference.
Step 3: Break the Ice Seal
After the solution has had time to penetrate, I use my plastic scraper or rubber mallet to break the remaining ice bond. I work my way around each tire, tapping or scraping at the junction between rubber and pavement.
Usually, I hear a satisfying crack as the ice releases. If it doesn’t give, I apply more solution and wait another minute or two.
Step 4: Gently Free the Vehicle
Once I’m confident the ice seal is broken on all four tires, I get in the car, start it up, and try to move forward very slowly. If the car moves even an inch, I know I’m free. I then pull forward enough to clear the icy patch entirely.
If the car still won’t budge, I switch to gentle rocking — forward, reverse, forward, reverse — with minimal throttle input. Nine times out of ten, this gets me unstuck.
Step 5: Clear the Tread
Once the car is free, I always stop and check the tread. Ice packed into the tread grooves dramatically reduces traction, and driving on public roads with ice-filled tread is genuinely dangerous.
I use my scraper to clear out the major grooves and sipes, then drive slowly for the first few minutes to let road friction and heat work out the remaining ice.
What NOT to Do When De-Icing Tires
I’ve learned most of these lessons the hard way, or I’ve watched other drivers make these mistakes in parking lots and driveways. Here’s what to avoid.
Don’t Use Boiling Water
I mentioned this earlier, but it bears repeating because it’s the single most common mistake I see. Boiling water can crack cold rubber, damage valve stems, and even warp alloy wheels due to thermal shock. Plus, the water rapidly refreezes, often making the problem worse than before.
Don’t Use Salt Directly on Tires
Road salt (sodium chloride) and rock salt are designed for pavement, not rubber. While a little road salt spray is unavoidable, deliberately packing salt around your tires can accelerate rubber degradation and corrode your wheels and brake components.
I’ve seen drivers dump handfuls of rock salt around their frozen tires, and while it does melt the ice eventually, the residual salt causes long-term damage that isn’t worth it.
Don’t Spin Your Wheels Aggressively
When your tires are frozen to the ground and you floor the accelerator, one of two things happens: either the tire breaks free suddenly and you lurch forward uncontrollably, or the tire stays stuck and your drivetrain takes all the stress.
I’ve heard of people snapping CV axles and damaging transmissions by flooring it on frozen tires. A gentle rocking motion is always the right approach.
Don’t Use a Metal Tool on the Rubber
Screwdrivers, metal ice picks, putty knives — I’ve seen people use all of these on their tires, and every one of them risks puncturing or cutting the rubber. Stick to plastic scrapers and rubber mallets.
Don’t Ignore Ice in the Wheel Wells
Ice buildup inside your wheel wells can prevent proper steering and suspension travel. After de-icing your tires, I always check the wheel wells and knock out any large ice chunks with a rubber mallet. During several winters, I’ve found ice formations the size of softballs packed into my wheel wells after driving through slush.
How to Prevent Tires from Icing Up in the First Place
The best de-icing strategy is preventing ice from forming on your tires in the first place. Here are the prevention methods I use every winter.
Park on Cardboard or Carpet Scraps
This is an old trick my father taught me, and it works like a charm. Before a freeze, I lay flat pieces of cardboard or old carpet remnants under each tire. The material acts as a barrier between the tire and wet pavement, preventing the ice bond.
In the morning, I simply pull the cardboard out from under the tires and drive away. It costs nothing if you save shipping boxes, and it’s been my most reliable prevention method over the years.
Use Tire Covers
If your car sits outside for extended periods in winter, tire covers (typically marketed for RVs) keep moisture off the rubber entirely. I’ve used a set of basic vinyl tire covers from Amazon — they cost about $25 for a set of four — and they do an excellent job preventing ice buildup.
They’re not the most practical solution for daily drivers, but if you know a major freeze is coming and the car won’t be driven for a day or two, they’re worth the effort.
Apply Silicone-Based Tire Protectant
Silicone tire dressings, like products from Chemical Guys, Meguiar’s, or Armor All, create a hydrophobic layer on the tire surface that repels water. I’ve found that applying a silicone-based protectant before a freeze significantly reduces ice adhesion.
The ice may still form on the tire, but it doesn’t bond to the rubber surface nearly as aggressively, making removal much easier. I reapply about every two weeks during winter.
Park in a Garage When Possible
I know this isn’t an option for everyone, but even an unheated garage makes a significant difference. My unheated detached garage typically stays 10 to 15 degrees warmer than outside air temperature, which is often enough to keep things above freezing.
If you don’t have a garage, try to park under any available cover — a carport, an awning, or even under a tree that blocks some of the freezing rain.
Move Your Car Periodically
If your car is going to sit for more than a day during freezing temperatures, I recommend moving it a few feet forward or backward every 12 hours or so. This simple action prevents the tires from freezing in place by breaking any ice that’s starting to form at the contact patch.
I learned this during a particularly brutal cold snap when I didn’t drive my second car for several days. By the time I tried to move it, all four tires were frozen solid to the concrete.
Why Your Tire Choice Matters for Ice Conditions
Since you’re reading TireAdvise.com, I’d be remiss if I didn’t connect this topic back to tire selection. The tires you run in winter play a massive role in how much ice accumulates and how easy they are to free.
Winter Tires Resist Ice Adhesion Better
Dedicated winter tires, like the Bridgestone Blizzak WS90, Michelin X-Ice Snow, or Continental VikingContact 7, are made from softer rubber compounds that stay flexible in cold temperatures. This flexibility means the tire is less likely to conform to and bond with an icy surface.
In my experience testing winter tires during cold seasons, I’ve noticed they accumulate less tread ice and release from frozen pavement more easily than all-season tires. The deeper tread depth and specialized sipe patterns also shed ice better while driving.
Tread Depth Is Critical
Worn tires with shallow tread are far more susceptible to ice packing. When the tread grooves are shallow, there’s less space for ice and water to evacuate, and the ice fills the remaining tread almost instantly.
I always recommend replacing tires before they reach 4/32″ of tread depth if you drive in winter conditions. The standard wear indicator at 2/32″ is the legal minimum, but in my experience, tires become dangerously ineffective on ice well before that point.
Tire Pressure and Cold Weather
Here’s something many drivers overlook: tire pressure drops approximately 1 PSI for every 10°F drop in temperature. If you set your tires to 35 PSI in September and don’t check them again until January, you could be running 5 to 8 PSI below the recommended pressure.
Under-inflated tires have a larger, flatter contact patch, which means more surface area bonding to icy pavement. I check my tire pressure at least once a month during winter and always inflate to the door placard specification using a cold reading.
My Winter De-Icing Kit (What I Keep in My Garage)
After years of trial and error, I’ve assembled a simple winter kit that handles any tire icing situation. Here’s exactly what I keep ready to go.
- 32 oz spray bottle filled with 2:1 rubbing alcohol and water mixture (~$2)
- One can of CRC Ice-Off as a backup (~$6 at AutoZone)
- Plastic ice scraper with a comfortable grip (~$5)
- Rubber mallet for breaking ice bonds (~$8 at Home Depot)
- Pair of insulated waterproof gloves — your hands will thank you (~$15)
- Several flat pieces of cardboard for parking on before freezes (free)
- A portable tire inflator for checking and adjusting pressure (~$30-$50)
The entire kit costs less than $70 and fits in a small corner of any garage or trunk. I consider it as essential as jumper cables or a spare tire.
Regional Considerations for US Drivers
Tire icing isn’t the same everywhere in the US. I’ve driven in winter conditions across several states, and the challenges vary significantly by region.
Upper Midwest (Minnesota, Wisconsin, Michigan)
This is where I’ve done most of my winter driving, and the combination of extreme cold and lake-effect moisture creates the worst tire icing conditions in the country. Temperatures routinely drop to -10°F or colder, which means any moisture freezes almost instantly.
In these areas, I strongly recommend keeping your de-icing kit in an accessible spot — not buried in the trunk under your emergency gear. You’ll use it often.
Northeast (New York, New England, Pennsylvania)
Freezing rain is more common here than in the Midwest, in my experience. That means complete ice encasement rather than just frozen contact patches. The rubbing alcohol spray method works especially well for the thin, uniform ice layers that freezing rain creates.
Pacific Northwest (Oregon, Washington)
While less extreme than the Midwest, the Pacific Northwest sees wet, hovering-around-freezing temperatures that create sneaky ice conditions. You might not think your tires will freeze when it’s 33°F at bedtime, but a drop of just a few degrees overnight can catch you off guard.
Mountain States (Colorado, Utah, Montana)
High-altitude cold is dry, which means less moisture and generally less tire icing. However, when you park at a ski resort after driving through slush, that slush freezes hard and fast in the mountain air. I always kick the slush off my tires before parking in mountain areas.
When De-Icing Isn’t Enough: Signs You Need New Tires
Sometimes the real problem isn’t the ice on your tires — it’s the tires themselves. If you’re experiencing any of these issues alongside frequent icing problems, it may be time to shop for replacements.
- Tread depth below 5/32″: Shallow tread can’t evacuate ice and water effectively.
- Visible cracking on sidewalls: Cold weather accelerates rubber aging, and cracked tires are more vulnerable to ice damage.
- Hardened rubber: If your tires are more than 6 years old, the rubber compound has likely hardened to the point where it can’t grip icy surfaces regardless of tread depth.
- No traction after de-icing: If you clear the ice but still can’t get moving, your tires simply aren’t designed for winter conditions.
If you’re in the market for tires that handle winter conditions better, I recommend checking out our winter tire reviews and our guide to the best all-season tires for snow. The right tire makes every cold-weather challenge easier to handle — including de-icing.
Final Thoughts: Be Prepared, Not Panicked
De-icing your tires doesn’t have to be a stressful ordeal. With the right tools, the right technique, and a little preparation, you can handle even the worst ice storms without damaging your tires or losing your mind in the cold.
In my experience, the rubbing alcohol spray method is the single best all-around solution for most ice situations. It’s cheap, effective, safe for rubber, and easy to keep on hand all winter. Pair that with a plastic scraper and some cardboard for prevention, and you’re covered.
The most important thing I’ve learned over years of dealing with frozen tires is this: patience beats force every single time. Give the de-icer a few minutes to work, be gentle with your tools, and never try to power through a frozen tire bond with brute throttle.
Stay safe out there this winter, and remember — good tires in good condition are your best defense against ice, snow, and everything else the cold months throw at you.
Frequently Asked Questions
How do you de-ice tires that are frozen to the ground?
I start by pouring lukewarm (never boiling) water around the base of the tire where it meets the pavement to gently melt the ice bond. If the tire is still stuck, I rock the vehicle gently between drive and reverse while turning the steering wheel slightly. Avoid spinning the tires aggressively, as this can damage the tread and create more heat-related refreezing later.
Can I use rock salt or ice melt products to de-ice my tires safely?
You can use a small amount of calcium chloride-based ice melt around frozen tires to break the ice bond, but avoid pouring rock salt directly on your tires or rims since it accelerates corrosion on alloy wheels and steel belts. Products like Safe Paw or calcium magnesium acetate (CMA) are less corrosive alternatives that cost around $15-$25 per jug at most US hardware stores. Always rinse your tires and wheel wells afterward to prevent long-term damage.
Will de-icing spray damage my tire rubber or sidewalls?
Most commercial windshield de-icing sprays contain isopropyl alcohol, which can dry out tire rubber if used repeatedly over time. For occasional use to free a frozen tire, the risk is minimal, but I recommend rinsing the area with water once the ice melts. If you need a tire-safe option, a 3:1 mixture of water and rubbing alcohol in a spray bottle works well without degrading the sidewall compound.
How do I prevent my tires from freezing to the ground overnight?
The best prevention is parking on a dry surface or placing a piece of cardboard, plywood, or a plastic tarp under each tire before a freeze. Moving your vehicle a few inches every couple of hours during an ice storm also prevents a strong bond from forming. If you live in states like Minnesota, Wisconsin, or Michigan where overnight freezes are common, investing in a set of quality winter tires with hydrophobic rubber compounds can also reduce ice adhesion significantly.
Do winter tires freeze to the ground less than all-season tires?
Yes, winter tires use a softer silica-rich rubber compound that stays flexible below 45°F and resists bonding to icy surfaces better than the harder rubber in most all-season tires. Brands like Bridgestone Blizzak, Michelin X-Ice, and Continental VikingContact are specifically engineered for US winter conditions and feature tread patterns that channel water away before it can refreeze. If you’re shopping for replacement tires and deal with regular ice and snow, a dedicated winter set is worth the $400-$800 investment for a full set.
Is it safe to drive on tires that were frozen and then de-iced?
In most cases, yes — once the ice is fully cleared and the tire can rotate freely, you’re safe to drive. However, I always do a quick visual inspection of the tire sidewalls and tread for any cracking or damage caused by the freeze, since rubber that was stressed while frozen can develop micro-fractures. If the tire was stuck and you spun the wheels hard to break free, check for flat spots or uneven tread wear before hitting highway speeds.
What household items can I use to de-ice my tires in an emergency?
Warm water is your best first option, but you can also use a mixture of dish soap and warm water, which lowers the freezing point and lubricates the contact patch between tire and pavement. Rubbing alcohol, hand sanitizer, or even a spray bottle of vodka will melt thin ice quickly. I keep a small emergency kit in my trunk with a spray bottle of 70% isopropyl alcohol and a plastic scraper, which has saved me multiple times during unexpected ice storms across the Northeast and Midwest.

