Most people never look at their tires until something goes wrong. A blowout on the highway, a slow leak that flattens overnight, or a failed state inspection — these are the wake-up calls that finally get drivers to pay attention to the rubber underneath their car.
Here’s the thing: every one of those situations is preventable. I’ve been reviewing tires and advising everyday drivers for years, and I can tell you that a simple five-to-ten-minute inspection can save you hundreds of dollars in emergency repairs — and potentially save your life.
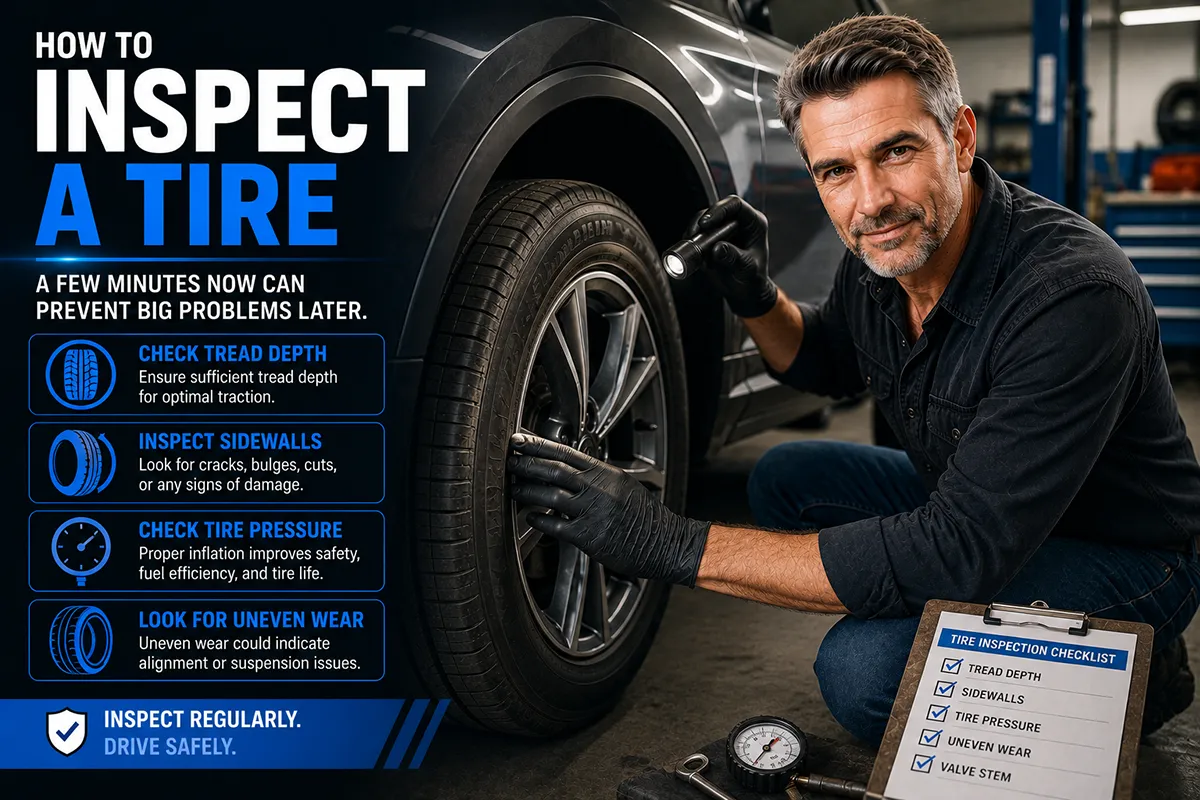
- Inspect your tires at least once a month and before any long road trip.
- Check tread depth using the penny test or a tread depth gauge — replace at 2/32″ or sooner.
- Look for cracks, bulges, cuts, and embedded objects on sidewalls and tread surfaces.
- Uneven wear patterns reveal alignment, inflation, or suspension problems.
- Always check tire pressure when tires are cold, and match the placard on your door jamb — not the number on the tire itself.
- Document what you find so you can track changes over time and make smarter replacement decisions.
Why Regular Tire Inspections Matter More Than You Think
I’ll be honest — for a long time early in my driving life, I treated tires like I treated my oil filter. I knew they existed, I knew they were important, and I completely ignored them until a mechanic told me otherwise.
That changed the day I discovered a nail embedded in my rear tire that had been slowly leaking air for who knows how long. If I had been doing regular inspections, I would have caught it weeks earlier and saved myself from buying a new tire altogether.
According to the National Highway Traffic Safety Administration (NHTSA), tire-related crashes cause approximately 11,000 accidents per year in the United States. Many of those are linked to underinflation, worn tread, or damage that the driver simply never noticed. The reality is that tires degrade slowly, and the changes are so gradual that you won’t notice them just by driving around.
That’s why I recommend making tire inspection a monthly habit — or at least doing one before every long trip. It takes less time than scrolling through your phone at a gas station, and the payoff is enormous.
What You’ll Need for a Proper Tire Inspection
You don’t need a garage full of tools to inspect your tires. In my experience, you can do a thorough job with items you probably already own or can pick up for a few dollars.
Essential Tools
- A penny and a quarter — for the classic tread depth tests
- A tread depth gauge — these cost about $3-$8 at any auto parts store like AutoZone or O’Reilly, and they’re far more accurate than the coin method
- A tire pressure gauge — I prefer a digital gauge (around $10-$15) for accuracy, but a basic pencil-style gauge works too
- A flashlight — even if you’re inspecting in daylight, you need to see into grooves and behind the tire
- A pair of gloves — optional, but tires are dirty and sometimes have sharp objects stuck in them
- Your phone camera — for documenting anything you find
I keep a small zip pouch in my glove compartment with a digital tire gauge, a tread depth gauge, and a flashlight. It probably cost me $25 total to put together, and I use it constantly.
Step 1: Start with a Visual Overview
Before you get down on your knees and start measuring things, take a step back and look at each tire from a few feet away. I always walk a slow circle around the car first, looking at each tire from the front, side, and rear.
What You’re Looking For at a Glance
- Obviously flat or low tires — a tire that looks noticeably squished at the bottom may be significantly underinflated
- Visible bulges or deformities — these can indicate internal structural damage
- Uneven stance — if one side of the car seems lower than the other, you could have a slow leak or a suspension issue
- Missing valve caps — not an emergency, but exposed valve stems can let debris in and cause slow leaks over time
This initial overview takes about 30 seconds and can immediately flag serious problems. I’ve caught bulging sidewalls this way that would have been easy to miss if I’d gone straight to checking tread depth.
Step 2: Check Tire Pressure
This is the single most important thing you can do for your tires, and in my experience, it’s the step most people skip or do incorrectly.
How to Check Tire Pressure the Right Way
Always check pressure when the tires are cold. “Cold” means the car hasn’t been driven for at least three hours, or has been driven less than a mile. Driving heats up the air inside the tire, which increases pressure readings and can give you a false sense of security.
Here’s how I do it:
- Remove the valve cap from the tire’s valve stem.
- Press your tire pressure gauge firmly onto the valve stem. You should hear a brief hiss as the gauge seats, then it should stop.
- Read the measurement on the gauge. Digital gauges display the number; pencil gauges push out a marked bar.
- Compare the reading to the recommended pressure on the tire information placard — this is located on the driver’s side door jamb, not on the tire sidewall.
- Replace the valve cap.
- Repeat for all four tires and the spare.
A Critical Distinction Most People Get Wrong
The number printed on the sidewall of your tire (e.g., “Max Press 51 PSI”) is the maximum pressure the tire can safely hold — it is not the recommended pressure for your vehicle. The correct pressure is determined by the vehicle manufacturer and is listed on the door jamb placard or in your owner’s manual.
I cannot tell you how many times I’ve seen people inflate to the max sidewall number and wonder why their ride is harsh and their center tread is wearing out prematurely. Overinflation is just as dangerous as underinflation.
What the Numbers Mean
| Pressure Status | Typical Range | What Happens | Action Needed |
|---|---|---|---|
| Properly inflated | Within 1-2 PSI of placard recommendation | Even wear, optimal handling, best fuel economy | None — you’re good |
| Underinflated | 5+ PSI below recommendation | Edge wear, overheating, increased blowout risk, poor fuel economy | Inflate to proper PSI; check for leaks if pressure drops repeatedly |
| Overinflated | 5+ PSI above recommendation | Center wear, harsh ride, reduced traction, increased vulnerability to impacts | Release air to proper PSI |
| Critically low | Below 20 PSI (most passenger tires) | Structural damage likely, unsafe to drive | Do not drive — inflate or replace immediately |
Step 3: Measure Tread Depth
Tread depth is what separates a tire that can stop your car in the rain from one that will hydroplane into the car ahead of you. In the US, the legal minimum tread depth is 2/32 of an inch, but I personally recommend starting to shop for replacements at 4/32″ — especially if you drive in rainy or snowy conditions.
The Penny Test
This is the classic method, and it works perfectly fine for a quick check.
Take a penny and insert it into a tread groove with Lincoln’s head pointing down into the groove. If you can see the top of Lincoln’s head, your tread is at or below 2/32″ and the tire needs to be replaced immediately.
The Quarter Test
For a slightly more conservative measurement, I like to use a quarter instead. Insert it the same way with Washington’s head pointing down. If you can see the top of Washington’s head, your tread is at or below 4/32″ — still legal, but getting into the danger zone for wet-weather traction.
Using a Tread Depth Gauge
For the most accurate measurement, I always follow up the coin test with a tread depth gauge. These inexpensive tools give you an exact reading in 32nds of an inch.
Press the gauge probe into the deepest part of the main tread groove, push the shoulders of the gauge flush against the tread surface, and read the number. I recommend checking at least three points across the tread face — inner edge, center, and outer edge — on each tire. Write down the numbers.
Why three points? Because different readings across the tread face tell you about more than just wear — they reveal alignment and inflation issues, which I’ll cover in the next section.
Step 4: Read Your Wear Patterns
This is where tire inspection becomes genuinely fascinating to me. Your tires are constantly recording information about your car’s health, and the wear patterns they develop are like a diagnostic readout if you know how to read them.
Center Wear
If the center of the tread is worn more than the edges, your tires have been consistently overinflated. The excess pressure causes the center of the tread to bulge outward, making it the primary contact point with the road. Reduce your pressure to the manufacturer’s specification and the problem will correct itself on your next set of tires.
Edge Wear (Both Sides)
If both edges of the tread are worn more than the center, the tire has been running underinflated. The low pressure causes the tire to sag, putting excessive load on the shoulders. This is the more dangerous of the two inflation-related wear patterns because underinflation generates heat and significantly increases blowout risk.
One-Sided Wear
If only one edge is wearing faster than the other — say, the inside edge is nearly bald while the outside edge still has good tread — you almost certainly have an alignment problem. In my experience, this is one of the most common wear issues I see, and it’s particularly prevalent after hitting a pothole or curb.
Get an alignment check at a shop. A four-wheel alignment typically costs $75-$120 at most tire shops like Discount Tire, Tire Rack-affiliated installers, or your local mechanic.
Cupping or Scalloping
This pattern looks like someone scooped out random dips in the tread surface. It’s often caused by worn shocks or struts, unbalanced tires, or bent suspension components. If you see cupping, don’t just replace the tires — get the suspension inspected first, or you’ll chew through the new set just as fast.
Feathering
Run your hand across the tread (with gloves on). If the tread blocks feel smooth in one direction but sharp or jagged in the other — like running your hand over a cat’s fur the wrong way — that’s feathering. This is usually caused by a toe alignment issue and is another signal to get to an alignment shop.
Step 5: Inspect the Sidewalls
I spend almost as much time looking at sidewalls as I do looking at tread, because sidewall damage is often the kind that can’t be repaired — and it’s the kind that leads to sudden, catastrophic blowouts at highway speeds.
What to Look For
- Cracks or crazing: Small cracks in the rubber, especially near the base of the sidewall, indicate age-related deterioration. Tire rubber breaks down over time due to UV exposure, ozone, and heat — even if the tire hasn’t been driven much. If you see widespread cracking, the tire needs to be replaced regardless of tread depth.
- Bulges or blisters: A bubble on the sidewall means the internal structural plies have been damaged, usually from an impact with a pothole, curb, or debris. This is a non-negotiable replacement situation. A bulging sidewall can fail at any moment, and no shop should attempt to repair it.
- Cuts, gouges, or abrasions: Look for any cuts that expose the fabric or cord beneath the rubber. Shallow scuffs from parallel parking against a curb are usually cosmetic, but anything deep enough to reveal the internal structure compromises the tire’s integrity.
- Exposed cords or wires: If you can see any of the internal reinforcing material, the tire is done. Do not drive on it.
I always use my flashlight during sidewall inspections, even in broad daylight. Angling the light across the sidewall surface helps reveal subtle bulges and cracks that are invisible when viewed head-on.
Step 6: Examine the Tread Surface for Damage and Debris
Now get up close to the tread surface itself. I typically crouch down and work my way slowly around each tire, looking into the grooves and across the tread blocks.
Embedded Objects
Look for nails, screws, glass, metal shards, or rocks lodged in the tread. Small stones wedged into grooves are usually harmless and can be pried out with a flat-head screwdriver, but metal objects are a different story.
Here’s a critical piece of advice from my experience: if you find a nail or screw in your tire and the tire is still holding air, do not pull it out. The object may actually be plugging the hole and preventing a rapid leak. Drive carefully to a tire shop and let them assess whether the tire can be patched from the inside (the only proper repair method) or needs to be replaced.
A puncture in the tread area can often be repaired if it’s no larger than 1/4 inch in diameter and located in the central tread zone — not the shoulder or sidewall. Most tire shops charge $15-$35 for a proper plug-patch repair.
Tread Separation
Look for any areas where the tread appears to be pulling away from the underlying structure. This can sometimes appear as a slight ridge or lip at the edge of a tread block, or as a subtle waviness in the tread surface. Tread separation is a serious structural failure, and the tire must be replaced immediately.
Step 7: Check the Tire Age
This is the step that surprises most people. Tires have an expiration date — not a printed “use by” date, but an age-related safety limit.
How to Read the DOT Code
Every tire sold in the US has a DOT (Department of Transportation) code stamped on the sidewall. The last four digits of this code tell you when the tire was manufactured. For example, a code ending in 2322 means the tire was made in the 23rd week of 2022.
Most tire manufacturers and safety organizations, including the NHTSA, recommend replacing tires that are six to ten years old — regardless of remaining tread depth. I personally lean toward the six-year mark, especially for tires in hot-climate states like Texas, Arizona, or Florida, where heat accelerates rubber degradation.
I’ve inspected tires that looked perfectly fine on the surface — decent tread, no visible cracks — but were eight or nine years old. The internal rubber compounds break down with age in ways you can’t see from the outside, and those tires are significantly more likely to fail under stress.
Where to Find the DOT Code
The full DOT code is usually on the outboard-facing sidewall, but on some tires, it’s stamped only on the inboard side — meaning you’d need to look at the side facing the car’s undercarriage. This can be tricky without getting under the vehicle. If you can’t find the full code on the visible sidewall, look for the partial code (which starts with “DOT” but may not have the last four date digits) and check the other side.
Step 8: Don’t Forget the Spare
I’m guilty of having neglected this step myself in the past, and I’ve talked to countless drivers who haven’t checked their spare in years. Your spare tire — whether it’s a full-size spare or a compact temporary spare — needs the same inspection treatment as your road tires.
Check the spare’s pressure (many compact spares require 60 PSI), tread depth, age, and condition. There’s nothing worse than getting a flat on the side of the road, pulling out the spare, and discovering it’s flat too.
If your vehicle has a tire repair kit instead of a spare (increasingly common in newer models), check the sealant canister’s expiration date and make sure the compressor works.
Step 9: Inspect the Wheels and Valve Stems
While you’re already down there looking at tires, take a moment to inspect the wheels and valve stems too.
Wheels
Look for cracks, bends, or significant curb rash on the rim. A cracked or bent wheel can cause slow air leaks and vibrations. Alloy wheels are particularly susceptible to cracking from pothole impacts. If you notice a persistent slow leak that shops can’t trace to the tire itself, the wheel may be the culprit.
Valve Stems
Rubber valve stems degrade over time, just like tire rubber. Look for cracks, swelling, or signs of dry rot at the base of the valve stem. A failing valve stem can cause a slow leak that mimics a puncture.
If your vehicle uses TPMS (Tire Pressure Monitoring System) sensors — which all US-market vehicles manufactured after 2007 are required to have — the sensor is attached to or integrated with the valve stem. Damaged valve stems can compromise the TPMS sensor as well.
How Often Should You Inspect Your Tires?
Based on my experience, here’s the schedule I follow and recommend:
- Monthly: Full inspection following all the steps above. I usually do mine on the first Saturday of the month — making it a habit helps it stick.
- Before any road trip: At minimum, check pressure and do a quick visual scan of tread and sidewalls.
- After hitting a major pothole or curb: Immediate visual inspection for bulges, cuts, or wheel damage.
- Seasonally: A more thorough inspection at the start of summer and winter, when temperature changes affect pressure (tires typically lose about 1 PSI for every 10°F drop in temperature).
- At every oil change: Ask the technician to inspect your tires, but also do your own check — don’t rely solely on a quick shop inspection.
When Inspection Tells You It’s Time to Replace
Inspection isn’t just about catching problems — it’s about knowing when it’s time to shop for new tires. Here’s my personal checklist for when replacement is necessary:
- Tread depth is at or below 2/32″ anywhere on the tire (legal minimum).
- Tread depth is at 4/32″ or below and you regularly drive in rain or snow (my personal comfort threshold).
- Any sidewall bulge, exposed cord, or visible structural damage.
- The tire is six or more years old, regardless of remaining tread.
- Persistent slow leak that cannot be repaired.
- Severe uneven wear that indicates a problem beyond simple inflation correction.
- Widespread sidewall cracking or dry rot.
If you’re reaching the replacement stage, I recommend checking out our tire reviews and buying guides here on TireAdvise.com. We test tires in real-world conditions and give you honest assessments to help you pick the right set for your vehicle and driving style.
Pro Tips from Years of Tire Inspections
I want to close with some practical wisdom I’ve picked up over the years that doesn’t always make it into the standard inspection guides.
Rotate Your Tires Regularly
Tire rotation isn’t part of the inspection itself, but inspection results often reveal when rotation has been neglected. If your front tires are wearing significantly faster than the rears (common in front-wheel-drive vehicles), you’re overdue for a rotation. Most manufacturers recommend rotating every time you get an oil change, and many tire shops like Discount Tire and Costco offer free rotation if you purchased tires from them.
Keep a Log
I keep a simple note on my phone where I record tread depth measurements and tire pressure each month. Over time, this log reveals trends — like a tire that’s consistently losing 2-3 PSI per month (indicating a slow leak) or one that’s wearing faster than the others.
Temperature Matters
If you live in a state with big seasonal temperature swings — like Michigan, Minnesota, or anywhere in the Northeast — you’ll need to adjust tire pressure more frequently. I’ve measured pressure differences of 5-8 PSI between a hot August afternoon and a cold November morning, all without any leaks.
Don’t Trust TPMS Alone
Your car’s tire pressure monitoring system is a safety backup, not a replacement for manual checks. Most TPMS systems don’t alert you until pressure drops 25% below the recommended level — by that point, you’ve been driving on a significantly underinflated tire for who knows how long.
In my experience, relying on TPMS alone leads to a false sense of security. I’ve checked tires that were 8-10 PSI low with no TPMS warning light on the dashboard.
Inspect After Seasonal Storage
If you store seasonal tires (like a set of winter tires you swap out each spring), always do a full inspection before mounting them for the new season. Tires can develop flat spots, dry rot, and pressure loss while sitting in a garage. I’ve seen tires that were fine when they came off the car develop visible cracking after several months of storage in a hot garage.
Final Thoughts: Five Minutes Can Save Your Life
I don’t say that for dramatic effect. Tire failures at highway speeds are genuinely life-threatening situations, and the vast majority of them are preventable with basic, regular inspections.
You don’t need to be a mechanic. You don’t need expensive equipment. You just need a few minutes, a penny, a pressure gauge, and the willingness to get down on one knee and actually look at the rubber that’s carrying you and your family down the road at 70 mph.
In my years of reviewing and testing tires, the most expensive and high-performance tire in the world is worthless if it’s underinflated, damaged, or worn out. And the most budget-friendly tire on the market can serve you reliably and safely if it’s properly maintained and regularly inspected.
Make it a habit. Set a monthly reminder on your phone. Do it while your coffee is cooling off on a Saturday morning. Your tires — and the people riding on them — are worth those five minutes.
Frequently Asked Questions
How do I inspect my tires for wear and damage at home?
Start by visually examining each tire for cracks, bulges, cuts, or objects embedded in the tread. Run your hand along the tread surface to feel for uneven wear patterns, and check the sidewalls for any bubbling or dry rot. I recommend doing this inspection at least once a month and always before long road trips, especially during extreme summer heat or harsh winter conditions common across the US.
How do you check tire tread depth without a gauge?
The easiest method is the penny test — insert a penny into the tread groove with Lincoln’s head facing down. If you can see the top of Lincoln’s head, your tread depth is below 2/32 of an inch and the tire needs to be replaced immediately. For a more conservative check, use a quarter instead; if Washington’s head is visible, you’re at 4/32 of an inch and should start shopping for replacement tires, especially if you drive in rain or snow.
What are the signs that my tires need to be replaced?
Key warning signs include tread worn down to the built-in wear indicator bars, visible sidewall cracks or bulges, excessive vibration while driving, and uneven tread wear across the tire surface. If your tires are over six years old — regardless of remaining tread — most tire manufacturers and brands like Goodyear and Michelin recommend replacement. Expect to budget anywhere from $100 to $250 per tire depending on your vehicle and the brand you choose.
How do I tell if my tires have uneven wear and what causes it?
Look for tread that’s significantly more worn on one edge than the other (inner or outer edge wear), or worn heavily down the center while the shoulders remain intact. Inner or outer edge wear typically signals a wheel alignment issue, while center wear often means your tires have been consistently over-inflated. I always recommend getting an alignment check — usually $75 to $120 at most US shops — whenever you install new tires to prevent premature and uneven tread wear.
How often should I check my tire pressure and why does it matter during an inspection?
You should check your tire pressure at least once a month and before any long highway drive, since tires can lose 1-2 PSI per month naturally. Incorrect tire pressure is one of the most common causes of premature tire wear, reduced fuel economy, and even blowouts on hot US highways in summer. Always reference the recommended PSI on your driver’s side door jamb — not the number on the tire sidewall — and check pressure when tires are cold for the most accurate reading.
Can I inspect a tire sidewall for damage myself, and what should I look for?
Absolutely — sidewall inspection is something every driver should know how to do. Look closely for bulges or bubbles, which indicate internal structural damage that can lead to a sudden blowout, as well as deep cuts, gouges, or cracking from dry rot caused by UV exposure and aging. If you spot any bulging or deep sidewall damage, the tire cannot be safely repaired and must be replaced, so avoid driving on it and consider using your spare until you can get to a tire shop.
What is the DOT date code on a tire and how do I use it to check tire age?
The DOT date code is a four-digit number stamped on the tire sidewall near the rim that tells you when the tire was manufactured — the first two digits represent the week and the last two represent the year. For example, a code reading 2219 means the tire was made in the 22nd week of 2019. Most tire safety experts and organizations like the NHTSA recommend replacing tires that are 6 to 10 years old regardless of tread condition, since rubber compounds degrade over time, especially in hot southern US climates.

