I’ve been reviewing and testing tires for over a decade, and you’d be surprised how often I get asked the simplest question in tire maintenance: “How do I let air out of my tires?” It sounds basic, but I’ve watched people at gas stations jabbing keys into their valve stems, using random pointy objects, and even trying to unscrew the entire valve — all of which can cause real damage.
The truth is, whether you’ve overinflated at the air pump or you need to drop pressure for off-road driving, knowing the right way to release air from your tires is a fundamental skill every driver should have.
- Use a tire pressure gauge or a small tool to press the metal pin inside the valve stem to release air safely.
- Always check your tire pressure with a reliable gauge — don’t guess by looking at the tire.
- Your target PSI is on the driver’s side door jamb sticker, NOT on the tire sidewall.
- Release air in short bursts, checking pressure between each release.
- Overinflated and underinflated tires both cause uneven wear, poor handling, and safety risks.
- A valve core tool costs under $5 and is the best investment for easy, controlled deflation.
Why Would You Need to Let Air Out of Your Tires?
Before I walk you through the how, let’s talk about the why — because understanding the reason helps you do it correctly. In my years of testing tires across every condition imaginable, I’ve encountered dozens of situations where deflating tires was necessary.
You Overinflated at the Gas Station
This is the number one reason most people need to release air. Those coin-operated air machines at gas stations are notoriously imprecise, and I can’t count the number of times I’ve seen someone pump their tires to 50 PSI when their vehicle calls for 35 PSI.
I’ve done it myself early in my career — got distracted, held the trigger too long, and suddenly my front tires were dangerously overinflated. The car felt like it was riding on bowling balls, bouncing over every crack in the road.
Temperature Changes Increased Your Pressure
If you’ve ever checked your tire pressure on a hot summer afternoon in Arizona or Texas, you know that heat makes air expand. For roughly every 10°F change in ambient temperature, tire pressure shifts by about 1 PSI.
I’ve personally measured tires that read 35 PSI in the cool morning jump to 40 PSI after a long highway drive on a 100°F day. That’s significant, and it means you may need to release a few pounds of pressure to stay in the safe zone.
Off-Road or Beach Driving
If you’re heading to the Outer Banks, Pismo Beach, or any trail in Moab, dropping your tire pressure is standard practice. I regularly air down to around 18-22 PSI for sand driving and 20-25 PSI for rocky trails.
Lower pressure increases the tire’s contact patch with the ground, giving you better traction on loose or soft surfaces. I’ve gotten stuck in soft sand exactly once because I was too lazy to air down — never again.
Correcting Uneven Tire Wear
During my tire testing, I always inspect tread wear patterns. If I notice excessive wear down the center of the tread, that’s a classic sign of chronic overinflation. Releasing air to the proper PSI and maintaining it going forward can help the remaining tread wear more evenly.
What PSI Should Your Tires Be At?
Before you let any air out, you need to know your target pressure. I see this mistake constantly: people look at the number printed on the tire sidewall and assume that’s the right pressure. It’s not.
The Door Jamb Sticker Is Your Bible
The number on the tire sidewall (usually something like “Max Press 51 PSI”) is the maximum pressure the tire can safely hold — not the recommended operating pressure for your vehicle. Your correct tire pressure is printed on a sticker located on the driver’s side door jamb.
Open your driver’s door and look at the edge of the door frame or the door itself. You’ll see a white or yellow sticker from the vehicle manufacturer that lists the recommended PSI for both front and rear tires. This number is engineered specifically for your vehicle’s weight, suspension, and handling characteristics.
In my experience, most passenger cars call for somewhere between 30 and 36 PSI, while trucks and SUVs often run 35 to 42 PSI. But always defer to your specific vehicle’s recommendation.
A Quick Reference Table for Common Vehicles
I’ve compiled typical recommended pressures from some of the vehicles I’ve tested tires on. Keep in mind these are general ranges — always check your own door jamb sticker.
| Vehicle Type | Typical Front PSI | Typical Rear PSI | Common Examples |
|---|---|---|---|
| Compact Sedan | 32-35 PSI | 32-35 PSI | Honda Civic, Toyota Corolla |
| Midsize Sedan | 33-36 PSI | 33-36 PSI | Toyota Camry, Honda Accord |
| Crossover/Small SUV | 33-36 PSI | 33-36 PSI | Toyota RAV4, Honda CR-V |
| Full-Size SUV | 35-38 PSI | 35-38 PSI | Chevy Tahoe, Ford Expedition |
| Half-Ton Pickup | 35-40 PSI | 35-42 PSI | Ford F-150, Ram 1500 |
| Heavy-Duty Truck | 50-65 PSI | 60-80 PSI | Ford F-250, Chevy 2500HD |
Tools You’ll Need to Safely Let Air Out of Tires
You don’t need a garage full of equipment for this. In fact, you can technically do it with nothing more than a fingernail or a small stick. But having the right tools makes the job easier, safer, and far more precise.
Here’s what I keep in my testing kit and what I recommend for every driver:
1. A Reliable Tire Pressure Gauge
This is non-negotiable. You absolutely cannot eyeball tire pressure by looking at the tire. I’ve tested tires that looked perfectly fine visually but were 10 PSI over or under the recommended pressure.
I personally use a digital tire pressure gauge that I picked up for about $12 at AutoZone. Digital gauges are easier to read and generally more accurate than the old pencil-style gauges. That said, a quality analog dial gauge works perfectly well too — I keep one as a backup.
2. A Valve Core Tool (Optional but Highly Recommended)
A valve core tool is a tiny, inexpensive metal tool — usually under $5 — that lets you remove the valve core entirely for rapid deflation, or simply press it in for controlled release. I consider this one of the most underrated tools in any driver’s glove box.
You can find them at any auto parts store like AutoZone, O’Reilly, or NAPA. Many tire valve cap kits even include one built into the cap itself.
3. A Portable Air Compressor (For Re-inflation)
If you’re airing down for off-road driving, you’ll need a way to re-inflate when you get back on pavement. I’ve tested several 12V portable compressors that plug into your vehicle’s power outlet, and most quality units in the $40-$80 range work well for passenger vehicles.
Having a compressor on hand also gives you the confidence to release air without worrying about being stuck at a low PSI.
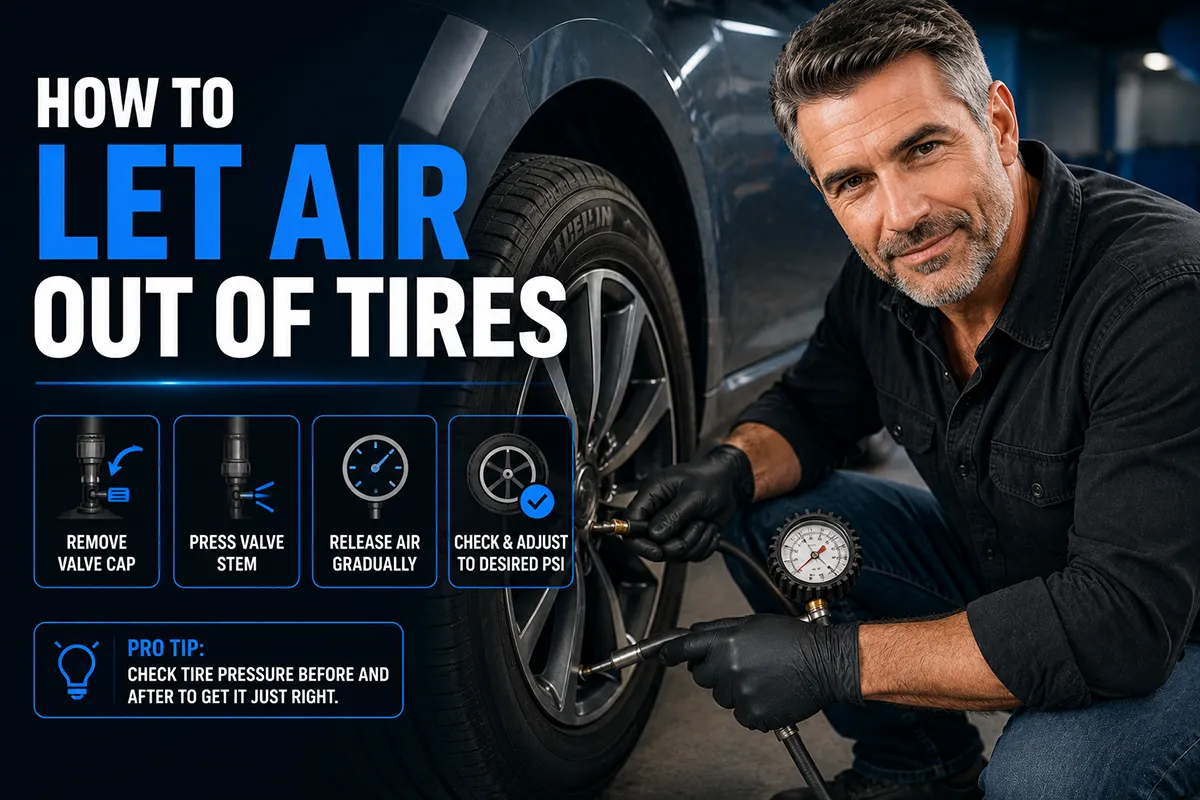
How to Let Air Out of Tires: Step-by-Step Guide
Alright, let’s get into the actual process. I’m going to walk you through this exactly the way I do it during my tire testing sessions.
Step 1: Locate the Valve Stem
Each tire has a valve stem — a small rubber or metal cylinder that sticks out from the wheel rim. On most passenger vehicles, it’s easy to spot. It’s the same place where you’d attach an air hose to inflate the tire.
If your wheels have hubcaps or decorative covers, you may need to look for an access hole in the cover that exposes the valve stem.
Step 2: Remove the Valve Cap
Unscrew the small plastic or metal cap from the valve stem by turning it counterclockwise. Set it somewhere safe — I usually put it in my pocket. Losing valve caps isn’t the end of the world, but they do keep dirt and moisture out of the valve, so I always replace them.
Step 3: Check the Current Tire Pressure
Press your tire pressure gauge firmly onto the valve stem. You’ll hear a brief hiss of air — that’s normal. Hold the gauge steady until you get a stable reading.
Write down the current PSI for each tire. I know it sounds tedious, but knowing where you’re starting from tells you exactly how much air to release. I keep a notes app on my phone specifically for this.
Step 4: Press the Valve Pin to Release Air
Inside the valve stem, you’ll see a small metal pin (this is the valve core). To release air, press this pin inward using one of the following:
- The back end of your tire pressure gauge — many gauges have a small nub specifically designed for this.
- A valve core tool — the forked end presses the pin evenly and gives you great control.
- A small flathead screwdriver — works in a pinch but be gentle to avoid damaging the pin.
- Your fingernail — if you have nothing else, a fingernail can press the pin, though it’s hard to maintain steady pressure.
When you press the pin, you’ll immediately hear air hissing out. The harder you press, the faster the air escapes.
Step 5: Release Air in Short Bursts
This is where most people mess up. Don’t just hold the pin down and walk away. Release air in 2-3 second bursts, then check the pressure with your gauge.
In my experience, each 2-3 second burst typically releases about 1-3 PSI, depending on how firmly you press and how high the starting pressure is. It’s much better to go slowly and check often than to accidentally drop below your target.
Step 6: Check the Pressure Again
After each burst, re-check with your gauge. Once you hit your target PSI (the number from your door jamb sticker), stop.
If you accidentally release too much air, don’t panic. Just use an air compressor or drive to the nearest gas station to add air back. I’ve done this more times than I’d like to admit during testing sessions.
Step 7: Replace the Valve Cap
Screw the valve cap back on finger-tight. Don’t overtighten it — you just want it snug enough to stay on and keep debris out.
Step 8: Repeat for All Tires
Go around the vehicle and repeat the process for each tire that needs adjustment. I always do all four tires in one session rather than doing one and “getting to the others later.” Trust me, you’ll forget.
Method 2: Removing the Valve Core for Rapid Deflation
If you need to drop pressure significantly — say, from highway pressure down to off-road pressure across all four tires — pressing the pin manually can take a while. In these cases, I remove the valve core entirely.
How to Do It
Using a valve core tool, insert the forked end into the valve stem and turn counterclockwise. The valve core will unscrew, and air will rush out rapidly. This method empties a tire very quickly, so you need to be attentive.
I hold the valve core tool loosely and partially unscrew the core to let air flow fast but not remove it completely. Once the pressure drops near my target, I tighten the core back in and fine-tune with the press-and-check method described above.
When I Use This Method
I use this approach almost exclusively for off-road tire testing when I need to drop from 35 PSI to 20 PSI across all four tires in a reasonable amount of time. For everyday overinflation corrections of just a few PSI, pressing the pin is faster and less fussy.
What Happens If Your Tires Are Overinflated?
I want to spend a moment on this because I encounter it constantly during testing, and most people don’t realize how much damage overinflation causes over time.
Reduced Contact Patch
An overinflated tire bulges in the center, meaning less rubber actually touches the road. I’ve measured contact patches during my testing, and the difference between a tire at 35 PSI versus 45 PSI is dramatic — you can lose up to 20% of your contact area.
Less rubber on the road means less grip. In wet conditions, this translates to longer braking distances and reduced cornering ability.
Center Tread Wear
Because the center of the tire bears most of the load when overinflated, it wears out much faster than the shoulders. I’ve seen tires that should have had plenty of life left rendered nearly useless because they were run overinflated for an extended period.
This is money out of your pocket. You’re essentially accelerating the need for replacement tires by not maintaining proper pressure.
Harsh Ride Quality
Overinflated tires don’t absorb road imperfections the way they’re designed to. During my testing, the difference in ride comfort between a tire at proper PSI and one that’s 8-10 PSI too high is immediately noticeable. The car feels jittery, harsh, and unsettled.
Increased Risk of Tire Damage
A tire that’s pumped too hard is more susceptible to impact damage from potholes and road debris. The stiff, unyielding sidewall can’t flex to absorb the hit, increasing the chance of a puncture, sidewall bulge, or even a blowout.
I once hit a pothole on a Michigan highway with tires that were about 8 PSI over spec. The impact caused a sidewall bubble that required immediate tire replacement. Proper inflation might have absorbed that hit without issue.
What Happens If Your Tires Are Underinflated?
While this article is about letting air out, I’d be doing you a disservice if I didn’t warn you about the dangers of going too far in the other direction.
Shoulder Wear and Heat Buildup
Underinflated tires wear excessively on the outer edges (shoulders) because the center of the tread sags away from the road. The increased flexing of the sidewall also generates excess heat, which is the number one killer of tires.
I’ve seen tires come apart on hot summer highway drives because they were chronically underinflated. The NHTSA estimates that underinflated tires are a contributing factor in thousands of crashes each year.
Reduced Fuel Economy
An underinflated tire has higher rolling resistance, meaning your engine has to work harder to move the car. The Department of Energy estimates that for every 1 PSI drop below the recommended pressure, your fuel economy decreases by about 0.2%.
That might sound trivial, but if all four tires are 5 PSI low, you could be losing 3-4% fuel economy — which adds up to real money at the pump over time.
Poor Handling and Response
During my testing, underinflated tires feel vague and mushy in the steering. Turn-in response is sluggish, and the car doesn’t feel as planted in corners. It’s a subtle but important safety difference that I always notice immediately.
Tips from My Years of Testing Tires
Here are some practical tips I’ve learned the hard way so you don’t have to.
Always Check Pressure When Tires Are Cold
“Cold” means the car hasn’t been driven for at least three hours, or has been driven less than a mile. Driving heats up the tires and increases pressure, which gives you an inaccurate reading.
I always do my pressure checks first thing in the morning before I start any test drive. If you check pressure after a long drive and find it’s a few PSI high, that’s likely heat-related expansion — not necessarily overinflation.
Don’t Trust Gas Station Air Machines Blindly
Many gas station air compressors have built-in gauges, and in my experience, they’re frequently inaccurate. I’ve tested them against my calibrated gauge and found discrepancies of 3-5 PSI on several occasions.
Always carry your own gauge and verify the pressure yourself after using a public air machine.
Check Pressure Monthly — Minimum
Tires naturally lose about 1-2 PSI per month through permeation (air molecules slowly passing through the rubber). I check my test vehicles weekly, but for everyday drivers, once a month is a good rhythm.
Set a recurring reminder on your phone. It takes less than five minutes for all four tires and can prevent premature wear, improve your fuel economy, and keep you safer on the road.
Don’t Forget the Spare
If your vehicle has a spare tire (full-size or compact), check its pressure too. I’ve encountered spare tires that were completely flat when someone actually needed them. Most compact spares require 60 PSI, which is listed on the tire itself.
Consider Nitrogen Inflation
Some tire shops and Costco fill tires with nitrogen instead of regular air. Nitrogen molecules are larger and permeate through rubber more slowly, meaning your tires hold their pressure longer.
In my testing, nitrogen-filled tires held pressure more consistently over several weeks compared to regular air. It’s not a dramatic difference, but if your shop offers it (often free with tire purchase), it’s a nice bonus.
TPMS Warning Light: What to Do
Most vehicles sold in the US since 2008 are equipped with a Tire Pressure Monitoring System (TPMS). If that little exclamation point icon lights up on your dashboard, it means at least one tire is significantly below the recommended PSI (typically 25% or more below).
If It Comes On After You Release Air
If you’ve been letting air out and the TPMS light illuminates, you’ve gone too far. Add air back until you reach the proper PSI. On most vehicles, the light will turn off after a few minutes of driving once the pressure is corrected.
If It Comes On Randomly
A TPMS warning that appears on its own could indicate a slow leak, a punctured tire, or simply pressure loss from a temperature drop. I always recommend stopping to check all four tires with a gauge rather than guessing which one triggered the warning.
Some vehicles display individual tire pressures on the dashboard or infotainment screen, which makes identifying the culprit much easier.
Special Scenario: Airing Down for Off-Road or Sand Driving
Since I test all-terrain and mud-terrain tires regularly, I air down frequently. Here’s what I’ve learned specifically about off-road deflation.
Target Pressures for Different Terrain
- Gravel/dirt roads: I typically stay at normal highway pressure or drop just 2-3 PSI. The risk of puncture is low and the surface is firm enough.
- Rocky trails: I drop to about 22-28 PSI depending on how aggressive the terrain is. This lets the tire conform to rocks and improves grip while still protecting the rim.
- Sand: I go down to 15-20 PSI for deep sand. The wider contact patch is essential for flotation. I’ve tested the same vehicle in the same sand at 35 PSI versus 18 PSI, and the difference is night and day — from hopelessly stuck to cruising through.
- Mud: Around 20-25 PSI works well, but it depends on the tire. Mud-terrain tires with aggressive lugs benefit from lower pressure because it allows the lugs to splay out and grab more effectively.
Always Re-inflate Before Highway Driving
This is critically important. Driving at highway speeds on underinflated tires generates extreme heat and can lead to catastrophic tire failure. I always carry a portable compressor and re-inflate to highway pressure before getting back on paved roads.
I’ve seen people drive home from the beach or the trail on 18 PSI because they forgot or didn’t have a compressor. Don’t be that person. A quality 12V compressor like the Viair 88P or the EPAuto portable compressor costs less than a single new tire.
Common Mistakes to Avoid When Letting Air Out
After over a decade of working with tires, I’ve seen (and made) just about every mistake in the book. Here are the ones I see most often:
Mistake 1: Not Using a Gauge
“I’ll just press the pin for a few seconds and it’ll be fine.” No, it won’t. Without a gauge, you’re guessing, and guessing leads to either still-overinflated tires or dangerously underinflated ones. A $10 gauge eliminates all uncertainty.
Mistake 2: Checking Pressure on Hot Tires
If you just drove 30 minutes to the gas station and then check your pressure, it’s going to read higher than the true cold pressure. Wait for the tires to cool, or account for approximately 3-5 PSI of heat-related increase.
Mistake 3: Using the Tire Sidewall Number as Your Target
I mentioned this earlier, but it bears repeating because it’s so common. The sidewall number is the maximum pressure, not the recommended pressure. Using it as your target will overinflate your tires every time.
Mistake 4: Damaging the Valve Core
If you use a screwdriver, knife, or other improvised tool to press the valve pin, you risk bending or damaging the valve core. A damaged core can cause a slow leak that’s maddening to diagnose. Spend the $3-5 on a proper valve core tool.
Mistake 5: Forgetting to Replace the Valve Cap
Valve caps are the first line of defense against dirt, moisture, and road debris entering the valve. Without a cap, grit can get into the valve core and cause a slow leak. I always keep spare valve caps in my glove box — a bag of 20 costs about $3.
How Often Should You Check and Adjust Tire Pressure?
In an ideal world, you’d check your tire pressure every time you get in the car. Realistically, here’s the schedule I follow and recommend:
- Monthly: A full check of all four tires plus the spare, with a quality gauge, when tires are cold. This is the bare minimum.
- With every significant temperature change: When seasons shift — especially the transition from fall to winter or winter to spring — temperature swings can cause noticeable pressure changes. I always check after a big cold front moves through.
- Before long road trips: I never hit the highway for a long drive without checking all tires. This takes five minutes and could prevent a breakdown or worse.
- After hitting a pothole or curb: Any significant impact warrants a pressure check. If you notice the car pulling to one side, check immediately.
- Whenever the TPMS light comes on: This one’s obvious, but I’ve met people who drove around with the light on for weeks. Don’t ignore it.
Final Thoughts: A Simple Skill That Saves Money and Lives
I know this article covers what seems like a straightforward topic, but proper tire pressure management is genuinely one of the most impactful things you can do for your vehicle’s safety, performance, and longevity. In my experience testing hundreds of tires across every type of vehicle, the difference between correct and incorrect tire pressure is dramatic — affecting everything from braking distance to tread life to fuel economy.
Learning how to let air out of your tires properly takes about two minutes and costs almost nothing. A $12 digital gauge and a $5 valve core tool are all you need. Master this basic skill, check your pressure monthly, and you’ll be ahead of the vast majority of drivers on the road.
Your tires are the only thing connecting your car to the pavement. Treat them well, and they’ll take care of you.
Frequently Asked Questions
How do you let air out of a tire without a special tool?
You can release air from a tire by pressing the small metal pin inside the valve stem with a fingernail, pen cap, or flat-head screwdriver. Simply push the pin inward and hold it until you reach your desired pressure, checking periodically with a tire pressure gauge. I always recommend using a reliable gauge—digital ones cost as little as $5 to $15 at most auto parts stores—so you don’t accidentally underinflate and cause uneven tread wear.
How much air should I let out of my tires for different driving conditions?
For normal US highway and city driving, you should keep your tires inflated to the PSI listed on the driver’s door jamb sticker, which typically ranges from 30 to 35 PSI for most passenger vehicles. If you’re airing down for off-road trails or sand driving, many experienced drivers drop to 15–20 PSI, but this should only be done at low speeds and re-inflated before returning to paved roads. Never go below the minimum pressure recommended by your tire manufacturer, as it can damage the sidewalls and void your warranty.
Can overinflated tires damage my car or wear out tires faster?
Yes, overinflated tires cause the center of the tread to bulge outward, leading to accelerated center-wear that can shorten tire life by thousands of miles. They also reduce your contact patch with the road, which hurts braking performance and traction—especially dangerous on wet US highways or in winter conditions. If your tires are reading 5+ PSI above the recommended level, I’d let air out immediately to protect both your tires and your suspension components.
How do I know if I need to let air out of my tires or add more?
Use a tire pressure gauge to check your PSI when the tires are cold—ideally before driving or after the car has sat for at least three hours. Compare your reading to the recommended pressure on the placard inside your driver’s door jamb, not the maximum PSI printed on the tire sidewall. If your reading is above the recommended number, you need to release air; if it’s below, add air at any gas station or with a portable inflator.
Is it bad to let air out of tires when they’re hot after driving?
Tire pressure increases by about 1 PSI for every 10°F rise in temperature, so checking and adjusting when tires are hot can lead to underinflation once they cool down. I always recommend waiting at least three hours after driving or checking first thing in the morning for the most accurate cold reading. If you must adjust on the road, add about 3–4 PSI to your target number to compensate for the heat, then verify again when the tires are cold.
How long does it take to let air out of a tire to the correct PSI?
Releasing air through the valve stem pin typically takes only 5 to 15 seconds per PSI, so adjusting a tire that’s 5 PSI overinflated usually takes under two minutes per tire. I recommend releasing air in short bursts and checking with your gauge between each release so you don’t overshoot and end up underinflated. The whole process for all four tires, including checking pressures, usually takes about 10 minutes.
Do I need a valve stem tool to deflate my tires, and where can I buy one?
A valve core removal tool makes the process faster and gives you more control, but it’s not strictly necessary for simply letting out small amounts of air—pressing the valve pin works fine for minor adjustments. Valve stem tools typically cost between $2 and $8 and are available at AutoZone, O’Reilly, Walmart, or Amazon. I keep one in my glove box along with a digital tire gauge, which is especially handy if you frequently adjust pressure for towing, hauling heavy loads, or seasonal temperature swings across US climates.

