Most people obsess over their tires — the rubber, the tread, the pressure — but completely ignore the wheels holding everything together. I’ve been guilty of this myself.
After years of reviewing tires and crawling around cars on my hands and knees, I’ve seen firsthand how neglected wheels lead to premature tire wear, dangerous vibrations, and repair bills that could have been avoided with thirty minutes of care per month.
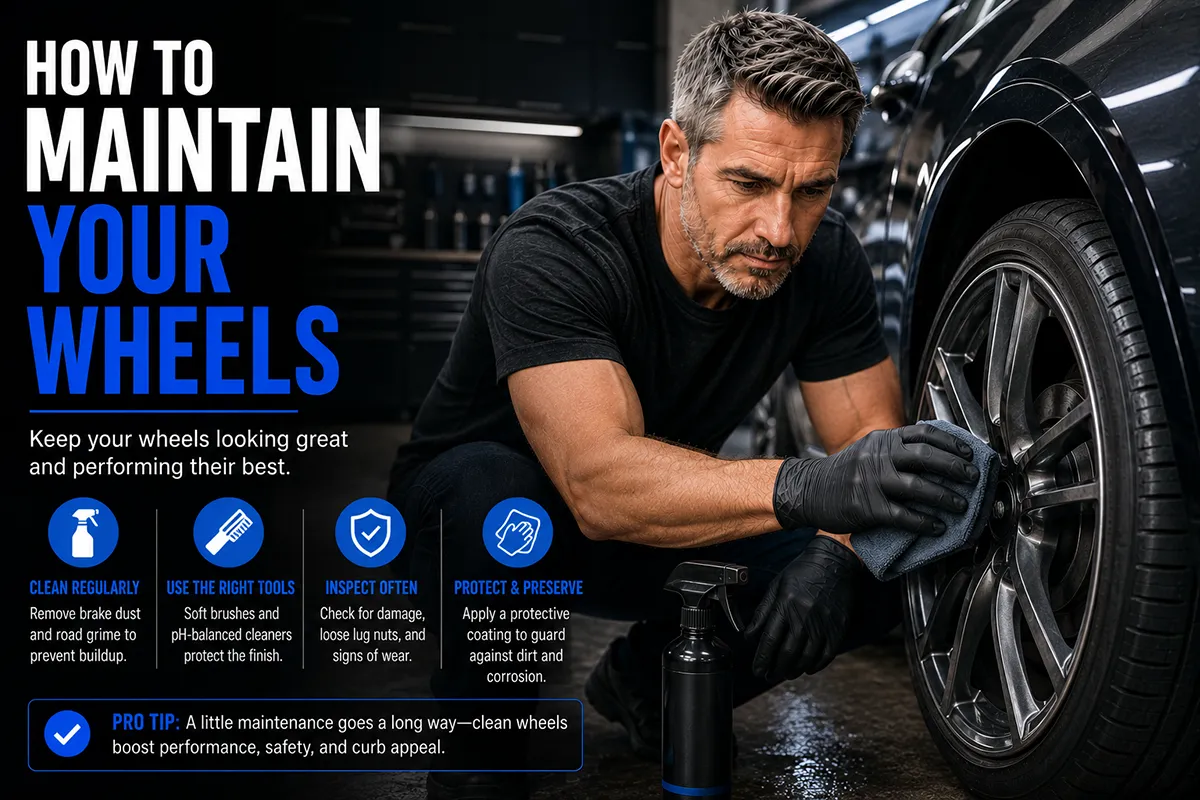
- Clean your wheels every two weeks with a pH-neutral wheel cleaner — brake dust is corrosive and causes permanent damage if left unchecked.
- Inspect for cracks, bends, and curb rash regularly, especially after hitting potholes or rough roads.
- Keep your wheels properly torqued to manufacturer specs using a torque wrench, not just a lug wrench.
- Apply a ceramic coating or quality wheel sealant to protect the finish and make future cleaning easier.
- Rotate your tires on schedule and rebalance whenever you feel vibrations — this protects both tires and wheels.
- Budget $50–$150 per year on basic wheel maintenance supplies; it saves thousands in premature replacements.
Why Wheel Maintenance Matters More Than You Think
I’ll be honest — when I first started reviewing tires professionally, I barely thought about the wheels. I’d mount new rubber, test it, write about it, and move on. But over time, I started noticing patterns that changed my perspective entirely.
Wheels that were neglected — caked in brake dust, slightly bent from a pothole, or corroded around the bead seat — consistently caused problems that people blamed on the tires. Vibrations at highway speed, slow air leaks, uneven wear patterns — these issues often traced back to the wheel, not the tire.
In my experience, proper wheel maintenance extends the life of your tires, improves ride comfort, maintains your vehicle’s resale value, and most importantly, keeps you safer on the road. It’s one of the highest-return maintenance tasks you can do as a car owner, and it requires surprisingly little time or money.
Understanding Your Wheel Type
Before diving into maintenance, you need to know what kind of wheels you’re working with. Different materials and finishes require different care approaches, and using the wrong products can cause more harm than good.
Steel Wheels
Steel wheels are the workhorses of the wheel world. I see them most often on base-model sedans, trucks, and winter tire setups. They’re heavy but incredibly durable, and they’re the most forgiving when it comes to cleaning products.
If you’re running steel wheels — especially with plastic hubcaps — your main enemies are rust and corrosion. I’ve pulled hubcaps off steel wheels and found entire sections bubbling with rust because moisture got trapped underneath. If you run steelies, pop those hubcaps off periodically and clean behind them.
Alloy Wheels (Aluminum)
This is what most US drivers are rolling on today. Alloy wheels are lighter than steel, look better, and dissipate heat more effectively. But they’re also more susceptible to damage from curbs, potholes, and corrosive brake dust.
I’ve tested dozens of tire and wheel combinations on alloy wheels, and the finish type matters enormously for maintenance. Painted alloy, machined alloy, polished alloy, and chrome-clad alloy all have different care requirements. Check your owner’s manual or the wheel manufacturer’s recommendations before choosing cleaning products.
Chrome Wheels
True chrome wheels — not chrome-clad or chrome-look — have a plated finish that’s beautiful but demanding. In my experience, chrome requires the most frequent maintenance and the gentlest products. Acidic cleaners will pit chrome in seconds, and I’ve seen it happen in real time during a shop visit.
Forged vs. Cast Alloy
Forged wheels are denser and stronger than cast wheels, but from a maintenance perspective, the care routine is essentially the same. The difference matters more for durability — forged wheels handle pothole impacts much better than cast ones. If you’re shopping for aftermarket wheels and drive on rough US roads (hello, Michigan and Pennsylvania), forged is worth the premium.
The Cleaning Routine That Actually Works
I’ve tried every wheel cleaning method and product you can imagine. I’ve used dish soap, all-purpose cleaners, dedicated wheel cleaners, and even some sketchy DIY concoctions I found on forums. Here’s the routine I’ve settled on after all that trial and error.
What You’ll Need
- pH-neutral wheel cleaner — I personally use Sonax Full Effect Wheel Cleaner ($15–$20 per bottle), but CarPro Iron X and Adam’s Wheel Cleaner are also excellent. Avoid anything with strong acids unless you’re dealing with extremely heavy contamination on plain steel wheels.
- A dedicated wheel brush set — You need at least two: a soft-bristle brush for the wheel face and a long, narrow brush for reaching through the spokes to clean the barrel. I like the EZ Detail brush for barrels and a boar’s hair brush for faces.
- Microfiber towels — Dedicate a set just for wheels. You don’t want brake dust contamination on the towels you use for paint.
- A bucket with clean water and a grit guard — This is the same two-bucket wash setup you’d use for your car’s paint.
- A hose with a spray nozzle or a pressure washer — I prefer a pressure washer on a fan tip setting, but a strong hose works fine.
Step-by-Step Process
Step 1: Rinse the wheel thoroughly. Before any product touches the surface, blast off loose dirt and brake dust with water. I always start with the wheel cold — never clean hot wheels, as the rapid temperature change can warp them and the cleaning product will flash-dry before it works.
Step 2: Apply wheel cleaner liberally. Spray the entire wheel face, between the spokes, and along the inner barrel as far as you can reach. Most quality iron-reactive cleaners will turn purple or red as they dissolve brake dust — it’s oddly satisfying to watch.
Step 3: Let it dwell for 2-3 minutes. Don’t let it dry. If it’s a hot day, work one wheel at a time and keep the surface wet.
Step 4: Agitate with your brushes. This is the step most people skip, and it’s the most important. The cleaner loosens contamination, but the brush removes it. Work the face, the spokes, the lug nut pockets, and the barrel. Get in there.
Step 5: Rinse thoroughly and dry. Use a microfiber towel to dry each wheel completely. Water spots on wheels are just as annoying as water spots on paint, and standing water in lug nut recesses promotes corrosion.
How Often Should You Clean Your Wheels?
I clean mine every two weeks during normal driving, and weekly if I’ve been doing a lot of highway driving or heavy braking (brake dust accumulation is directly related to how much you use your brakes). If you live in the rust belt and drive through winter salt, increase your frequency to weekly — salt is brutally corrosive to every wheel type.
In my experience, waiting more than a month between cleanings allows brake dust to bond with the clear coat, turning a simple wash into a frustrating decontamination project. I learned this the hard way on a set of OEM BMW wheels that ended up permanently stained because I got lazy during a busy testing season.
Protecting Your Wheels After Cleaning
Cleaning your wheels without protecting them is like washing your car and never waxing it. The protection step is what separates wheels that look great for years from wheels that deteriorate after a couple of seasons.
Wheel Sealants
A dedicated wheel sealant creates a barrier between the wheel surface and contaminants like brake dust, road salt, and tar. I’ve had excellent results with Poorboy’s Wheel Sealant ($12–$15) and CarPro DLUX ($20–$25). Application is simple: clean the wheel, apply the sealant with an applicator pad, let it haze, and buff off.
A good sealant lasts me about two to three months before it needs reapplication. During that time, brake dust washes off dramatically easier — sometimes a strong rinse is all it takes between full cleanings.
Ceramic Coatings for Wheels
If you want longer-lasting protection, ceramic coating your wheels is a game-changer. I coated a set of wheels with CQUARTZ DLUX during a test period, and the difference was remarkable even after several months of daily driving. Brake dust barely adhered to the surface, and the wheels looked freshly detailed with minimal effort.
Ceramic coating costs more upfront — a quality DIY kit runs $30–$60 — and requires more careful preparation. The wheel surface needs to be completely decontaminated and free of any previous sealants. But the protection lasts significantly longer, often a year or more with proper maintenance.
My Protection Recommendation by Wheel Type
| Wheel Type | Recommended Protection | Estimated Cost | Reapplication Frequency |
|---|---|---|---|
| Painted Alloy | Ceramic coating or wheel sealant | $15–$60 | Every 2–12 months |
| Machined/Polished Alloy | Wheel sealant (avoid abrasive polishes) | $12–$25 | Every 2–3 months |
| Chrome | Chrome-specific sealant or wax | $10–$20 | Monthly |
| Steel (with hubcaps) | Rust-preventive spray or basic wax | $8–$15 | Every 3–4 months |
Inspecting Your Wheels: What to Look For
Cleaning time is inspection time. Every time I clean my wheels, I’m also running my eyes and fingers over the surface looking for problems. Catching issues early is the difference between a $50 repair and a $400 replacement.
Curb Rash and Cosmetic Damage
Curb rash is the most common wheel damage I encounter, and it’s more than just cosmetic. Deep scratches through the clear coat expose bare aluminum to the elements, and corrosion starts faster than you’d expect. I’ve seen small curb scrapes turn into flaking, pitting messes within a single winter in northern states.
For minor curb rash on painted alloy wheels, a DIY wheel repair kit ($20–$40 at most auto parts stores) can do a surprisingly decent job. I’ve used them myself with acceptable results for small areas. For anything more than superficial damage, I recommend a professional wheel repair service — most metro areas have mobile wheel repair technicians who charge $75–$150 per wheel.
Cracks and Bends
This is the serious stuff. A cracked or bent wheel is a safety hazard, period. I always run my fingers along the inner lip of the wheel (the bead seat area) to feel for bends, and I visually inspect the spokes and face for any hairline cracks.
Bent wheels are incredibly common in the US, especially in states with rough roads and brutal winters. Potholes are the number one culprit. If you hit a significant pothole and notice a vibration afterward, get your wheels inspected immediately. I’ve seen bent wheels cause slow leaks that drivers chased for weeks, refilling their tires repeatedly before finally discovering the real issue.
Most alloy wheel bends can be repaired by a wheel straightening specialist for $75–$200, depending on severity. Cracks, however, generally mean replacement — a cracked wheel cannot be reliably repaired for safe highway use.
Corrosion Around the Bead Seat
This one is sneaky and incredibly frustrating. The bead seat is where the tire seals against the wheel, and if corrosion builds up in this area, you’ll develop a slow leak that no amount of new valve stems or tire patching will fix.
In my experience, this is most common on older alloy wheels (eight years and up) and wheels that have been exposed to heavy road salt. The fix requires dismounting the tire, cleaning the bead seat with a wire brush or bead blaster, and applying bead sealer during remounting. Most tire shops charge $20–$40 per wheel for this service, and I recommend requesting it any time you have tires swapped on older wheels.
Lug Nut and Hardware Maintenance
This is the area of wheel maintenance that’s most overlooked and potentially most dangerous. I’ve personally witnessed a wheel come loose on a vehicle because of improperly torqued lug nuts, and it’s an experience I never want to repeat.
Proper Torque Matters
Every vehicle has a specific lug nut torque specification, typically found in the owner’s manual. For most passenger cars in the US, it’s somewhere between 80 and 100 ft-lbs. For trucks and SUVs, it’s often 120–140 ft-lbs.
I own a quality torque wrench (you can get a reliable one from Tekton or EPAuto for $25–$40), and I use it every single time I install a wheel. Impact guns at tire shops are fast but imprecise — I’ve seen lug nuts overtorqued to the point of warping brake rotors and stretching wheel studs. I always ask shops to final-torque by hand, or I do it myself in the parking lot.
Retorque After Installation
Here’s something many drivers don’t know: after any wheel installation — new tires, rotation, seasonal swap — you should retorque the lug nuts after several days of driving. Wheels settle slightly as they’re driven, and lug nuts can loosen just enough to become dangerous.
I make it a habit to retorque after about a week of driving following any wheel service. It takes two minutes and costs nothing. This is especially critical if you’re mounting wheels yourself, swapping between summer and winter setups, or using wheel spacers.
Lug Nut Condition
Cheap, chrome-capped lug nuts — the kind that come stock on many vehicles — are notorious for swelling and seizing. I’ve broken more than one lug nut socket trying to remove a swollen capped lug nut. If your lug nuts are starting to look like they’ve been through a war, replace them with solid one-piece lug nuts. Gorilla Automotive and McGard make affordable, high-quality replacements for $25–$50 per set.
Inspect your lug nuts during every cleaning session. Look for rust, cross-threading, and that telltale swollen appearance on capped nuts. Replace any questionable hardware immediately — lug nuts are cheap, and wheel-off events are catastrophic.
Tire Rotation and Wheel Balancing
While tire rotation and balancing are technically tire maintenance tasks, they directly impact your wheels, so I’m including them here.
Rotation
I follow the rotation schedule recommended by each tire manufacturer during my testing. For most all-season and touring tires, that’s every few months or at regular service intervals. Consistent rotation ensures even wear across all four tires, which keeps the weight distribution balanced and reduces stress on individual wheels.
During rotation, I always inspect all four wheels closely — it’s the perfect opportunity since the wheels are already off the vehicle. This is when I catch small bends, developing corrosion, and hardware issues that aren’t visible when the wheel is mounted.
Balancing
If you feel a vibration in the steering wheel at highway speeds (typically 55–70 mph), your wheels likely need rebalancing. Wheel weights can fall off, tires can wear unevenly, and even brake dust buildup can throw off the balance over time.
I recommend rebalancing whenever you rotate your tires, and any time you feel a new vibration. Most tire shops include free balancing with tire purchases, and standalone rebalancing typically costs $15–$20 per wheel. It’s cheap insurance for a smooth ride and even tire wear.
Seasonal Wheel Care for US Drivers
The US has incredibly diverse driving conditions, and your wheel care routine should adapt to the seasons and your region.
Winter and Road Salt
If you live anywhere in the northern half of the US — from the Pacific Northwest to New England — road salt is your wheels’ worst enemy. Salt accelerates corrosion dramatically, and the combination of salt, water, and freeze-thaw cycles can destroy a wheel finish in a single winter.
I recommend washing your wheels (and your car’s undercarriage) at least once a week during salt season. Even a quick rinse at a self-serve car wash makes a significant difference. If you run a dedicated winter wheel setup (steel wheels with winter tires), apply a heavy coat of wax or rust-preventive spray before the season starts.
Summer Heat
In the Sun Belt states, extreme heat can accelerate clear coat degradation on alloy wheels. UV exposure combined with brake dust creates a corrosive cocktail that’s particularly damaging to polished and machined surfaces. A quality wheel sealant with UV protection is essential for drivers in Arizona, Texas, Florida, and similar climates.
I also recommend parking in shade whenever possible — not just for your paint and interior, but for your wheels and tires. I’ve measured wheel surface temperatures exceeding 150°F on black alloy wheels parked in direct Texas sun, and that kind of heat degrades sealants and coatings faster.
Spring Inspection
After winter ends, I do a thorough spring inspection of every wheel. This means cleaning them deeply, checking for any winter damage (salt corrosion, pothole bends, cracked clear coat), and reapplying protection. Think of it as a seasonal reset for your wheels.
This spring inspection has saved me from bigger problems multiple times. During one post-winter check, I found a hairline crack in a wheel spoke that had developed after a particularly brutal pothole hit. If I hadn’t caught it, that crack would have propagated under summer highway driving loads.
Common Wheel Maintenance Mistakes to Avoid
I’ve made many of these mistakes myself, so I’m sharing them to help you skip the expensive learning curve.
Using Acid-Based Cleaners on Coated Wheels
Acidic wheel cleaners are effective on bare or heavily contaminated steel, but they’ll destroy the clear coat on alloy wheels and pit chrome finishes. I once used an acid-based cleaner on a set of polished alloy wheels because I didn’t read the label carefully enough. The result was a dull, etched surface that required professional polishing to restore. Always check the label and use pH-neutral cleaners as your default.
Cleaning Hot Wheels
I mentioned this earlier, but it’s worth repeating because it’s such a common mistake. Never spray cold water or cleaning chemicals on a hot wheel — like right after a long drive or heavy braking. The thermal shock can warp the wheel and cause the cleaning product to dry on the surface before it can work. Let your wheels cool for at least 20-30 minutes before cleaning.
Using a Pressure Washer Too Close
Pressure washers are great for wheel cleaning, but keep the nozzle at least 12 inches from the surface. I’ve seen clear coat blown off wheels by overzealous pressure washing at close range. Use the fan tip setting, not the pinpoint jet.
Ignoring Valve Stems
Rubber valve stems degrade over time, and a cracked valve stem will cause a slow leak that’s easy to misdiagnose. I check and replace valve stems every time I buy new tires, and I always keep caps on them to prevent dirt and moisture from entering the valve core. Replacing valve stems during a tire mount costs only $2–$5 each — there’s no reason not to.
Neglecting the Inner Barrel
The inside of your wheel — the barrel — collects more brake dust than the face because it’s closer to the brake caliper. If you’re only cleaning what you can see, you’re leaving the dirtiest part untouched. Get a long barrel brush and clean the inside every time. Your future self will thank you when it’s time to mount new tires and the technician doesn’t have to chisel off a layer of baked-on brake dust.
When to Replace Your Wheels
Wheels don’t last forever, and knowing when to replace them is an important part of maintenance. In my experience, here are the signs it’s time:
- Cracks in the spokes or barrel — Non-negotiable. A cracked wheel must be replaced immediately.
- Severe bends that can’t be straightened — Some bends are too significant for repair, especially if they’ve compromised the bead seat.
- Heavy corrosion on the bead seat — If repeated bead cleaning and sealing can’t maintain an air-tight seal, the wheel is done.
- Clear coat failure across the entire surface — Widespread peeling and flaking clear coat isn’t just ugly; it exposes the raw aluminum to accelerated corrosion.
- Repeated balance issues — If a wheel can’t hold balance despite proper tire mounting and new weights, it’s likely warped beyond what the balancing machine can correct.
Replacement wheels for most US-market vehicles cost $100–$300 each for quality aftermarket options and $200–$600+ for OEM wheels. Sites like TireRack.com, Discount Tire, and 1010Tires offer solid selections with shipping to your door. I always recommend buying a full matching set if budget allows — mixing old and new wheels can create subtle differences in offset and balance.
Building Your Wheel Maintenance Kit
Here’s exactly what I keep in my garage for wheel maintenance. The total investment is around $100–$150, and everything lasts for months or years.
- Sonax Full Effect Wheel Cleaner — $18
- EZ Detail Wheel Brush (long barrel brush) — $20
- Boar’s hair wheel face brush — $12
- Detail brushes for lug nut pockets (set of 3) — $8
- Dedicated wheel microfiber towels (pack of 6) — $12
- CarPro DLUX ceramic coating — $25
- Tekton 1/2-inch drive torque wrench — $40
- Gorilla Automotive one-piece lug nuts (set of 20) — $35
That’s roughly $170 for a complete kit that covers every aspect of wheel maintenance I’ve discussed in this article. Compare that to the cost of replacing a single corroded or damaged wheel, and the math speaks for itself.
My Monthly Wheel Maintenance Schedule
Here’s the routine I follow. It takes about 30-40 minutes total per month, and it keeps my wheels in excellent condition year-round.
Every two weeks: Full wheel cleaning — rinse, spray cleaner, agitate with brushes, rinse, and dry. Visual inspection for new damage.
Monthly: Check lug nut torque with a torque wrench. Inspect valve stems and caps. Check for any slow leaks by visually comparing tire pressure to your baseline.
Every 2-3 months: Reapply wheel sealant (or as needed if you notice brake dust sticking more than usual).
At every tire rotation: Deep clean all four wheels including inner barrels. Full inspection for bends, cracks, and bead seat corrosion. Rebalance if needed.
Annually (or seasonally): Consider reapplying ceramic coating. Replace any worn valve stems. Inspect and replace damaged lug nut hardware.
This schedule has kept every set of wheels I’ve worked with in excellent shape. It’s not complicated, and once it becomes a habit, it feels as natural as checking your oil or topping off your washer fluid.
Final Thoughts on Wheel Maintenance
Your wheels are the foundation of your entire tire setup. I’ve reviewed hundreds of tires, and I can tell you with absolute certainty that even the best tire in the world won’t perform correctly on a neglected wheel. A bent wheel ruins ride quality. A corroded bead seat causes chronic air loss. A cracked spoke puts your life at risk.
The good news is that wheel maintenance is straightforward, affordable, and satisfying. There’s something deeply rewarding about stepping back and seeing a set of wheels that look as good as the day they were installed, knowing they’ll continue to perform safely for years to come.
Invest the time. Buy the right products. Build the habit. Your wheels — and your wallet — will thank you.
Frequently Asked Questions
How often should I check my tire pressure to maintain my wheels properly?
I recommend checking your tire pressure at least once a month and before any long road trips, especially during seasonal temperature swings common across the US. Underinflated tires wear unevenly, reduce fuel economy, and can cost you hundreds of dollars in premature replacements. Use a quality digital gauge and refer to the placard on your driver-side door jamb—not the number on the tire sidewall—for the correct PSI.
What is the best tire rotation schedule to extend tire life?
Most tire manufacturers and brands like Goodyear, Michelin, and Cooper recommend rotating your tires every 5,000 to 7,500 miles, which typically aligns with every other oil change. Regular rotation ensures even tread wear across all four tires, which can extend their lifespan by 20% or more. I always keep the rotation receipt since many tire warranties require documented rotations to stay valid.
How do I know when my tires need to be replaced instead of just maintained?
Use the penny test by inserting a penny into the tread groove with Lincoln’s head facing down—if you can see the top of his head, your tread is below 2/32 of an inch and it’s time for replacement tires. Also look for sidewall bulges, uneven wear patterns, or cracks, which signal structural damage that no amount of maintenance can fix. Replacement tires typically cost between $100 and $250 each for most passenger vehicles in the US, depending on size and brand.
Does wheel alignment really affect tire wear and how much does it cost?
Yes, improper wheel alignment is one of the leading causes of premature and uneven tire wear, and I’ve seen misaligned wheels shave thousands of miles off a set of tires. A standard four-wheel alignment at US shops like Firestone, Discount Tire, or a local mechanic typically costs between $75 and $150. I recommend getting an alignment check every 12 months or whenever you hit a major pothole, which is especially relevant for drivers in states with harsh winters like Michigan, Pennsylvania, or New York.
How should I maintain my wheels and tires during winter driving conditions?
If you live in northern US states with heavy snow and ice, switching to dedicated winter tires like Bridgestone Blizzaks or General Altimax Arctic gives you significantly better traction than all-season tires below 45°F. Keep your tire pressure slightly higher than normal during cold months since PSI drops about 1 pound for every 10°F decrease in temperature. I also clean road salt and brake dust off my wheels every few weeks to prevent corrosion on both alloy and steel rims.
Can I balance my own tires at home or should I pay for professional wheel balancing?
While DIY stick-on wheel weights exist, I strongly recommend professional wheel balancing because it requires a spin balancer that costs $1,000+ and trained calibration most home mechanics don’t have. Unbalanced wheels cause vibrations at highway speeds, accelerate tire and suspension wear, and can make your steering wheel shake noticeably above 55 mph. Most US tire shops charge between $15 and $50 per tire for balancing, and many retailers like Costco, Discount Tire, and Sam’s Club include free lifetime balancing when you purchase tires from them.
What’s the best way to clean and protect alloy wheels from brake dust and curb damage?
I use a pH-neutral wheel cleaner and a soft-bristle brush every two weeks to remove brake dust before it bakes onto the alloy surface and causes permanent pitting. After cleaning, applying a ceramic wheel coating or quality wheel sealant—products like Adam’s Wheel Coating or CarPro DLUX run $15 to $40—creates a barrier that makes future cleaning much easier. For curb rash, minor cosmetic damage can be repaired at local wheel repair shops for $75 to $150 per wheel, which is far cheaper than the $200 to $500 cost of a full replacement alloy wheel.

