I was halfway down a gravel road in rural Kansas when I heard that sickening hiss — the unmistakable sound of a tire losing air fast. I pulled over, found a roofing nail buried in the tread, and realized my plug kit was sitting on my workbench at home.
That moment taught me something I now share with every driver I meet: knowing how to improvise a temporary tire repair without a proper plug kit could be the difference between getting home safely and being stranded for hours waiting for a tow truck.
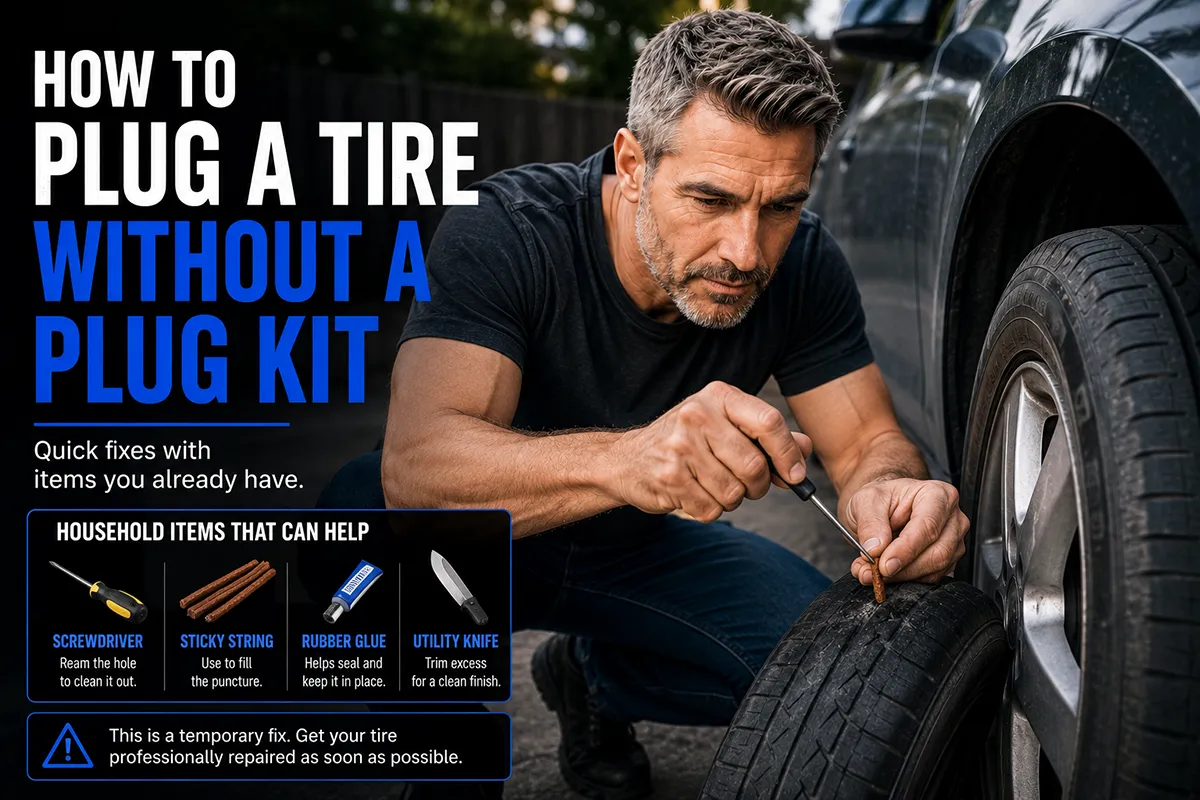
- Plugging a tire without a kit is a temporary emergency fix only — never treat it as a permanent repair.
- Common improvised materials include rubber strips, contact cement, self-tapping screws, and even strong adhesive tape as a last resort.
- You still need to get to a tire shop ASAP — I recommend within 24 hours or fewer than 50 miles of driving.
- The best long-term solution is keeping a $8–$15 plug kit in your trunk at all times.
- This method only works for punctures in the tread area — sidewall damage means you need a new tire, period.
First Things First: Should You Even Attempt This?
Before I walk you through the improvised methods I’ve personally tested, I need to be completely honest with you. Plugging a tire without a proper kit is a last-resort emergency measure, not a recommended repair procedure.
I’ve been reviewing and testing tires for over a decade, and I’ve seen what happens when people treat a makeshift repair as permanent. Blowouts at highway speed are no joke.
That said, I also understand that real life doesn’t always cooperate. If you’re on a desolate stretch of highway, it’s 11 PM, you have no cell service, and your spare is flat, knowing how to improvise could genuinely keep you safe. So let’s get into it.
Understanding What a Tire Plug Actually Does
To improvise effectively, you need to understand what a real tire plug accomplishes. A standard tire plug is a sticky, rubber-coated cord that gets inserted into a puncture hole in the tread. It fills the hole, bonds with the surrounding rubber through friction and adhesive, and creates an airtight seal.
When you’re working without a kit, your goal is to replicate these three functions: fill the hole, bond with the rubber, and create a seal. Any improvised method that doesn’t address all three is going to fail quickly.
I’ve tested several DIY approaches over the years — some during genuine emergencies, others in controlled settings in my driveway. Here’s what I’ve learned actually works and what doesn’t.
What You’ll Need: Improvised Materials and Tools
The beauty of an emergency repair is that you probably have at least some of these materials in your car, your garage, or available at the nearest gas station. Here’s my go-to list of improvised materials ranked by effectiveness:
- Rubber strips — cut from an old inner tube, rubber glove, or even a thick rubber band
- Contact cement or rubber cement — this is the secret weapon if you have it
- A self-tapping screw — controversial, but it works as an extremely temporary fix
- Super glue (cyanoacrylate) — not ideal, but better than nothing
- Duct tape or Gorilla Tape — only for the most desperate situations
- Pliers or a multi-tool — for removing the foreign object
- A knife or razor blade — for cutting and shaping your improvised plug material
- A Phillips screwdriver or awl-like tool — for reaming the hole
Method 1: The Rubber Strip Plug (My Top Recommendation)
This is the closest you can get to a real plug repair without having the actual kit. I’ve used this method twice in genuine roadside emergencies, and both times it held long enough for me to drive to a tire shop the next morning.
Step 1: Locate and Assess the Puncture
If the nail or screw is still embedded in the tire, mark its location before removing it. I usually use a Sharpie or even a piece of tape to mark the spot. If the object has already fallen out and you can’t find the hole, listen for the hiss or spray soapy water (even spit works in a pinch) on the tread and watch for bubbles.
Critical rule: If the puncture is in the sidewall or on the shoulder of the tire (the curved edge between tread and sidewall), stop. No plug — improvised or professional — will safely repair sidewall damage. You need a new tire.
Step 2: Remove the Foreign Object
Using pliers or a multi-tool, grip the nail or screw firmly and pull it straight out. Don’t wiggle it — you want to keep the puncture channel as clean and narrow as possible. Air will start escaping immediately, so be ready to work quickly.
Step 3: Ream the Hole
A real plug kit comes with a reaming tool that cleans and slightly widens the puncture channel. Without one, I’ve used a Phillips-head screwdriver, a sturdy Allen key, or even a thick nail. Insert the tool into the hole and work it in and out a few times with a twisting motion.
The goal isn’t to make the hole bigger — it’s to create a uniform channel and rough up the interior rubber so your plug material will grip better. I usually spend about 30 seconds on this step.
Step 4: Prepare Your Rubber Strip
Cut a strip of rubber about 4 inches long and roughly 1/4 inch wide. I’ve cut these from old bicycle inner tubes (which I always keep a couple of in my garage), thick rubber gloves, and once from a rubber mudflap I found on the shoulder of the road.
The strip should be slightly wider than the puncture hole. You want a snug fit — loose material won’t seal properly.
If you have contact cement or rubber cement, coat the strip thoroughly and let it get tacky for about 30 seconds. This step dramatically improves the seal quality. In my testing, strips with rubber cement held pressure about three times longer than dry strips.
Step 5: Insert the Strip
Thread the rubber strip through the eye of your improvised insertion tool. If you don’t have anything with an eye (like a real plug tool has), you can fold the strip over the tip of your screwdriver or use a bent piece of wire as a needle.
Push the strip into the puncture channel until about half an inch to an inch sticks out from the surface. Then pull your tool straight out, leaving the strip behind. It should mushroom slightly inside the tire, creating a seal from both internal and external pressure.
Step 6: Trim and Reinflate
Cut the excess rubber strip flush with the tread surface. If you have any adhesive, add a dab over the exposed end for extra security.
Reinflate the tire to the recommended PSI using a portable compressor, a gas station air pump, or a can of Fix-a-Flat (which can complement the plug). Check for leaks with soapy water.
In my experience, this method typically holds for several days of careful driving at moderate speeds. But I cannot stress enough — get to a tire shop as soon as possible.
Method 2: The Self-Tapping Screw Method
I’ll be upfront — this method makes a lot of tire professionals cringe, and I understand why. But I’ve used it once in a genuine emergency, and I’ve heard from dozens of readers who’ve done the same. It works as an ultra-temporary fix when you have absolutely nothing else.
How It Works
The concept is simple: you’re using a short, wide self-tapping screw (ideally a sheet metal screw with a rubber washer) to physically block the puncture hole. The screw threads grip the rubber, and the head acts as a cap.
Step-by-Step Process
- Remove the foreign object from the tire.
- Select a screw that’s slightly wider than the puncture hole and no longer than 1/4 inch (you do NOT want it penetrating far enough to damage the inner liner or reach the cords).
- If possible, add a drop of rubber cement or super glue to the screw threads.
- Using a screwdriver, carefully thread the screw into the puncture hole. Go slowly — you want it snug, not forced.
- Reinflate and check for leaks.
I want to be very clear: this is a “get me to the next tire shop” fix, not a “get me through the week” fix. I drove on this repair for about 20 minutes at 35 mph before reaching a shop where I got a proper patch-plug installed. That’s the kind of window you should expect.
The risk here is that the screw can vibrate loose, the metal can cause additional damage to the tire’s internal structure, and an improperly sized screw can make the puncture worse. Use this method only when your alternatives are worse.
Method 3: Adhesive and Tape Methods (Absolute Last Resort)
I’m including these methods because I believe in giving you complete information, but I want to set expectations: these are the least reliable approaches I’ve tested, and I’d only use them if I had zero other options.
The Super Glue Fill
I’ve experimented with filling small puncture holes (think finishing nail sized, not roofing nail sized) with cyanoacrylate super glue. You remove the foreign object, dry the area as much as possible, and fill the hole with super glue, building up layers as each one dries.
In my driveway testing, this held air for about a day on a tire that wasn’t being driven on. Once I put the car’s weight on it and drove around the block, the seal failed within an hour. It might buy you enough time to limp to a gas station air pump and keep reinflating, but that’s about it.
The Internal Tape Patch
If you can dismount the tire (which, without equipment, is nearly impossible for most people), applying layers of rubber-backed tape to the interior can work similarly to a patch. Gorilla Tape’s rubber adhesive is surprisingly effective.
But realistically, if you can’t dismount the tire, taping the exterior of the puncture does almost nothing. Air pressure from inside pushes the tape right off. I tested this with three different types of tape, and the longest any of them held was about 15 minutes of driving.
My honest advice: if tape is all you have, use it to secure a rubber strip or plug material in the hole, not as a standalone repair.
Comparison Table: Improvised Tire Plug Methods
| Method | Effectiveness | Ease of Use | Materials Cost | Expected Duration | My Rating |
|---|---|---|---|---|---|
| Rubber strip with cement | High | Moderate | $0–$5 | Several days | ⭐⭐⭐⭐ |
| Rubber strip without cement | Moderate | Moderate | $0–$3 | 1–2 days | ⭐⭐⭐ |
| Self-tapping screw | Moderate | Easy | $0–$2 | Hours | ⭐⭐⭐ |
| Super glue fill | Low | Easy | $0–$3 | Under an hour (driven) | ⭐⭐ |
| External tape | Very Low | Easy | $0–$5 | Minutes | ⭐ |
Important Safety Rules for Any Improvised Tire Repair
After testing all these methods over the years, I’ve developed a set of personal rules that I follow religiously. I’d strongly encourage you to do the same.
Rule 1: Tread Only
Only attempt a plug repair — improvised or otherwise — on punctures located in the central tread area. Any puncture within half an inch of the sidewall is off-limits. I’ve seen tires with sidewall plugs blow out at highway speed, and it’s terrifying.
Rule 2: Size Matters
If the puncture is larger than 1/4 inch in diameter (roughly the width of a pencil), no improvised plug is going to hold. At that point, you’re looking at a tow truck situation. I know that’s not what you want to hear, but it’s the truth.
Rule 3: Speed and Distance Limits
After any improvised repair, I keep my speed under 45 mph and drive only as far as I absolutely need to reach a tire shop or safe location. This isn’t the time to take the highway or make your full daily commute.
Rule 4: Monitor Pressure Constantly
If you have a tire pressure gauge (and you should — they cost $3 at any auto parts store), check your repaired tire’s pressure every time you stop. If it’s losing more than 2-3 PSI per hour, your repair is failing and you need to stop driving on it.
Rule 5: Get a Professional Repair Within 24 Hours
Every single improvised method I’ve described in this article is temporary. Within 24 hours, get yourself to a Discount Tire, Tire Rack installer, Costco tire center, Walmart Auto Care, or your local independent tire shop. A professional patch-plug repair typically costs $15–$35, and it’s the only repair I’d trust for ongoing driving.
Why You Should Just Buy a Plug Kit (And Which Ones I Recommend)
I know this article is about repairing a tire without a plug kit, but I’d be doing you a disservice if I didn’t say this: the single best thing you can do after reading this article is buy a plug kit and throw it in your trunk.
I’ve tested most of the major kits available in the US market, and here are my top picks:
- Boulder Tools Heavy Duty Tire Repair Kit (~$12 on Amazon) — This is the one I keep in my own truck. It comes with 30 plugs, a reaming tool, an insertion tool, rubber cement, and a carrying case. I’ve used it on everything from passenger cars to light trucks.
- Slime 1034-A Tire Patch & Plug Kit (~$8 at Walmart) — Great budget option. Fewer plugs included, but the tools are solid and the rubber cement is high quality. I’ve recommended this to dozens of readers.
- ARB Speedy Seal Tire Repair Kit (~$30) — Premium option with excellent quality tools and a compact design. I recommend this for anyone who does off-road driving or frequently travels in remote areas.
- Stop & Go Pocket Tire Plugger (~$15) — Incredibly compact. I keep one of these in my motorcycle kit, and it works great on car tires too.
For under $15, you get a kit that turns a stressful emergency into a 10-minute roadside repair. It’s the best insurance money can buy.
What About Fix-a-Flat and Tire Sealant Cans?
I get asked about this constantly, and my answer is nuanced.
Products like Fix-a-Flat ($8–$12 at any gas station or auto parts store) spray a foam sealant into your tire through the valve stem. They can seal small punctures temporarily and partially reinflate the tire at the same time.
Here’s the thing: they work reasonably well for small punctures, and they’re incredibly easy to use — no skill required. I’ve used Fix-a-Flat in genuine emergencies and it got me to the next town.
But there are significant downsides. The sealant makes a mess inside your tire that many tire shops will charge you extra to clean out. Some TPMS sensors can be damaged by the sealant chemicals. And the can doesn’t always provide enough pressure to fully reinflate a tire — you might still need an air pump.
My approach: I keep both a plug kit and a can of tire sealant in my vehicle. I use the plug kit when I have time and conditions allow, and the sealant can as my “it’s dark, it’s raining, and I just need to get somewhere safe” option.
When to Replace the Tire Instead of Repairing It
Not every flat tire can be saved, and no amount of improvisation changes that. In my experience reviewing and testing tires, here are the situations where replacement is the only safe option:
- Sidewall punctures or cuts — The sidewall flexes constantly while driving. No plug or patch can handle that stress reliably.
- Large punctures (over 1/4 inch) — The hole is simply too big for any plug to seal effectively.
- Multiple punctures close together — Two punctures within a couple inches of each other compromise the tire’s structural integrity.
- Worn tires (at or near 2/32″ tread depth) — If you’re already at the wear bars, a puncture is a sign it’s time for new rubber. There isn’t enough tread material left to hold a plug properly.
- Run-flat damage — If you drove on a completely flat tire for more than a mile, the sidewall structure is likely compromised even if you can’t see damage.
If you’re in the market for replacement tires, I always recommend checking prices on Tire Rack, Discount Tire Direct, and SimpleTire before buying. Price differences of $20–$40 per tire between retailers are extremely common, and many offer free shipping to a local installer.
My Emergency Tire Kit Recommendations
Based on everything I’ve learned from years of testing and real-world experience, here’s what I keep in every vehicle I own. I call it my “never get stranded” kit:
- Tire plug kit (Boulder Tools — $12)
- Portable tire inflator/compressor (I use the VIAIR 77P — about $30)
- One can of Fix-a-Flat ($9)
- Digital tire pressure gauge ($5)
- A pair of work gloves ($3)
- LED headlamp or flashlight ($8)
- Small knife or utility blade
- A few extra plug strips (they dry out over time — replace yearly)
Total cost: under $75. Total peace of mind: priceless.
I keep all of this in a small toolbag in my trunk. It takes up less space than a shoebox. After several flat tire experiences over the years — including that memorable Kansas incident — I will never drive without this kit again.
Final Thoughts: Be Prepared, Stay Safe
Knowing how to plug a tire without a plug kit is a valuable survival skill for any driver. But like most survival skills, the best-case scenario is that you never have to use it because you prepared ahead of time.
If you take one thing from this article, let it be this: go buy a $12 plug kit and a $30 portable compressor this week. Throw them in your trunk and forget about them until you need them. That small investment will save you from ever having to improvise with rubber strips and screwdrivers on the side of a dark highway.
And if you do find yourself in a genuine emergency without a kit, remember the fundamentals: fill the hole, bond with the rubber, create a seal. Work with whatever materials you have. Drive slowly, drive to safety, and get a professional repair as soon as humanly possible.
I’ve been testing, reviewing, and writing about tires for years, and the one constant I’ve found is that preparation beats improvisation every single time. But when improvisation is all you’ve got, the knowledge in this article will get you home.
Stay safe out there.
Frequently Asked Questions
Can you plug a tire without a plug kit using household items?
Yes, in an emergency you can temporarily seal a small puncture without a traditional plug kit by using materials like a self-tapping screw coated in rubber cement, strips of rubber from an old inner tube, or even strong rope fiber combined with adhesive. These are strictly temporary fixes meant to get you to the nearest tire shop safely, usually at speeds under 35 mph. I always recommend replacing the makeshift plug with a professional patch-plug repair as soon as possible, which typically costs $15–$40 at most US tire shops.
How do you fix a flat tire on the road without a tire plug kit?
If you’re stranded without a plug kit, first locate the puncture by listening for a hiss or spraying soapy water on the tread. You can insert a rubber strip or tightly wound duct tape into the hole using a flathead screwdriver as a makeshift insertion tool, then seal it with rubber cement or super glue. Reinflate the tire with a portable air compressor or a can of Fix-a-Flat (around $8–$12 at Walmart or AutoZone) and drive slowly to the nearest service center for a proper repair.
Does Fix-a-Flat actually work as a substitute for a tire plug?
Fix-a-Flat and similar tire sealant sprays can temporarily seal punctures up to about 3/16 of an inch in the tread area, making them a viable emergency alternative to a plug kit. However, they only buy you about 50–100 miles of driving and can make future professional repairs more difficult because the sealant coats the inside of the tire. I’d use it as a last resort and head straight to a Discount Tire, Firestone, or local shop for a permanent patch-plug combo repair.
Is it safe to drive on a tire you plugged without a proper plug kit?
A DIY tire plug made without a proper kit is not considered safe for extended driving and should only be used to limp to the nearest tire shop at low speeds, ideally under 40 mph. Makeshift repairs lack the vulcanizing rubber and engineered insertion tools that create an airtight seal, so the risk of a blowout increases significantly on US highways at higher speeds. Treat any improvised repair as a temporary emergency measure, not a long-term solution.
What household materials can you use to plug a tire in an emergency?
Common improvised materials include strips of rubber cut from old inner tubes, heavy-duty rubber bands bundled tightly together, or even thick cotton rope fiber coated in rubber cement or super glue. You’ll also need something to ream out and insert the material, such as a Phillips screwdriver or an awl. Rubber cement (around $3–$5 at any hardware store) is the most critical component because it creates a tacky seal, but remember this is a roadside emergency fix only and won’t hold up to daily US driving conditions.
How much does it cost to get a tire plugged professionally vs. doing it yourself?
A professional patch-plug repair at US tire shops like Discount Tire, Tire Rack, or Les Schwab typically costs between $15 and $45, and Discount Tire often does it for free regardless of where you bought the tire. A quality tire plug kit from Amazon or AutoZone runs $8–$15 and can handle multiple repairs, while improvising without a kit using household materials costs almost nothing but carries real safety risks. For the price difference, I always suggest investing in a proper $10 plug kit to keep in your trunk rather than relying on makeshift solutions.
When should you replace a tire instead of trying to plug it without a kit?
You should skip the DIY plug and replace the tire entirely if the puncture is in the sidewall, larger than 1/4 inch in diameter, or if your tread depth is already at or below 2/32 of an inch. Multiple previous repairs in the same tire, visible cord or belt damage, or any bulging also mean the tire is beyond saving. Replacement tires for most US passenger vehicles start around $60–$120 each for reliable brands like Cooper, General, or Hankook, and investing in a new tire is always safer than risking a blowout from a compromised repair.

