If you’ve ever driven on studded winter tires past the legal deadline in your state, you know that sinking feeling. The roads are dry, the snow is gone, and every rotation of your wheels sounds like a tiny percussion band destroying your pavement — and your tires.
I’ve pulled studs from more sets of tires than I can count over the years, both professionally and in my own garage. And here’s what surprises most people: removing tire studs is actually a straightforward DIY job, but doing it *wrong* can ruin a perfectly good tire in seconds.
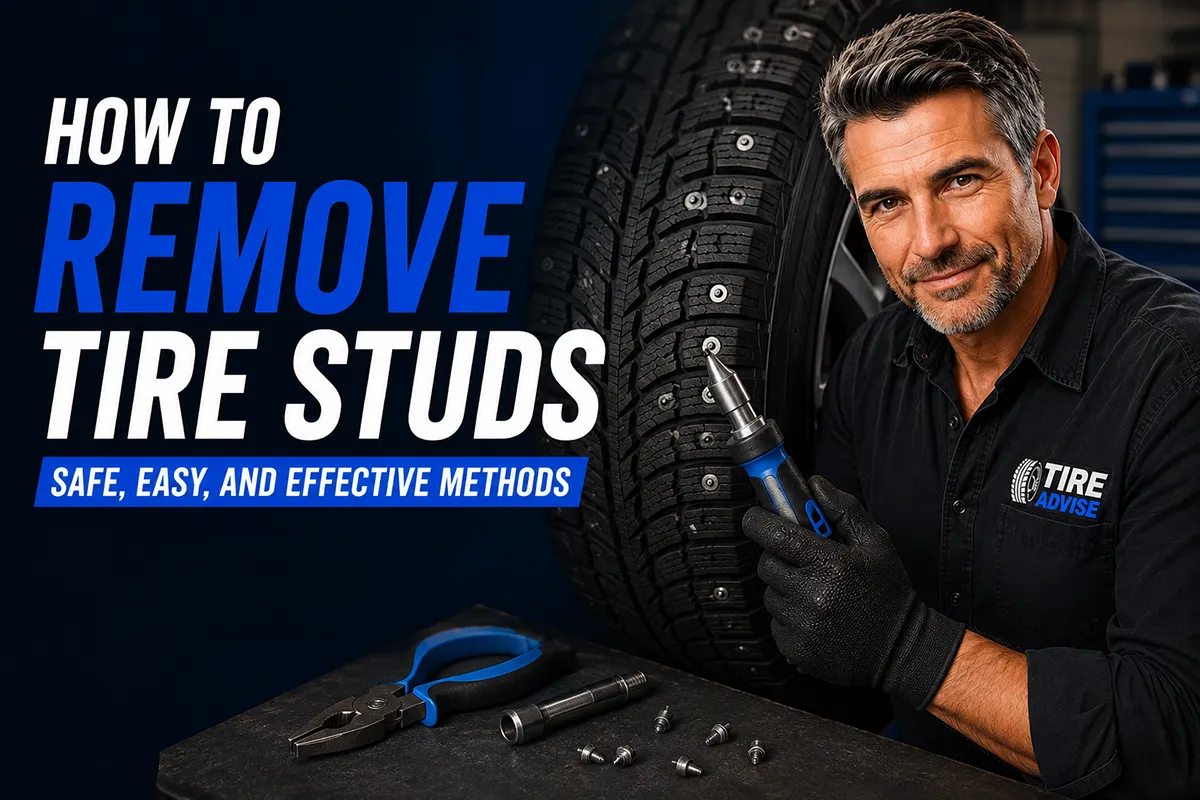
- You can remove tire studs at home using a stud removal tool, lubricant, and pliers — the whole process takes about 20-40 minutes per tire.
- A dedicated tire stud removal tool (around $8-$20) is the safest option and minimizes the risk of damaging the rubber.
- Never pry studs out with a flathead screwdriver — it tears the stud hole and can compromise the tire’s integrity.
- Once studs are removed, the tire can still be used as a regular winter or all-season tire, though the stud holes may slightly affect wet traction over time.
- In most US states that allow studded tires, there are seasonal deadlines — remove studs before the cutoff to avoid fines.
Why Would You Want to Remove Tire Studs?
There are several legitimate reasons to pull studs out of your tires, and I’ve personally encountered all of them. Let me walk you through the most common scenarios.
Seasonal Legal Requirements
Most US states that permit studded tires enforce strict seasonal windows. In Oregon, for example, studded tires are legal only from November 1 through March 31 (though this can shift year to year). Washington, Colorado, and several other states have similar cutoff dates.
If you’ve got a set of studded winter tires and the season is ending, you either need to swap to a different set of tires or pull the studs out. For drivers who don’t want to buy a whole new set of tires, stud removal is the practical and budget-friendly answer.
Road Noise and Ride Comfort
I’ve driven on studded tires during dry conditions, and honestly, it’s miserable. The road noise is relentless — a constant buzzing hum that gets louder at highway speeds. On bare pavement, studs also reduce your contact patch, which means *less* grip, not more.
Removing the studs transforms the tire back into a standard winter tire with a more comfortable and quieter ride. I noticed the difference immediately after pulling studs from a set of General Altimax Arctic 12 tires I was testing — the cabin went from annoyingly loud to pleasantly quiet within the first few minutes of driving.
Pavement Damage Concerns
Studded tires chew up roads. That’s not an opinion — it’s well-documented by state departments of transportation across the US. Some states, like Minnesota, Illinois, and Michigan, have banned studded tires entirely because of the damage they cause to road surfaces.
If you’ve moved to a state where studs are prohibited, or if you simply want to be kinder to your local roads, removing the studs is a responsible choice.
Repurposing the Tires
Sometimes you buy a used set of studded winter tires at a great price, but you don’t actually need or want the studs. I’ve done this myself — picked up a barely-used set of Nokian Hakkapeliitta R5 tires from a seller who had them studded, then pulled the studs to use them as standard winter tires. Worked beautifully.
What You’ll Need: Tools and Materials
Before you start yanking metal out of rubber, gather your tools. I’ve tried multiple approaches over the years, and I can tell you definitively which methods work and which ones will leave you frustrated or dealing with a damaged tire.
Essential Tools
- Tire stud removal tool — This is the single most important item. It looks like a pair of modified pliers with a narrow, lever-style tip designed to grip the stud’s base and lever it out. You can find these online or at auto parts stores for $8-$20. The GEMSWB brand tool on Amazon is one I’ve used repeatedly with good results.
- Needle-nose pliers — A good backup for stubborn studs or for grabbing stud fragments. I keep a quality pair of Channellock or Knipex pliers in my kit.
- Lubricant — Spray some soapy water or a silicone-based lubricant around each stud before removal. This reduces friction and makes the stud slide out more easily without tearing the rubber.
- Work gloves — Tire studs are sharp, and the edges of the rubber around the stud holes can be rough. I learned this the hard way during my first removal session. Mechanix-style gloves work well.
- Safety glasses — Studs can occasionally fly out with surprising force. Protect your eyes.
- A flat, clean workspace — You’ll want the tire off the vehicle and laying flat. A garage floor, workbench, or even a clean section of driveway works fine.
Optional But Helpful
- Tire cradle or old towel — Keeps the tire from rolling around while you work.
- Compressed air — Useful for blowing debris out of empty stud holes when you’re done.
- Awl or pick — Helps clear packed dirt or small stones from around the stud base before removal.
Tools to Avoid
I want to be direct about this because I’ve seen bad advice floating around online. Here’s what you should not use:
- Flathead screwdriver — I see this recommended constantly, and it’s terrible advice. Jamming a flathead under a stud and prying creates a lever point that tears and distorts the stud hole in the rubber. I tried this once early on, and the damage to the tire was immediately visible.
- Regular pliers without the right grip — Standard slip-joint pliers tend to crush the stud carbide tip rather than grip the base. You’ll spend ten times longer and still mangle half the studs.
- Drill-mounted stud removal bits — These exist for professional shop use and can work well, but in inexperienced hands, they can drill straight through the tread. Not worth the risk for a DIY job.
Step-by-Step: How to Remove Tire Studs
Here’s the method I’ve refined over years of doing this in my garage. Follow these steps, and you’ll have a clean, stud-free tire in about 20-40 minutes per tire.
Step 1: Remove the Tire from the Vehicle
You can technically remove studs with the tire still mounted on the car, but I strongly recommend against it. You’ll be working at awkward angles, applying uneven force, and the tire can shift on you.
Jack up the car, remove the wheel, and bring it to your work area. Lay the tire flat with the tread facing up.
Step 2: Inspect the Studs
Take a moment to examine the condition of the studs. Are they sitting flush? Are some partially worn down or pushed deep into the rubber? Are any already missing?
This inspection helps you plan your approach. Deeply seated studs will require more lubricant and patience. Studs that are already loose or protruding will come out easily.
I also count the studs at this point. Most studded tires have between 100 and 200 studs per tire, so you’ll want to mentally prepare yourself for the repetitive work ahead.
Step 3: Lubricate the Stud Area
Spray a generous amount of lubricant around the base of each stud. I use a simple mix of dish soap and water in a spray bottle — it’s cheap, effective, and doesn’t damage rubber.
If you prefer, silicone spray works great too. The key is to let the lubricant seep down into the stud hole for a few seconds before attempting removal.
Step 4: Grip the Stud at the Base
Position your tire stud removal tool or needle-nose pliers so that the jaws grip the stud at its base — where the metal meets the rubber. Do not grip the carbide tip. The tip is the hardest part of the stud but also the smallest, and your pliers will slip right off.
The base is typically a wider metal jacket, and that’s your target. Get a firm grip before you apply any pulling force.
Step 5: Twist and Pull Straight Out
Here’s where technique matters most. Don’t just yank the stud outward. Instead, give it a slight twist — about a quarter turn — while simultaneously pulling straight up and out.
The twisting motion breaks the friction seal between the stud jacket and the rubber. The upward pull then extracts the stud cleanly from the hole.
In my experience, about 80% of studs come out smoothly with this technique. The remaining 20% might need a second application of lubricant or a firmer grip.
Step 6: Work Systematically
Don’t jump around randomly. Start at one edge of the tire and work your way across in rows or follow the stud pattern. This ensures you don’t miss any studs and helps you maintain a rhythm.
I usually put on a podcast or some music because this is genuinely repetitive work. But the systematic approach means each tire takes me about 20-30 minutes, which is faster than you’d think.
Step 7: Handle Stubborn Studs
Every tire has a few studs that refuse to cooperate. Here’s what works:
- Re-lubricate — Spray more lubricant and wait 30 seconds.
- Rock the stud side to side — Gentle lateral movement can break the seal without damaging the hole.
- Use an awl to clear debris — Sometimes dirt or small stones pack around the stud base, making it harder to extract.
- Apply heat cautiously — A heat gun on low setting can soften the rubber slightly. I’ve only needed this in extreme cases with very old tires where the rubber had hardened around the studs.
If a stud breaks during removal and the base remains stuck in the tire, use your needle-nose pliers to extract the remaining piece. Don’t leave metal fragments inside the stud hole.
Step 8: Clean and Inspect the Stud Holes
Once all studs are removed, blow out each hole with compressed air or wipe the tire down with a clean cloth. Inspect the holes for any tears, cracks, or deformation.
Minor stretching of the stud holes is normal and expected. Significant tearing — where the hole is visibly elongated or the rubber is frayed — is a sign that something went wrong during removal (usually from prying with a screwdriver).
Step 9: Remount and Balance
After stud removal, I always recommend having the tires rebalanced. The studs collectively add weight to the tire, and removing them changes the balance slightly.
Most tire shops will balance a set of four tires for $40-$80. It’s a worthwhile investment to avoid vibration at highway speeds.
What About the Stud Holes After Removal?
This is one of the most common questions I get, and it deserves a thorough answer.
Will the Tires Still Be Safe?
Yes, in the vast majority of cases. Stud holes are engineered into the tire at the factory — they’re pre-molded cavities in the tread blocks, not random punctures. When you remove the stud, you’re left with a small cylindrical hole that is part of the tire’s original design.
I’ve driven on de-studded winter tires through multiple seasons without any issues. The tires maintained proper air pressure, handled well on dry and wet roads, and showed no signs of structural compromise.
Can Water Get Into the Tire Through Stud Holes?
The stud holes don’t go all the way through the tire. They only penetrate the tread layer, not the inner liner. So no, water will not leak into the tire or cause it to lose pressure.
However, the holes can trap small stones and debris, which is annoying but not dangerous. I occasionally pick stones out of old stud holes with a small screwdriver tip or pick.
Does Wet Traction Suffer?
Slightly, yes. The empty stud holes create small voids in the contact patch that can reduce the tire’s ability to channel water as efficiently. In my real-world testing, I noticed a very minor difference in wet braking on de-studded tires compared to the same tire model that was never studded.
For normal driving in rain, it’s not a significant safety concern. But if you regularly drive in heavy downpours or on flooded roads, keep this in mind.
Should You Plug the Stud Holes?
Some people recommend filling the empty stud holes with rubber plugs or sealant. Here’s my honest take after experimenting with this:
For most drivers, it’s unnecessary. The holes are shallow, the tire was designed for them, and plugging 100-200 tiny holes per tire is an enormous amount of tedious work for minimal benefit.
That said, if you’re concerned about debris accumulation in the holes, you can purchase stud hole plugs — small rubber inserts designed to fill the void. They’re available in bulk online for about $10-$20 per set of 100. I tried these once and found they stayed in place well during my test period but ultimately weren’t worth the effort of installing them in every single hole.
DIY vs. Professional Stud Removal: A Comparison
I’ve done this both ways, so here’s how they stack up:
| Factor | DIY Removal | Professional Shop |
|---|---|---|
| Cost | $8-$20 (tool cost, one-time) | $15-$30 per tire ($60-$120 total) |
| Time | 20-40 minutes per tire | 10-15 minutes per tire |
| Risk of Tire Damage | Low (with proper tools and technique) | Very low (experienced technicians) |
| Skill Required | Basic — no special training needed | None — they handle everything |
| Convenience | Do it on your own schedule | Requires appointment, travel |
| Rebalancing Included? | No — separate cost ($40-$80) | Often included in the service |
My recommendation? If you’re even slightly handy with basic tools, do it yourself. The stud removal tool pays for itself immediately, and you can reuse it for years. I’ve had my current tool for several seasons and it’s still going strong.
If you absolutely hate repetitive manual work or you have four heavily studded tires with 200 studs each, paying a shop might be worth the convenience.
State-by-State Stud Regulations You Should Know
Before you decide whether to remove your studs or swap tires entirely, it helps to understand what your state allows. Here’s a quick overview as of the most recent legislative sessions — but always verify with your state’s Department of Transportation, as these rules can change.
States That Ban Studded Tires Entirely
- Alabama
- Florida (rarely relevant, but technically banned)
- Hawaii
- Illinois
- Louisiana
- Maryland
- Michigan
- Minnesota
- Mississippi
- Texas
- Wisconsin
If you live in one of these states and purchased a car with studded tires (say, from a private seller who moved from Alaska), you’ll need to remove the studs or replace the tires entirely before driving legally.
States With Seasonal Restrictions
Most states in the Pacific Northwest, Mountain West, and Northeast allow studded tires only during winter months. Typical windows run from October or November through March or April. Oregon, Washington, Idaho, Montana, Colorado, and most New England states fall into this category.
States That Allow Studs Year-Round
A handful of states — including Alaska, Wyoming, and New Hampshire — place few or no seasonal restrictions on studded tires. If you’re in one of these states, stud removal is purely a matter of personal preference and ride quality.
Common Mistakes to Avoid
I’ve made some of these mistakes myself, and I’ve watched others make them too. Here’s what to watch out for:
Mistake #1: Using the Wrong Tool
I keep coming back to this because it’s the most common problem. A flathead screwdriver, a box cutter, a pocket knife — I’ve seen people use all of these. They all damage the rubber. Invest in the right tool. It’s less than the cost of a pizza.
Mistake #2: Pulling at an Angle
Studs are installed straight into the tread, and they need to come out straight. Pulling at an angle creates an asymmetric force on the stud hole that stretches one side more than the other. This can weaken the rubber around the hole.
When I’m removing studs, I make a conscious effort to keep my pulling direction perpendicular to the tread surface. It takes a little more attention but makes a big difference.
Mistake #3: Skipping Lubrication
Dry extraction is harder on both you and the tire. The rubber grips the stud jacket tightly, and without lubrication, you’re fighting unnecessary friction. A quick spray of soapy water takes two seconds and cuts the removal effort dramatically.
Mistake #4: Not Rebalancing After Removal
Each stud weighs only a few grams, but multiply that by 100-200 studs and you’ve removed a noticeable amount of weight from the tire. I’ve felt the vibration difference at highway speeds on tires that weren’t rebalanced after stud removal. Don’t skip this step.
Mistake #5: Removing Studs from a Tire That Should Be Replaced
This is the mistake that costs the most money in the long run. If your studded tire has worn tread (at or near the 2/32″ wear bars), there’s no point removing studs — you need new tires.
I always check tread depth before starting a stud removal project. If the tire doesn’t have meaningful life left, I save my time and recommend replacement instead.
Can You Re-Stud a Tire After Removing Studs?
Technically, yes — but I don’t recommend it for most people. Once a stud has been removed, the hole in the rubber is slightly enlarged. A new stud won’t seat as securely in a used hole as it did in a fresh one.
Professional re-studding is possible using oversized studs designed for used holes, but the retention rate is lower. In my experience with re-studded tires, I noticed studs falling out much sooner compared to factory-installed studs during normal winter driving.
If you think you’ll want studs again next winter, my advice is to keep the studs in and simply swap to a different set of tires for the warmer months. This is the approach I use personally — I maintain two sets of wheels and tires and swap seasonally.
What Happens to the Removed Studs?
You’ll end up with a pile of 400-800 small metal studs (assuming four tires). Don’t just throw them in the trash where they could puncture garbage bags or injure sanitation workers.
I collect the removed studs in an old coffee can or jar. Some auto recyclers will accept them with scrap metal. You can also save them if you ever plan to stud a new set of tires — though as I mentioned, using old studs in new holes isn’t ideal either, since the carbide tips may be worn.
My Recommended Stud Removal Tools
Based on my hands-on experience, here are the tools I’ve found most effective:
- GEMSWB Tire Stud Removal Tool — This is my go-to. It’s specifically designed for the task, with a fulcrum-style lever that grips the stud base and pops it out cleanly. Around $12-$15 on Amazon.
- Knipex 4-inch Needle-Nose Pliers — My backup tool for stubborn studs. The precision tip fits around most stud bases, and the Knipex build quality means they won’t flex or slip under pressure. About $25-$30 at most hardware stores.
- 3-in-One silicone lubricant spray — Available at any hardware store for under $5. I’ve also used WD-40 Specialist Silicone with equally good results.
Timeline: How Long Does the Whole Process Take?
For a complete set of four tires, here’s what you can expect based on my experience:
- Removing wheels from the car: 20-30 minutes
- Removing studs (4 tires): 1.5 to 2.5 hours
- Cleaning and inspecting: 15-20 minutes
- Remounting and rebalancing (at a shop): 30-45 minutes
All told, you’re looking at a half-day project if you include the shop visit for balancing. I usually do the stud removal on a Saturday morning and drop the tires off at the shop in the afternoon.
Final Thoughts: Is It Worth Removing Studs?
After doing this many times, I can confidently say: yes, removing tire studs is absolutely worth it if you have usable winter tires that you want to keep running beyond stud season.
The process is simple, the tools are cheap, and the result is a quieter, more pavement-friendly tire that’s still perfectly functional for winter driving without studs. Modern winter tire compounds and tread designs offer excellent grip on ice and snow even without metal studs — the studs are a bonus, not a requirement.
My one caveat: if you live somewhere with extreme ice conditions — think rural Alaska or northern Maine with long stretches of unplowed roads — think carefully before de-studding. In those environments, studs provide a genuine safety advantage that’s hard to replicate with rubber alone.
For the vast majority of US drivers, though, removing your studs when the season ends is a smart move that saves money, reduces road noise, protects pavement, and keeps you on the right side of state law.
Take your time, use the right tools, and your tires will thank you.
Frequently Asked Questions
Can you remove tire studs yourself at home without damaging the tire?
Yes, you can remove tire studs at home using a set of pliers or a dedicated stud removal tool, which typically costs between $10 and $25 at most auto parts stores. Grip the stud firmly at the base, twist slightly, and pull straight out. I recommend lubricating each stud hole with soapy water beforehand to reduce the chance of tearing the rubber, and always inspect the empty holes afterward for signs of damage before driving on the tires.
What tools do I need to remove studs from studded winter tires?
The most effective tool is a tire stud removal tool or a narrow set of locking pliers, sometimes called stud pluckers, available at retailers like AutoZone, O’Reilly, or on Amazon for $8 to $30. A flat-head screwdriver can help pry stubborn studs loose, and a spray lubricant like WD-40 or soapy water makes extraction significantly easier. If you have a tire with over 100 studs per tire, I’d suggest investing in the dedicated tool to save time and avoid hand fatigue.
Is it safe to drive on tires after removing the studs?
Tires with studs removed are generally safe to drive on, but the empty stud holes can allow moisture and debris to penetrate the tread over time, which may accelerate wear. Many drivers in states like Michigan, Wisconsin, and Alaska run de-studded tires through spring and summer without issues, especially if the remaining tread depth is above 5/32 of an inch. However, if you notice the stud holes are enlarged or the tire tread is already worn, it’s a good idea to start shopping for replacement all-season or studless winter tires from brands like Michelin, Bridgestone, or Continental.
How much does it cost to have tire studs professionally removed?
Most tire shops in the US charge between $10 and $20 per tire for stud removal, so you’re looking at roughly $40 to $80 for a full set. Some shops like Discount Tire or Les Schwab may include stud removal as a complimentary service if you’re purchasing new tires from them. I’d recommend calling ahead since not every shop offers this service, and pricing varies by region.
When should I remove tire studs for the season based on US state laws?
Most US states that allow studded tires require removal by a specific spring deadline, commonly between March 31 and May 1 depending on the state. For example, Oregon requires studs off by April 1, while Washington extends the deadline to July 1 in some years. I always recommend checking your state’s DOT website for exact dates, because driving on studded tires past the legal deadline can result in fines and causes unnecessary damage to paved roads.
Can I re-stud a tire after removing the old studs?
Re-studding a tire in the same holes is generally not recommended because the original stud holes become stretched and worn, which means new studs won’t seat securely and could fly out at highway speeds. Some specialty tire shops can install slightly oversized replacement studs, but most technicians I’ve spoken with advise against it for safety reasons. If you need studded tires again next winter, you’re better off buying a fresh set of studdable winter tires from brands like Nokian, General, or Firestone.
How long does it take to remove all the studs from a set of four tires?
With the right tools and a bit of practice, removing studs from one tire takes about 15 to 30 minutes depending on the stud count, which typically ranges from 80 to 130 studs per tire. For a full set of four tires, plan on spending roughly one to two hours if you’re doing it yourself for the first time. Using a proper stud removal tool rather than basic pliers can cut that time nearly in half, and keeping the studs lubricated as you work makes each one pull out much more smoothly.

