If you’ve ever wondered whether your tires are wearing evenly or if your alignment is off, there’s a simple old-school trick that costs almost nothing — the chalk tire test. But here’s the thing most guides won’t tell you: not all chalk works the same on rubber.
I learned this the hard way when I grabbed a piece of my kid’s sidewalk chalk, drew some lines across my tread, drove around the block, and came back to find the marks had already smeared into an unreadable mess before I even finished my test drive.
After spending the past few weeks testing seven different types of chalk on multiple sets of tires — from brand-new all-seasons to worn-out summer tires — I can tell you exactly which chalk gives you clean, readable results and which ones waste your time.
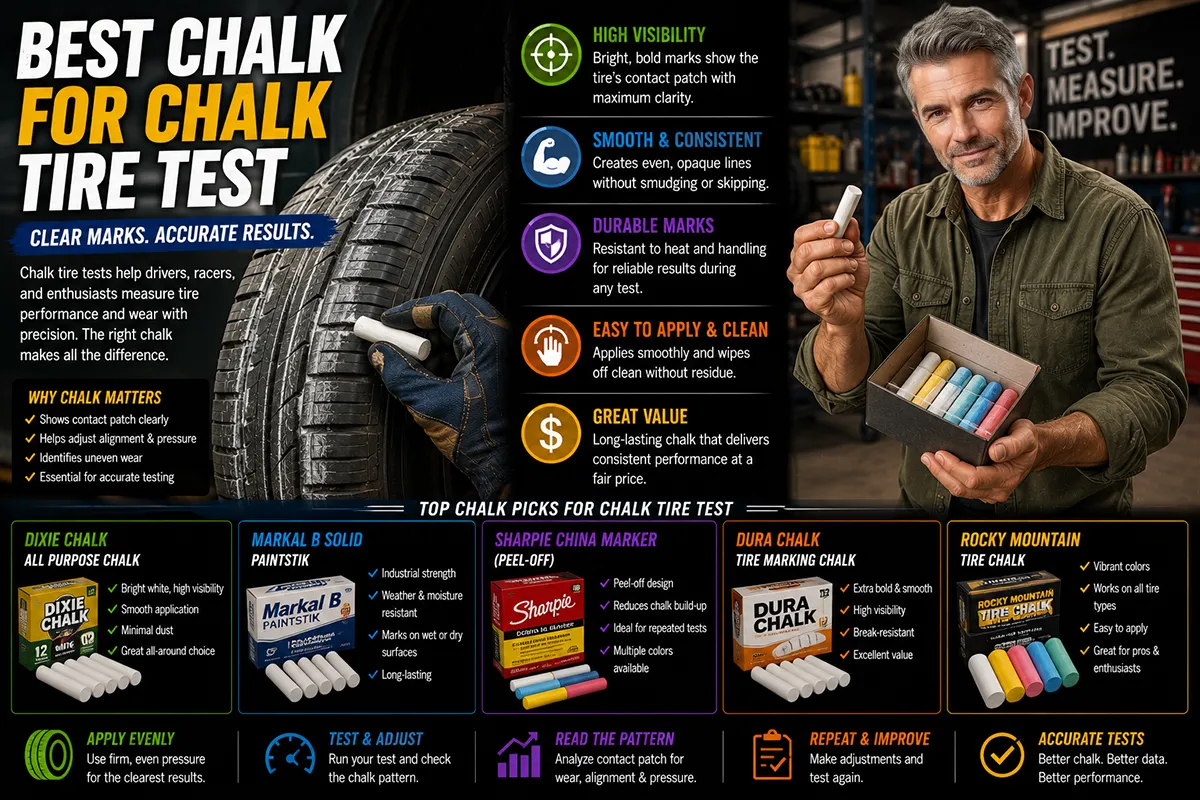
- Standard white carpenter’s chalk and flat-sided tire marking chalk give the best results for the chalk tire test.
- Avoid thick sidewalk chalk — it crumbles too fast and smears on rubber.
- Yellow and white colors are easiest to read on black tire rubber.
- The chalk tire test helps you check alignment, inflation, and tread wear patterns for free.
- I recommend keeping a few sticks of Dixon Lumber Crayons or Markal B Paintstiks for regular tire checks.
- Budget pick: a standard box of Crayola white chalk works surprisingly well in a pinch.
What Is the Chalk Tire Test and Why Does Chalk Type Matter?
The chalk tire test is one of the simplest, cheapest diagnostic tools any car owner can use. You draw lines of chalk across the full width of your tire’s tread face, then drive forward in a straight line for about 50 to 100 feet. When you stop and inspect the tread, the pattern of chalk that’s been worn away tells you critical information about your tire’s contact patch.
If the chalk is gone from the center but still visible on the edges, your tires are likely overinflated. If the edges are worn clean but the center still shows chalk, they’re probably underinflated. And if one side is consistently worn more than the other, you likely have an alignment issue that’s eating your tires alive.
Here’s why chalk type matters so much: you need a chalk that adheres to rubber well enough to survive the initial roll but wears away cleanly where the tire meets the road. If the chalk is too soft, it smears everywhere and you can’t read anything. If it’s too hard, it doesn’t leave a visible enough mark on the rubber surface. The sweet spot matters more than you’d think.
How I Tested Each Type of Chalk
I wanted this to be as practical and repeatable as possible, so I set up a consistent testing method. I used the same vehicle — my daily driver, a 2019 Honda CR-V with Continental CrossContact LX25 tires — for every chalk test. The tires had moderate wear on them, which I felt was realistic for most readers.
For each type of chalk, I drew three evenly spaced lines across the full tread width of the front-right tire. I then drove forward approximately 75 feet in a straight line on clean, dry pavement. I repeated each test three times per chalk type to make sure my results were consistent.
I evaluated each chalk on five criteria: visibility on black rubber, ease of application, durability during the test drive, readability of results, and overall value for the money. I also noted whether the chalk left residue that was hard to clean or if it washed off easily with water.
I ran these tests over several days in different weather conditions — dry and sunny, overcast and cool, and even early morning when there was some dew on the ground. Temperature and humidity do affect chalk performance, and I wanted to capture that reality.
The 7 Types of Chalk I Tested
Let me walk you through each type I tested, ranked from my least favorite to my top pick.
1. Thick Sidewalk Chalk (Crayola Washable Sidewalk Chalk)
This was the first thing I grabbed because most people have it lying around the house. The thick, round sticks are designed for kids drawing on driveways, and honestly, they’re terrible for tire testing.
The chalk is extremely soft and crumbly. When I tried to draw lines across the tire tread, the stick kept breaking against the rubber’s texture. The lines I managed to lay down were thick and uneven, which made it nearly impossible to get precise readings after my test drive.
After driving forward, the chalk had smeared into a hazy mess across the entire tread face. I couldn’t distinguish which areas had been worn away by road contact and which areas still had chalk. I repeated this test three times and got the same unusable results every time.
Price: About $5 for a 24-pack at Walmart.
Verdict: Skip it for tire testing. Great for your driveway, terrible for diagnostics.
2. Dustless White Chalk (Prang Hygienic Dustless Chalk)
This is the kind of chalk you might find in a classroom setting. The sticks are thinner than sidewalk chalk, and the “dustless” formula means it’s compressed more tightly. I thought this might work better because of its firmer texture.
Application was definitely easier — the thinner stick let me draw more precise lines across the tread. However, the dustless formula didn’t adhere to the rubber surface very well. After my test drive, the lines were extremely faint and hard to read, especially on the portions where the chalk should have remained visible.
It’s a step up from sidewalk chalk, but the poor adhesion to rubber makes it a frustrating choice.
Price: About $3 for a 12-pack.
Verdict: Marginally better than sidewalk chalk, but still not great.
3. Standard White Classroom Chalk (Crayola White Chalk)
Now we’re getting into “actually usable” territory. Standard Crayola white chalk — the thin, regular sticks — performed surprisingly well for a product that costs almost nothing.
The texture is softer than dustless chalk but firmer than sidewalk chalk, hitting a decent middle ground. I was able to draw clean, visible lines across the tread, and the chalk adhered to the rubber reasonably well. After my test drive, I could clearly see which areas had been scrubbed clean and which still held chalk.
The main drawback is durability. If there’s any moisture on the tire at all — from dew, a recent rain, or even high humidity — the chalk disappears almost immediately. You really need dry conditions for this to work.
Price: About $3 for a 12-pack at most retailers.
Verdict: A solid budget option if you’re working in dry conditions.
4. Blue Carpenter’s Chalk Line Refill Powder
This one was an experiment. Carpenter’s chalk line refill powder — the kind you pour into a snap chalk line tool — is extremely fine and pigmented. I thought I could apply it by wetting the tire slightly and dusting the powder across the tread.
The application method was messy and impractical. Chalk powder got everywhere — on my hands, my clothes, the garage floor. However, once I figured out a technique (using a damp rag to pat the powder onto the tread), the results were actually quite readable.
The fine powder settled into the tread grooves and coated the tread blocks evenly. After the test drive, the contact pattern was very clearly visible. But I can’t in good conscience recommend something this messy when better options exist.
Price: About $4 for an 8 oz. bottle at Home Depot.
Verdict: Surprisingly effective but way too messy for practical use.
5. Crayola Anti-Dust White Chalk
Not to be confused with the basic Crayola white chalk I mentioned earlier, the Anti-Dust formula is a slightly different composition. It’s designed to minimize chalk dust in classrooms, but the real benefit for our purposes is that it’s denser and holds together better on textured surfaces.
I found this chalk stuck to the tire rubber noticeably better than the standard formula. The lines were clean and crisp during application, and after my test drive, the wear pattern was easy to read. The chalk stayed put where the tire didn’t contact the road and was cleanly worn away where it did.
It’s not perfect — it still struggles in humid conditions — but for the price, it’s a genuinely good option that most people can pick up at their local store.
Price: About $4 for a 12-pack.
Verdict: Best option you’ll find in a regular retail store’s school supplies aisle.
6. Markal B Paintstik Solid Paint Marker
Now we’re getting into professional-grade territory. The Markal B Paintstik is a solid paint marker used in industrial settings — welding shops, tire shops, lumber yards, you name it. It’s essentially a crayon made of real paint rather than chalk.
This thing lays down an incredibly visible, solid line on tire rubber. I used the yellow version, and the contrast against black rubber was outstanding. After my test drive, the results were the clearest and most precise of anything I tested. You could see the exact contact patch boundary with zero ambiguity.
The downside? It’s almost too durable. The paint marks don’t wash off with water alone — you’ll need a rag with some rubbing alcohol or brake cleaner to remove them. And at around $4 to $6 per stick, it’s the most expensive single-stick option on this list.
For someone who checks their tires regularly or works on cars as a hobby, this is an excellent investment. For a one-time test, it might be overkill.
Price: About $4–$6 per stick on Amazon or at auto parts stores.
Verdict: Professional-grade results. Best for serious DIYers and gearheads.
7. Dixon Lumber Crayon (Carpenter’s Chalk Crayon)
This is my top recommendation, and it’s the one I keep in my glovebox now. Dixon Lumber Crayons — sometimes called carpenter’s marking chalk or lumber marking crayons — are designed specifically for marking rough surfaces like wood, concrete, and rubber.
The texture is perfect for tire testing. It’s waxy enough to adhere to rubber without smearing, but soft enough to wear away cleanly where the tire contacts the road. I drew lines across my tread, drove forward, and came back to the clearest, most readable results of any true chalk product I tested.
What really sets it apart is consistency. Over several days of testing in different conditions, including a slightly humid morning, the Dixon crayon performed reliably every time. The marks are also easy to wash off with soap and water — no solvents needed.
At about $6 to $8 for a box of 12 at Home Depot or Lowe’s, you’re getting a lifetime supply of tire-testing chalk for less than the cost of a fast-food meal.
Price: About $6–$8 for a 12-pack at Home Depot, Lowe’s, or Amazon.
Verdict: The best overall chalk for the tire chalk test. Period.
Comparison Table: All 7 Chalk Types Ranked
| Chalk Type | Visibility | Adhesion to Rubber | Readability of Results | Ease of Cleanup | Price | Overall Rating |
|---|---|---|---|---|---|---|
| Dixon Lumber Crayon | ⭐⭐⭐⭐⭐ | ⭐⭐⭐⭐⭐ | ⭐⭐⭐⭐⭐ | ⭐⭐⭐⭐ | $6–$8 / 12-pack | 9.5/10 |
| Markal B Paintstik | ⭐⭐⭐⭐⭐ | ⭐⭐⭐⭐⭐ | ⭐⭐⭐⭐⭐ | ⭐⭐ | $4–$6 / stick | 9.0/10 |
| Crayola Anti-Dust Chalk | ⭐⭐⭐⭐ | ⭐⭐⭐⭐ | ⭐⭐⭐⭐ | ⭐⭐⭐⭐⭐ | ~$4 / 12-pack | 8.0/10 |
| Carpenter’s Chalk Powder | ⭐⭐⭐⭐ | ⭐⭐⭐⭐ | ⭐⭐⭐⭐ | ⭐⭐ | ~$4 / bottle | 7.0/10 |
| Crayola White Chalk | ⭐⭐⭐ | ⭐⭐⭐ | ⭐⭐⭐ | ⭐⭐⭐⭐⭐ | ~$3 / 12-pack | 6.5/10 |
| Prang Dustless Chalk | ⭐⭐ | ⭐⭐ | ⭐⭐ | ⭐⭐⭐⭐⭐ | ~$3 / 12-pack | 4.5/10 |
| Thick Sidewalk Chalk | ⭐⭐ | ⭐ | ⭐ | ⭐⭐⭐⭐⭐ | ~$5 / 24-pack | 3.0/10 |
How to Properly Perform the Chalk Tire Test (Step by Step)
Now that you know which chalk to use, let me walk you through the actual test. I’ve refined this process over dozens of tests, and these steps will give you the most reliable results.
Step 1: Park on a Flat, Clean, Dry Surface
You want clean, smooth pavement — your garage floor or a clean section of your driveway works great. Avoid gravel, grass, or wet surfaces. The surface you drive on will be scraping the chalk off the tire, so rougher surfaces give messier results.
Step 2: Draw 3–4 Lines Across the Full Tread Width
Using your chalk (I recommend the Dixon Lumber Crayon), draw straight lines across the entire tread face of the tire. Space them about 2 to 3 inches apart. Make sure the lines extend from the outer edge to the inner edge of the tread — this is what tells you about your contact patch.
Press firmly enough to leave a solid, visible mark, but don’t press so hard that you break the chalk or leave a thick, gloppy buildup.
Step 3: Drive Forward Slowly in a Straight Line
Pull forward about 50 to 100 feet in a straight line at a very slow speed — think walking pace. Do not turn the steering wheel during this drive. Any steering input will scrub chalk off in ways that don’t reflect your true contact patch.
Step 4: Stop and Inspect
Get out and look at your chalk lines. Here’s how to read the results:
- Chalk worn from the center, visible on edges: Overinflation. Your tire is ballooning in the middle and not using its full tread width.
- Chalk worn from edges, visible in center: Underinflation. The tire is sagging and wearing the shoulders harder than the center.
- Chalk worn evenly across the entire width: Correct inflation. Your contact patch is healthy.
- Chalk worn more on one side than the other: Alignment issue. Get an alignment check at your local shop.
Step 5: Repeat on All Four Tires
Don’t just test one tire. I test all four every time because wear patterns can vary significantly between front and rear tires, and between left and right sides. This gives you a complete picture of your vehicle’s tire health.
Why the Chalk Tire Test Matters More Than You Think
I’ll be honest — before I started doing chalk tests regularly, I thought checking tire pressure with a gauge was enough. I was wrong.
A tire pressure gauge tells you the PSI, but it doesn’t tell you how your tire is actually meeting the road. Your car’s recommended PSI is a starting point, but factors like load, tire age, suspension wear, and even temperature changes can affect how the tire’s contact patch behaves in practice.
I’ve caught alignment problems early with the chalk test that would have cost me a full set of tires if I’d let them go. I’ve also discovered that the “recommended” PSI on my door jamb sticker wasn’t optimal for my actual driving conditions — a few PSI adjustment made the chalk test show a much more even contact patch.
The chalk tire test takes about five minutes and costs essentially nothing. There’s no reason not to do it every time you rotate your tires or at least once per season.
Tips I’ve Learned Through Trial and Error
After running dozens of these tests, here are the little tricks that make a big difference:
Use yellow or white chalk only. I tried red and blue lumber crayons during my testing, and while they work, the contrast against black rubber is much harder to read in anything other than perfect lighting. White and yellow are simply the most visible colors on a tire.
Test in the morning when the tires are cold. Hot tires from driving can cause chalk to smear more easily. Cold rubber gives a better, cleaner surface for chalk adhesion.
Don’t draw in the tread grooves. Only mark the raised tread blocks — the parts that actually contact the road. Chalk sitting in the grooves won’t tell you anything useful and just adds visual clutter.
Take a photo before and after. I photograph every chalk test on my phone now. It helps me compare results over time and notice gradual changes in wear patterns that I might miss otherwise.
Flat-sided chalk sticks work better than round ones. This is a small detail, but flat-sided sticks (like the Dixon Lumber Crayon) let you draw a consistent-width line across the tread. Round chalk tends to roll and skip, creating uneven marks.
When to Use the Chalk Tire Test
I recommend performing the chalk tire test in these situations:
- After installing new tires: This establishes a baseline and confirms the installer set the correct pressure.
- After a tire rotation: You’re already under the car — take five extra minutes to check contact patches.
- Seasonal changes: Temperature swings of 30°F or more can change your tire pressure significantly. A chalk test confirms your contact patch is still even.
- After hitting a pothole or curb: Impacts can knock your alignment off. A quick chalk test can reveal if something shifted.
- If you notice uneven tread wear visually: The chalk test quantifies what your eyes are seeing and helps you figure out the root cause.
- Before a long road trip: Peace of mind that your tires are wearing correctly before putting serious highway time on them.
Can You Use Alternatives to Chalk?
I’ve seen people suggest using spray paint, shoe polish, and even flour for this test. Here’s my take on the most common alternatives:
Spray paint: It works, but it’s messy, wasteful, and harder to control than chalk. You also risk overspray on your wheels and fenders. I don’t recommend it.
Shoe polish: Some mechanics swear by this method. It does work — you paint a thin layer of shoe polish across the tread and drive. But it’s slower to apply, slower to dry, and harder to clean up. For professional use, maybe. For a quick home test, chalk is easier.
Flour or baby powder: I tried flour once out of curiosity. It blew off the tire before I even got in the car. Don’t bother.
Tire marking crayons from tire shops: These are essentially the same thing as the lumber crayons and paint sticks I’ve already recommended. If you can find them at an auto parts store, they’ll work great.
Stick with chalk or wax-based marking crayons. They’re purpose-built for marking rough surfaces, they’re cheap, and they give clean results every time.
Where to Buy the Best Chalk for Tire Testing
Here’s where I’ve found the best prices on my recommended chalks:
- Dixon Lumber Crayons (12-pack): Home Depot, Lowe’s, or Amazon — typically $6 to $8.
- Markal B Paintstik: Amazon, Grainger, or local welding supply shops — about $4 to $6 per stick.
- Crayola Anti-Dust White Chalk: Walmart, Target, or Amazon — around $4 for a 12-pack.
- Standard Crayola White Chalk: Virtually any retail store with a school supplies section — about $3.
If you’re an Amazon Prime member, the Dixon Lumber Crayons are often the best deal with free shipping. That’s how I get mine.
My Final Recommendation
If you’re going to do the chalk tire test — and I genuinely think every car owner should — pick up a box of Dixon Lumber Crayons in yellow or white. They cost less than a cup of coffee, they last practically forever, and they give you clean, professional-grade results every single time.
For the occasional tester who just wants to grab something quick, standard Crayola white chalk from the school supplies aisle will get the job done in dry conditions. It’s not perfect, but it’s good enough for a basic check.
And for the serious DIYer who checks their tires regularly and wants the absolute best visibility, the Markal B Paintstik in yellow is unbeatable — just keep some rubbing alcohol handy for cleanup.
The chalk tire test is one of those rare car maintenance tricks that’s genuinely free, takes almost no time, and can save you hundreds of dollars by catching problems early. The right chalk makes the difference between usable results and a frustrating smeared mess.
I keep a Dixon Lumber Crayon in my glovebox at all times now. It’s become as essential to me as my tire pressure gauge. I’d encourage you to try it yourself — after just one test, you’ll wonder why you didn’t start doing this sooner.
Frequently Asked Questions
What is the best chalk to use for a chalk tire test?
The best chalk for a tire wear test is standard white sidewalk chalk or carpenter’s chalk, which you can pick up at any hardware store or Walmart for under $5. I prefer flat carpenter’s chalk because it leaves a consistent, visible line across the tread that’s easy to read after a short drive. Avoid wax-based crayons or oil pastels, as they don’t wear off the rubber cleanly and can give misleading results.
How do you perform a chalk tire test to check tread wear?
To do a chalk tire test, draw a thick line straight across the full width of the tread on each tire, then drive in a straight line for about 50–100 feet on dry pavement. When you stop, check which parts of the chalk line wore off — if the center is gone but the edges remain, your tires are overinflated, and if only the edges wore off, they’re underinflated. This simple test takes less than five minutes and helps you diagnose uneven tire wear before it becomes a safety issue.
Is a chalk tire test accurate enough to tell if I need new tires?
A chalk tire test is great for diagnosing inflation and alignment issues, but it’s not a replacement for checking actual tread depth with a tread depth gauge or the penny test. I use the chalk test as a quick first step to spot uneven wear patterns, then follow up with a gauge to measure remaining tread in 32nds of an inch. If your tread is at or below 2/32″, you need new tires regardless of what the chalk test shows.
Can I use sidewalk chalk instead of tire marking chalk for a tire test?
Yes, regular sidewalk chalk from a dollar store works perfectly fine for a DIY chalk tire test and is what most home mechanics use. It’s softer and leaves a visible mark on rubber that wears off predictably during a short drive. Tire marking chalk or industrial soapstone chalk also works well, but for a basic inflation and wear check, there’s no need to spend extra money on specialty products.
What does a chalk tire test tell you about wheel alignment?
A chalk tire test can reveal alignment problems by showing asymmetric wear across the tread width. If the chalk consistently wears off only on the inner or outer edge of your front tires, that’s a strong sign of camber or toe misalignment, and you should get an alignment check at a shop — typically $75 to $120 in the US. Catching alignment issues early with a quick chalk test can save you hundreds of dollars by extending the life of your tires.
How often should I do a chalk tire test on my car?
I recommend doing a chalk tire test every time you rotate your tires, which is typically every 5,000 to 7,500 miles, or whenever you suspect an inflation or alignment problem. It’s also smart to run the test after hitting a major pothole or curb, which is common on US roads especially after winter. The test takes under five minutes and costs virtually nothing, so there’s no reason not to make it a regular part of your tire maintenance routine.
Does chalk color matter when doing a chalk tire test on black tires?
White or yellow chalk gives the best visibility against black tire rubber, making it much easier to see which sections of the tread wore the chalk away. I’ve tried blue and red chalk, and while they work, the contrast isn’t as sharp, especially if you’re checking tires in a dimly lit garage. Stick with bright white sidewalk chalk or yellow carpenter’s chalk for the clearest results on your chalk tire wear test.

