Most people focus on which tire to buy — and completely forget that how it gets put on the wheel matters just as much. I’ve had “mounted” tires leak from day one, cause vibration at highway speeds, and even damage a rim — all because of sloppy installation.
After testing tires for this blog and personally overseeing more than fifty mounting jobs across different shops and setups, I want to save you from the same headaches.
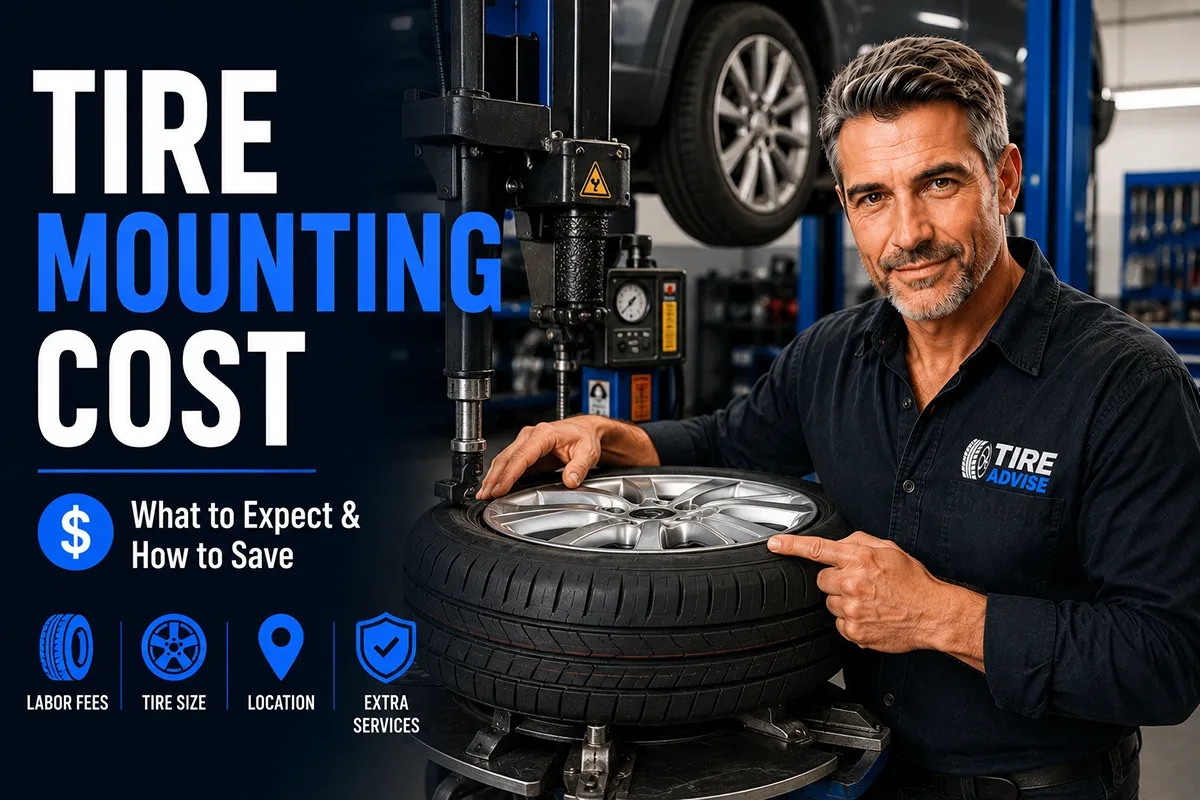
Tire mounting typically costs $10–$22 per tire (mount only) or $18–$55 per tire for mount + balance, depending on where you go. Dealer prices are the highest; big-box stores and independent shops offer the best value. Beyond price, the real difference-makers are bead lubrication, match-mounting, proper torque sequencing, and a TPMS reset — steps many shops skip but you should always demand.
Why Tire Mounting Deserves More Attention Than It Gets
When I started reviewing tires seriously, I assumed installation was a commodity service — drop the tires off, hand over a card, drive away. That view changed fast.
On a set of Michelin Defenders I was testing, two out of four tires showed a persistent wobble at 65 mph. The tires themselves were fine. The shop had dry-mounted the beads and skipped the match-mount process entirely. Thirty minutes of re-work later, the vibration was gone.
The stakes are real: a poor mount can cause slow leaks, premature wear, vibration, and in rare cases, a bead blowout at speed. Proper mounting protects your investment — and given that a quality set of tires can run $600–$1,200, it pays to understand what “proper” actually looks like.
Before diving into costs and techniques, if you’re still deciding which tires to buy, my tire buying and maintenance guide walks through sizing, load ratings, and how to read a sidewall — all the groundwork that makes this mounting conversation make sense.
How Much Does Tire Mounting Cost? A Real-World Breakdown
Prices vary more than you’d think, and the listed price rarely tells the whole story. Here’s what I’ve actually paid (or observed others pay) across different service types in the U.S., as of 2024–2025:
| Service Provider | Mount Only (per tire) | Mount & Balance (per tire) | Disposal Fee | TPMS Reset |
|---|---|---|---|---|
| Big-Box (Walmart, Costco) | $12–$15 | $18–$22 | ~$2 | Included |
| National Chain (Firestone, Pep Boys) | $16–$22 | $25–$32 | $2–$4 | $3–$8 |
| Dealership | $25–$40 | $35–$55 | $3–$5 | $10–$20 |
| Local Independent Shop | $10–$20 | $18–$28 | $1–$3 | Varies |
| Mobile Tire Service | $25–$45 | $45–$65 | None / carry-out | Included |
| DIY (with machine rental) | $0–$5 | N/A | $0 | $0 |
Important notes on that table: “Mount only” assumes you’re bringing tires already on wheels that just need swapping — like seasonal changeovers between a summer and winter set. “Mount & balance” is what you want for any new tire going onto a vehicle. Disposal fees for old tires are often not mentioned upfront. Always ask.
Big-Box Stores (Walmart Auto Center, Costco Tire Center)
Costco and Walmart are the price leaders, but there’s a catch: they’ll typically only mount tires purchased through them. Bring in a set you bought online and you’ll hit a wall.
When they do mount, the work is generally solid — they use calibrated equipment and follow a process. I’ve had good experiences at Costco in particular; their technicians tend to be unhurried.
National Chains (Firestone, Pep Boys, Discount Tire, NTB)
This is the sweet spot for most people. Discount Tire, in my experience, does some of the cleanest mounting work at a reasonable price.
They are also one of the few chains that consistently performs match-mounting (more on that below) without being asked. Pep Boys is more variable — quality depends heavily on location.
Dealerships
Dealerships charge the most and don’t always do the best work. Their advantage is familiarity with your specific TPMS system, which matters on newer vehicles.
If you’re under warranty or have a car with a complex TPMS setup, the premium might be worth it. Otherwise, I’d skip the dealership for routine mounting.
Independent Local Shops
This is my personal favorite for anyone who has found a trustworthy independent mechanic. The best shops I’ve visited charge fair prices, take their time, and treat the job as craftsmanship. The worst rush through it. Ask whether they match-mount and whether they reset TPMS before committing.
Mobile Tire Services
Services like Treads or local mobile operators come to you — your driveway, parking lot, wherever. Convenience has a price: you’ll pay $45–$65 per tire for mount and balance.
Some don’t offer road-force balancing, which limits what they can fix if a vibration persists. Good option for high-end vehicles you don’t want driven to a shop, or when you’re time-constrained.
Hidden Costs That Catch People Off Guard
The advertised price is rarely the final price. Here’s what I’ve seen added to bills without prior warning:
- TPMS service kit replacement ($3–$12 per sensor): The rubber grommet, valve core, and cap on your TPMS sensor should be replaced every time a tire is dismounted. Most shops charge separately for this — and some skip it entirely, which can cause slow leaks.
- Road-force balancing upcharge ($10–$20 per tire): Standard spin balancing doesn’t detect radial force variation inside the tire. Road-force balancing does. If you have a persistent vibration after a regular balance, this is what you need — but most shops don’t offer it by default.
- Valve stem replacement ($3–$8 per wheel): If your existing valve stems are old or cracked, they should be replaced. Many shops charge extra; some include it. Ask ahead.
- “Shop supplies” or “environmental fee” ($5–$15 flat): A vague catch-all charge that some chains add. It’s real overhead, but it should be disclosed upfront.
- Same-day or after-hours appointment premium: Some mobile services and busy chains charge $10–$20 extra for immediate or weekend slots.
💡 Pro tip: Always ask for a written estimate that includes all fees before you authorize the work. A reputable shop won’t hesitate.
The Tire Mounting Tricks That Actually Matter
This is the section I wish I’d had years ago. Whether you’re doing it yourself or just want to know what to look for at a shop, these are the techniques that separate a professional job from a sloppy one.
| Trick / Tip | Why It Matters | Who It Applies To |
|---|---|---|
| Mark the heavy spot before dismount | Helps re-mount in same orientation; reduces balance weights needed | DIY & Pro |
| Lubricate the bead — properly | Dry mounting cracks beads and scuffs rims; avoid petroleum-based lube | DIY & Pro |
| Match-mount by dot & line | Aligns tire’s high point with wheel’s low point; improves balance | Pro shops |
| Torque lug nuts in star pattern | Prevents warped rotors and uneven seating | Everyone |
| Seat beads at 40 PSI, then set final pressure | Ensures both beads seat evenly before adjusting to spec | DIY |
| Inspect rim bead seats before mounting | Old rubber debris causes slow leaks even with new tires | DIY & Pro |
| Use a rubber valve stem, not metal, on steel wheels | Prevents galvanic corrosion; $1 fix vs. $20 leak diagnosis | DIY |
| Request no balance weights on outer face | Cosmetic fix for alloy wheels — tape weights on inner barrel instead | Consumer tip |
1. Match-Mounting: The Most Overlooked Step
Every tire has a high point in its radial profile — a spot where the rubber is slightly thicker. Every wheel has a low point in its rim runout. Match-mounting aligns these two points so they cancel each other out, reducing how much balance weight is needed and minimizing vibration.
The tire’s high point is typically indicated by a red or yellow dot on the sidewall. The wheel’s low point is usually marked by a small dimple or drilled hole near the valve stem.
Line them up before pressing the bead on. When I’ve had shops skip this and then had to use 4–6 ounces of balance weight on a single tire, match-mounting was almost always the missed step.
2. Bead Lubrication — Not Just Any Lube
The bead is the inner edge of the tire that seats against the rim. It needs lubrication to slide into place without tearing or cracking. The correct lubricant is a dedicated tire mounting paste — usually a soap-based compound.
Never use WD-40, motor oil, or silicone spray. Petroleum products degrade rubber and can cause the bead to unseat after mounting.
Apply the paste to both the inner and outer bead lips and to the rim’s bead seats. If you hear a dry squeak during mounting, stop — that’s the sound of damage happening.
3. Bead Seating: The 40 PSI Rule
When inflating a freshly mounted tire, you need enough pressure to pop the bead fully into the seat. Most manufacturers allow up to 40 PSI for initial seating — do not exceed that. Listen for two pops (one per bead) as confirmation both sides are fully seated.
Then deflate to your vehicle’s spec (usually 32–36 PSI for passenger cars). Skipping this step leaves one or both beads partially unseated, which causes slow leaks and uneven wear.
4. Torque Sequence and Value
This one isn’t technically a mounting trick — but it’s part of the same job and gets skipped alarmingly often. Lug nuts must be torqued in a star pattern (not a circle) to ensure the wheel seats evenly.
Impact guns set to “full blast” don’t count. Every vehicle has a specified torque value — typically 80–120 ft-lbs for passenger cars. Ask whether the shop torques to spec by hand or with a calibrated torque wrench after using an impact gun. If they look at you blankly, that’s your answer.
5. Inspecting the Rim Before Mounting
Old tires leave rubber residue in the bead seats. Corroded aluminum oxidizes. Bent flanges from pothole damage create gaps where air escapes.
All of these cause slow leaks with a brand-new tire. A good shop wire-brushes the bead seats and visually inspects the rim before mounting.
On my own setups, I run a finger around the inside of the rim flange — if I feel grit or a raised ridge, it gets cleaned before the new tire goes on.
6. TPMS Sensor Care
Tire pressure monitoring sensors sit inside the wheel, attached to the valve stem. They’re fragile. During dismounting, they can be cracked by a careless mounting machine.
Ask the tech to manually locate each sensor before starting — a mark on the outside of the rim helps.
If your TPMS light comes on after a new mount, don’t assume it’s just a relearn issue; check that no sensor was damaged. See my tire speed ratings chart for additional context on tire specs that affect how your sensors are calibrated for different tire types.
DIY Tire Mounting: Is It Worth It?
I’ll be direct: DIY tire mounting makes sense in a narrow set of circumstances. You need a machine (manually mounting without one risks bead damage and is brutal on your hands), access to a balancer, and a compressor strong enough to seat beads.
Machine rental runs $50–$120/day at some auto parts stores; trailer-mounted mobile units exist in some markets.
Where DIY shines:
- Dedicated off-road or track setups where you swap tires frequently
- Enthusiasts who maintain their own fleet and can justify equipment cost over time
- Farms, fleet operators, or others who deal with large-diameter tires in remote locations
Where DIY doesn’t make sense:
- Everyday passenger vehicles where the math doesn’t pencil out
- Low-profile tires on expensive alloy wheels — the risk of rim damage is high without professional equipment
- Any situation involving run-flat tires — these require specialized machines
My honest take: for the average driver, the cost savings of DIY tire mounting — maybe $60–$100 on a four-tire set — are not worth the risk of a damaged bead or bent rim. The exception is if you have genuine access to quality equipment and know how to use it.
Mounting vs. Balancing: What’s the Difference and Do You Need Both?
Mounting is physically attaching the tire to the wheel. Balancing is correcting for weight distribution so the assembly spins without vibration. They’re separate services — and you need both every time you install new tires.
Static imbalance (heavy spot causes up-and-down hop) and dynamic imbalance (causes side-to-side shimmy) are both addressed by a spin balancer.
Road-force balancing adds a roller that simulates pavement load — it finds issues a standard spin balancer misses, like a tire with a flat spot or radial force variation. If you’ve ever had a vibration that shop after shop couldn’t fix, road-force balancing is likely the answer.
When I tested a set of Continental PureContact LS tires on a 2021 Honda Accord, standard balancing left a ghost vibration at 72 mph. Road-force balancing at a Discount Tire resolved it in under 20 minutes. The upcharge was $12 per tire. Worth every cent.
📌 Note: Always insist on mount AND balance together. A tire that is mounted but not balanced will vibrate at highway speed. It’s not a tire defect — it’s an incomplete installation.
When Should You Get Tires Re-Mounted or Re-Balanced?
Most people only think about this at tire replacement time, but there are situations that call for re-balancing outside of a new tire install:
- After hitting a significant pothole or curb — this can knock weights off
- If you notice new vibration at highway speeds that wasn’t there before
- After a flat repair — the plug or patch changes the weight distribution
- When rotating tires — many shops include a free rebalance with rotation, and you should accept it
- If you remove a wheel for brake work and the tech doesn’t reinstall it correctly
Re-balancing alone (on existing tires) typically runs $8–$15 per tire. Most shops that balanced the tires originally offer free rebalance within a certain period — 30 to 90 days is common. Check whether that’s included before you pay for a second balance.
Questions to Ask Before You Let Any Shop Touch Your Tires
I’ve developed a short checklist after years of watching shops do this well and poorly. These aren’t gotcha questions — a good shop will answer all of them without hesitation.
- Do you match-mount using the dot-and-line method?
- Do you torque lug nuts to spec with a calibrated torque wrench after using an impact gun?
- Do you replace the TPMS service kit (grommet, core, cap) on dismount?
- Do you clean the bead seats before mounting?
- What type of mounting paste do you use?
- Is road-force balancing available, and what’s the upcharge?
- What’s your all-in price including disposal, TPMS reset, and any shop fees?
If a shop can’t answer question six or seven, they probably can’t answer the others either in practice. Move on.
Frequently Asked Questions
Can I mount tires myself without a machine?
Technically yes, using tire spoons and rim protectors — but I strongly advise against it for modern low-profile tires. The risk of bead damage and rim scratching is high. On older, higher-profile tires (like 70- or 75-series), it’s more feasible. For anything below a 55-series, don’t try it without a machine.
How long does tire mounting take?
At a well-staffed shop with an appointment, a four-tire mount and balance takes 45–75 minutes. Walk-ins at busy times can mean a 2–4 hour wait. Some shops offer while-you-wait express service for an upcharge. If a shop claims they can do four tires in 20 minutes, ask how they’re accomplishing that — speed at the expense of match-mounting and torque sequencing is not a trade I make.
Is it safe to drive immediately after mounting?
Yes, with one caveat: verify your lug nut torque after 25–50 miles of driving. Wheels settle slightly after installation, and it’s standard practice (especially for aluminum alloy wheels) to do a re-torque. Most shops recommend this but don’t always communicate it clearly. Just loosen and re-tighten to spec — it takes five minutes.
What if my TPMS light stays on after mounting?
After new tires are mounted, TPMS sensors usually need a relearn procedure — sometimes done automatically as you drive, sometimes requiring a dedicated scan tool. If the light is still on after 10–15 miles of driving at various speeds, return to the shop for a sensor relearn or diagnostic. A stuck TPMS light after mounting can also mean a sensor was damaged — a very common problem at shops with rushed technicians.
Can I reuse old valve stems?
Rubber valve stems should be replaced any time a tire is dismounted — they cost about $1–$3 each. Metal valve stems (with TPMS sensors) are a different story; the metal doesn’t need replacement, but the rubber grommet and valve core do. Reusing cracked or aged rubber stems is the single most common cause of slow leaks I’ve seen on newly mounted tires.
What’s the difference between a tire mount and a tire installation?
“Mount” refers specifically to attaching the tire to the wheel rim. “Installation” is the broader process of putting the mounted wheel back on your vehicle. Some shops price these separately; others bundle them. Make sure you know which is included in any quote.
Final Thoughts: Spend Wisely, Ask the Right Questions
Tire mounting is one of those services where the cheapest option and the best option don’t always overlap. After fifty-plus mounting jobs — across budget shops, premium chains, dealerships, and my own garage — the consistent winners are independent shops where technicians take ownership of their work and national chains with mature processes like Discount Tire and Costco.
The tricks I’ve outlined above aren’t insider secrets; they’re just standard practice that doesn’t happen at every shop. Knowing them lets you recognize good work when you see it — and walk away when you don’t.
If you’re working through the full tire replacement process, my tire buying and maintenance guide covers everything before this step: how to read your sidewall, what load index and speed rating mean (you can also check my tire speed ratings chart for a quick reference), and how to match tires to your driving conditions. Mounting is just the last mile — but as I hope this post makes clear, it’s not a mile worth rushing.
Have a tire mounting horror story — or a shop you’d genuinely recommend? Drop it in the comments below. I read every one.
🔗 Related Reading on The Tire Reviews
→ Tire Buying & Maintenance Guide
→ Tire Speed Ratings Chart (H, V, W, Y & More)